Table of contents
Related articles
- Basic Configuration - Incident
- Basic Configuration - Service Requests
- Create customized forms in Octopus
Introduction
When you manage a service, it is important to measure it to find out what are its strengths and weaknesses. From the information that is gathered, you can make changes to processes, give training or coaching to employees, communicate more information to the customers, etc. to improve on what the service can offer.
The basic Octopus configuration already includes the required options to set up resolution service targets for incidents and service requests, but it is possible to add the initial response targets on requests. This is beneficial, because if the response to the requests is reasonable, a greater number of them will be resolved within the time frame.
The activation of the initial response targets is therefore an additional tool to help measure and improve services.
Prerequisites
Before the initial response targets can be configured, the service level targets must have been activated in the Options.
The Administer Octopus permission is required to configure the resolution and initial response targets.
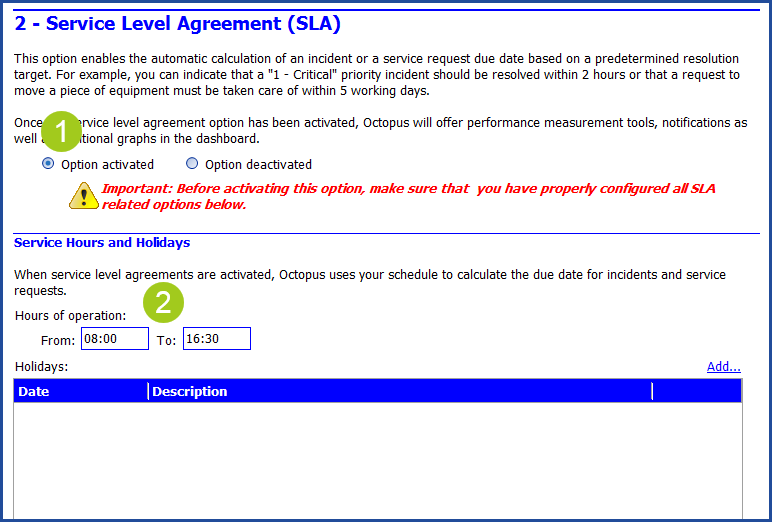
To activate the resolution targets
Go to Tools > Option in the 2- Service Level Agreement (SLA) section.
- Activate the option.
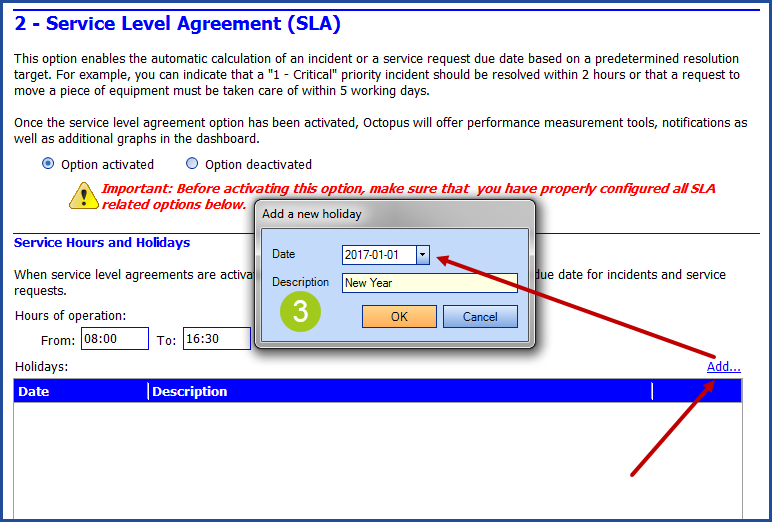
- Add the hours of operation.
- Add the service's holidays.
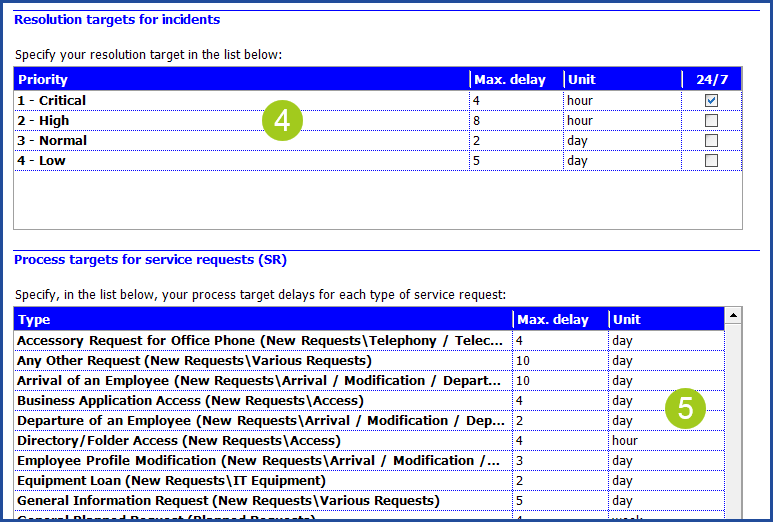
- Configure the Resolution targets for incidents.
- Configure the Process targets for service requests (SR).
- Save the modifications with OK.
NOTE: It is also possible to configure the resolution targets for incidents and service requests in the Configuration Data.
To activate the initial response targets
Before you can configure the initial response targets for the incidents and service requests, you must contact our Service Desk to activate the Initial response targets.
Initial response targets configuration
Before proceeding to the configuration of the initial response targets, the option must have been activated by the Octopus Service Desk.
Once the option has been activated, the initial response configuration can be done in :
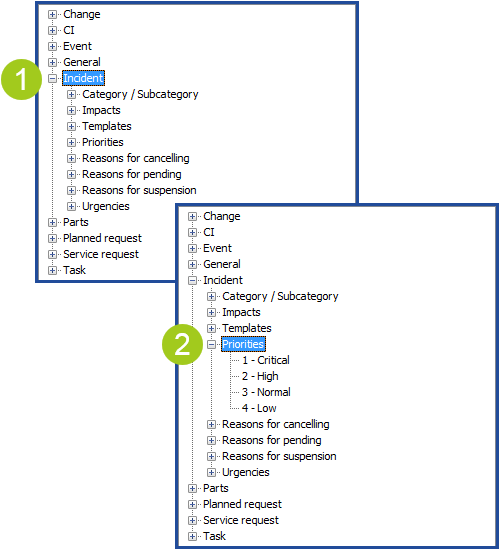
Tools > Reference data management.
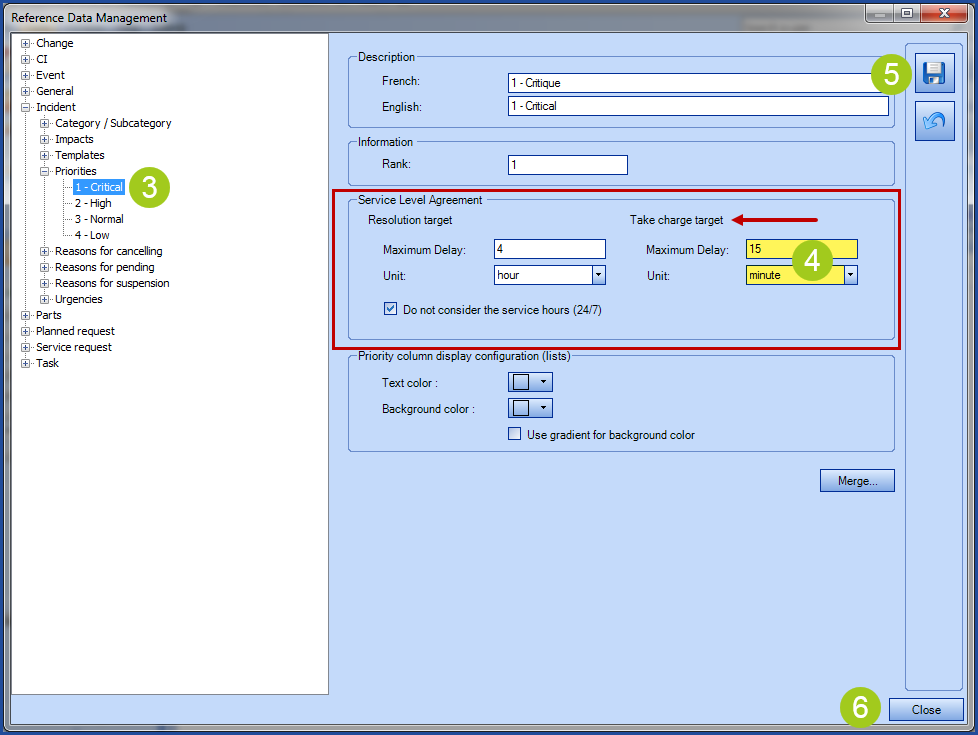
For incidents
- From the reference data, open the Incident node.
- Open the Priority node.
- Select one of the priorities.
- From the Service Level Agreement section, add or modify the Take charge target.
- Generally, we recommend that the response delay be ± 20 % of the resolution delay.
- Save the modifications with the disk icon and repeat the process for other priorities.
- Finish the configuration with the Close button at the bottom right.
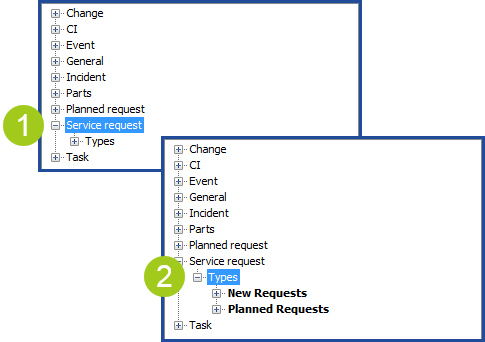
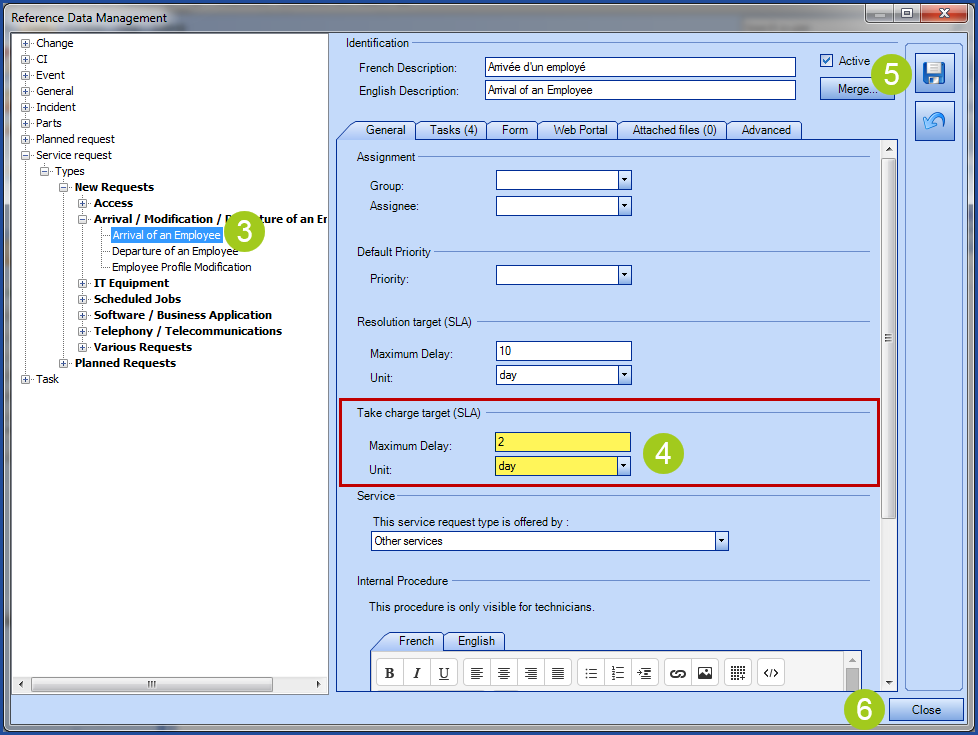
For service requests
- From the reference data, open the Service request node.
- Open the Types node.
- Select one of the service requests.
- From the Take charge target (SLA), add or modify the response delay.
- Generally, we recommend that the response delay be ± 20 % of the resolution delay.
- Save the modifications with the disk icon and repeat the process for other service requests.
- Finish the configuration with the Close button at the bottom right.
How the initial response targets work
The response is always calculated between the Open Date and the Response Date of the request. If the Take assignment action is not performed and the request is resolved, than the Resolution Date will also be the Response Date.
It is only the first time the request is taken in charge that will be used for the Response Delay calculation. If the request is taken in charge again during its lifecycle, these other responses will have no effect on the initial response target.
Here are the fields that can be used in searches or shown in lists to follow the initial response targets:
- Response SLA.
- Take Assignment Due Date.
- Response Date.
- Response Delay.
- Response Delay (Business Days).
From a list, the Take Assignment Due Date will be:
- Empty.
- If the Take assignment action has not been done.
- In black.
- When the response was done within the expected delay.
- In red.
- When the response was done later than the expected delay.

Thank you, your message has been sent.