Table of contents
Related Article
- Basic Configuration - Incident
- Basic Configuration - Service Requests
- Create customized forms in Octopus
Introduction
Octopus is used in many different contexts. Because from one company or team to the next, the need for the behaviour required when a person makes a new request may vary a lot, several options are available to support these needs.
This article will focus on the elements that can be configured in relation to the Requester and User fields for incidents and service requests.
Because these are possible configurations, permissions that give access to options and/or reference data are required to implement these options.
Available Options
Initialise the User as the Requester
In Octopus

By default this option is always active the Windows version of Octopus.
This is to increase the data entry speed of a new request as most of the time people make requests for themselves.
If needed, the user name can simply be edited for another as demonstrated in the GIF.
On the Web Portal
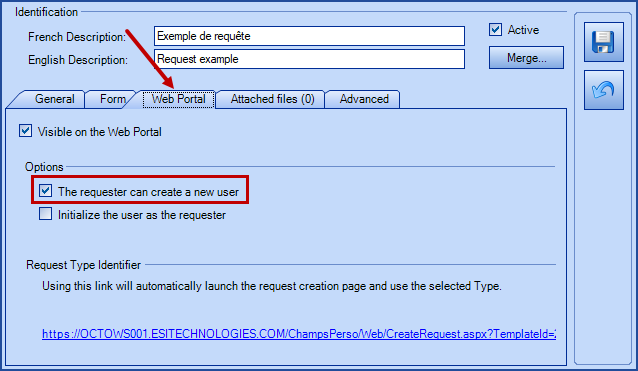
This configuration is specific to each incident template and SR type and it can be modified in the Web Portal tab.
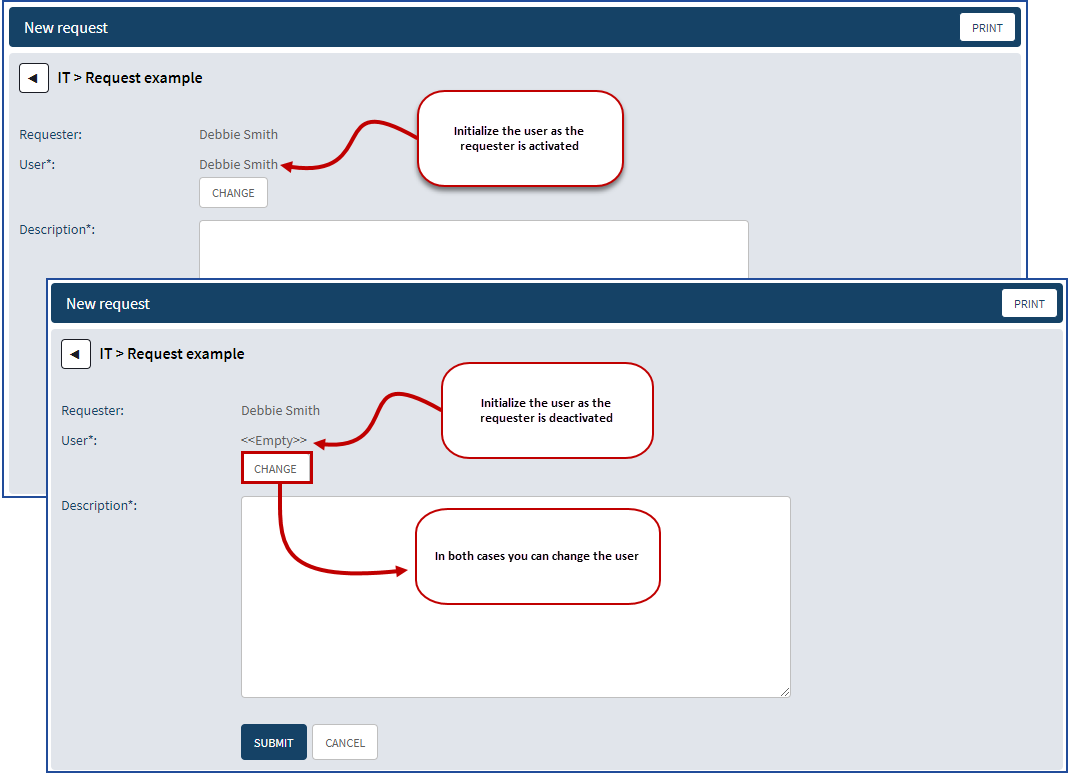
This is the default configuration in Octopus, as most of the time people make requests for themselves.
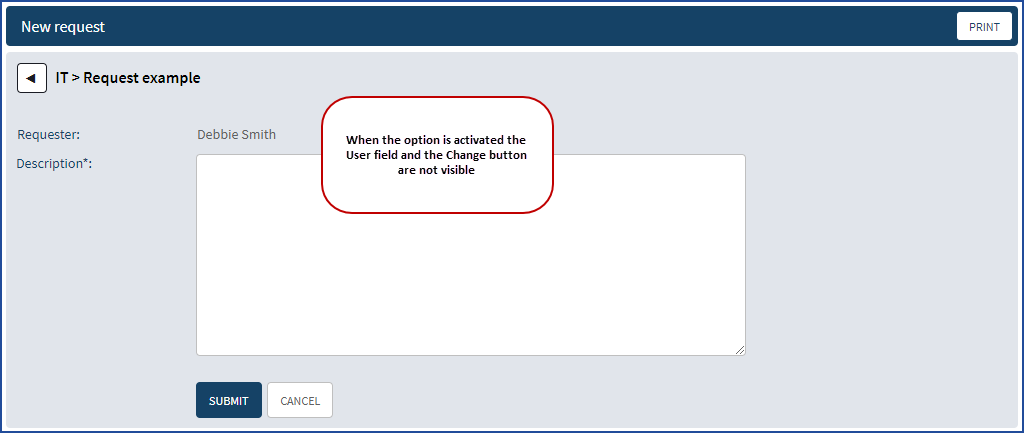
When activated, if a person makes a request on the Web Portal they will be the requester and user, but a Change button is available to change the user if needed.
If, on the other hand, the option is disabled, the name of the person will be in the requester field and the user will be <<Empty>>. As this field is mandatory, the person making the request will need to choose the user.

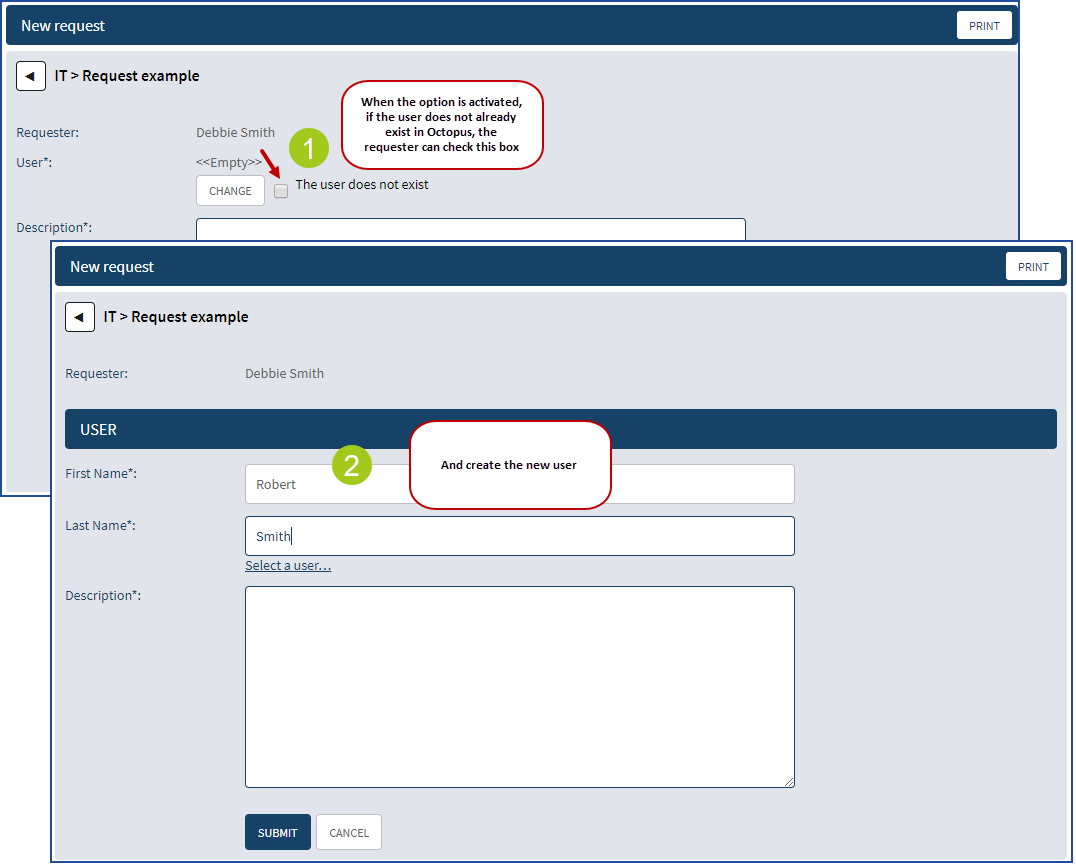
The Requester Can Create a New User
This option will generally be used in a very specific context. For example, you may have a request for the arrival of a new employee and allow the person completing the request to create the person in Octopus.
The advantage of this option is to ensure that the new employee's name is correctly written and that the request will automatically be associated with his name. If a synchronization with AD is done later, the account that was created should be recognized by AD.
This option is generally used in combination with a restriction on the request to a group of authorized requesters.
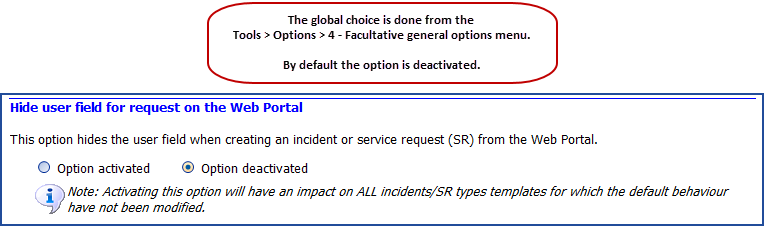
Hide User Field for Requests on the Web Portal
This option is special because it can be selected globally or by request. It only affects requests submitted on the Web Portal.
It can be used in an environment where you do not want to allow one person to make requests for another on the Web Portal for any request type. We then use the global option that hides the User field for all requests on the Web Portal.
Or it can be used in a specific request type to hide or to view the User field from the Web Portal.

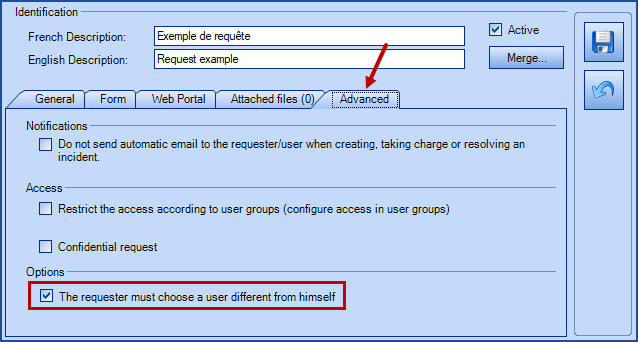
The Requester Must Choose a User Different From Himself
This option is there for specific contexts where we know that the request will not be made by people for themselves and we want to make sure that they will choose another user, for example for the arrival or the departure of an employee.
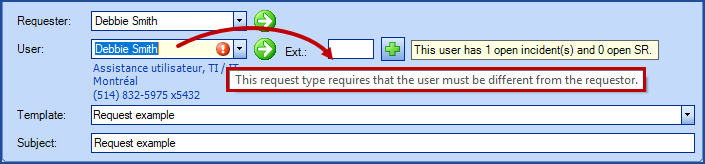
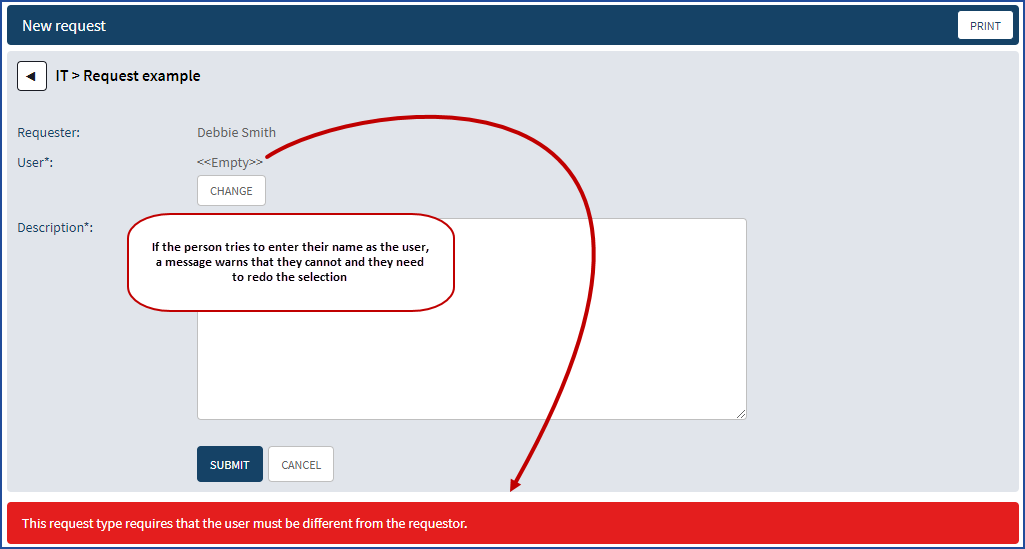
If the option is enabled, it will do the validation on both the Web Portal and Octopus to ensure that the requester is not a user.
Multi-Users for a Request
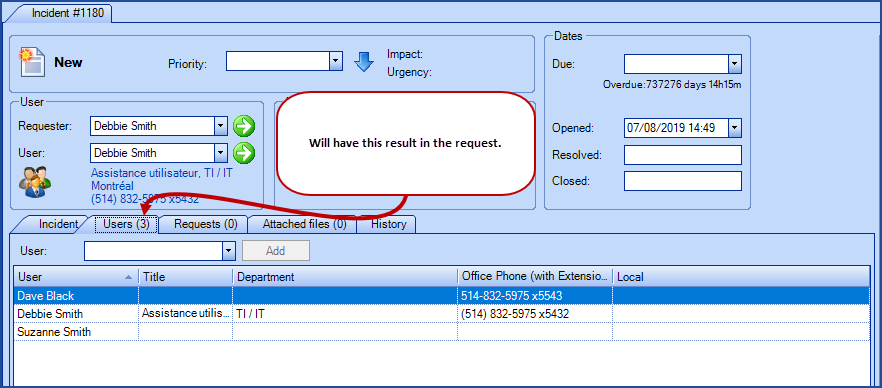
In some cases you need to add more than one user to a request in addition to the requester.
In Octopus
By default, it can be done at any time in the Octopus application from the User tab.
Just search for the person and use the Add button.
In the Web Portal With the Assistance of a Form
To be able to do the same thing from the Web Portal, you must first add a Multi-Users field to a form.
For more information on the configuration, see the Create customized forms in Octopus article.
Restrict the Access According to User Groups
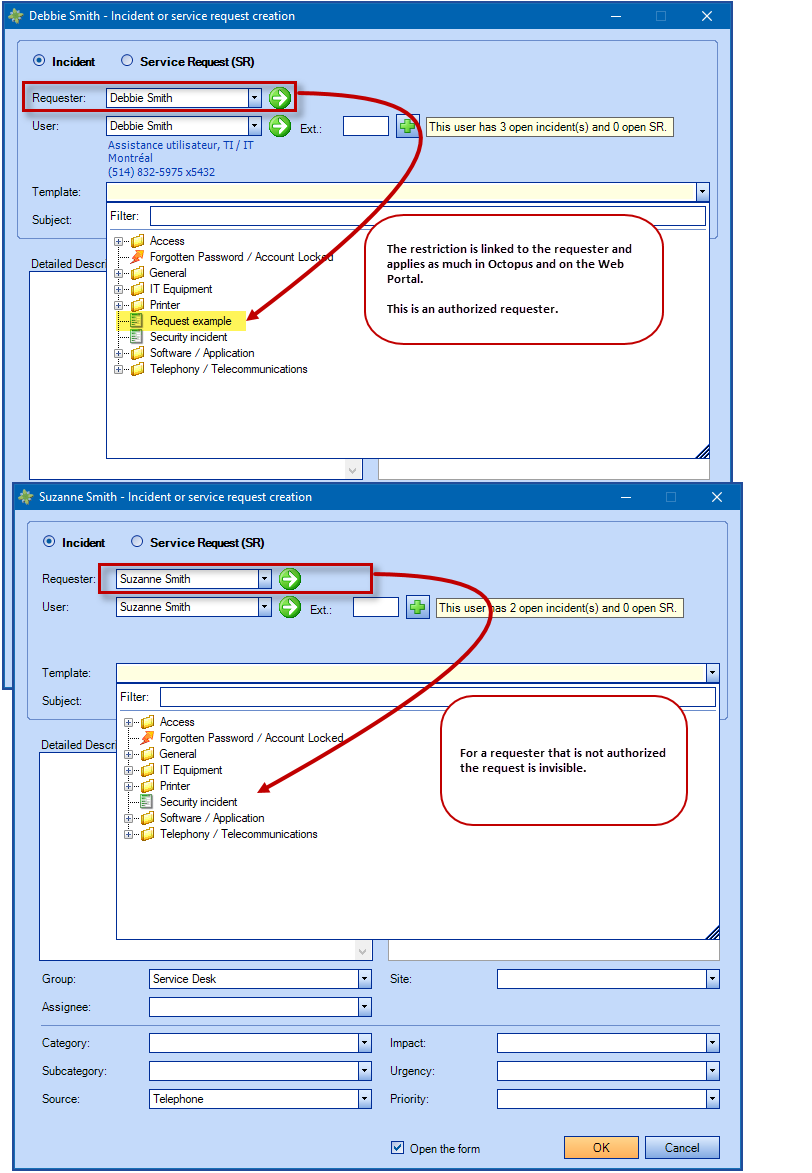
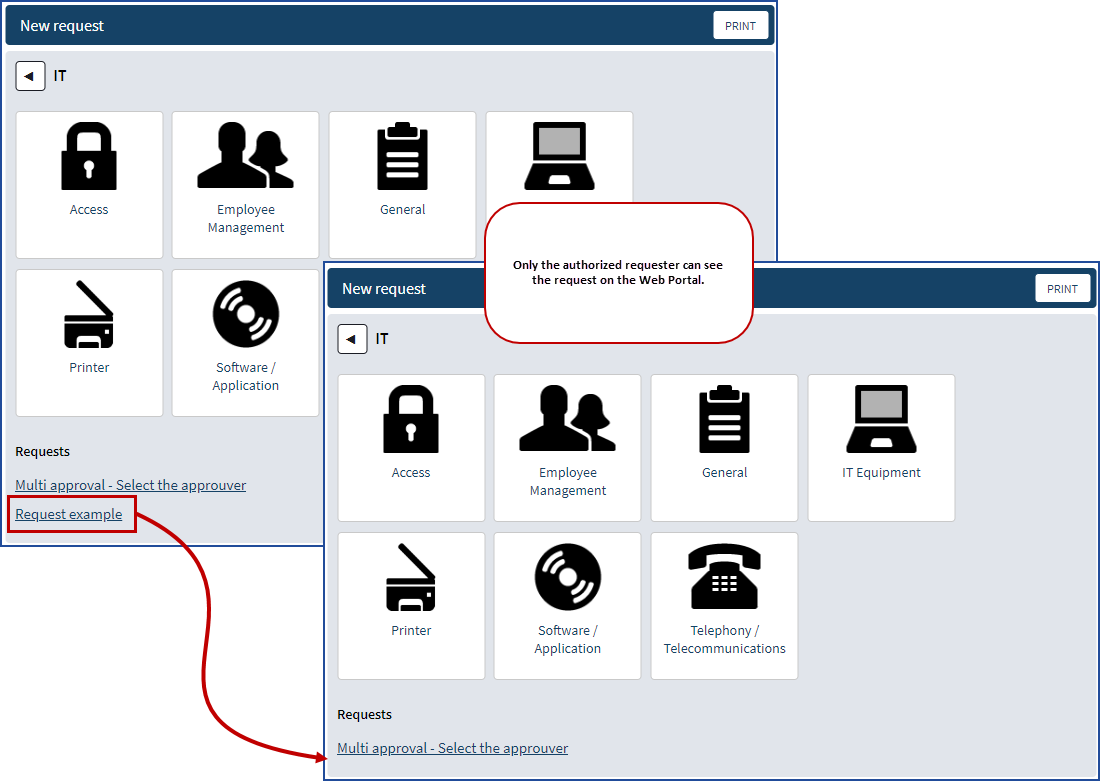
Another interesting option is to be able to give access to certain people as authorized requesters to specific requests.
This can be done using groups of people who have the right to make certain requests, both in Octopus and on the Web Portal.
For more information, see the Restrict a request by the user group section of the Restrict a template article
Thank you, your message has been sent.