Table of contents
Related Articles
Introduction
In Octopus, the use and customization of lists is a must.
Each technician needs to see the information in a way that reflects their reality and need. For this reason, there are a large number of fields available for lists.
In this article, we offer list layouts and tips and tricks to improve the management of the various elements of Octopus..
What is a list in Octopus?
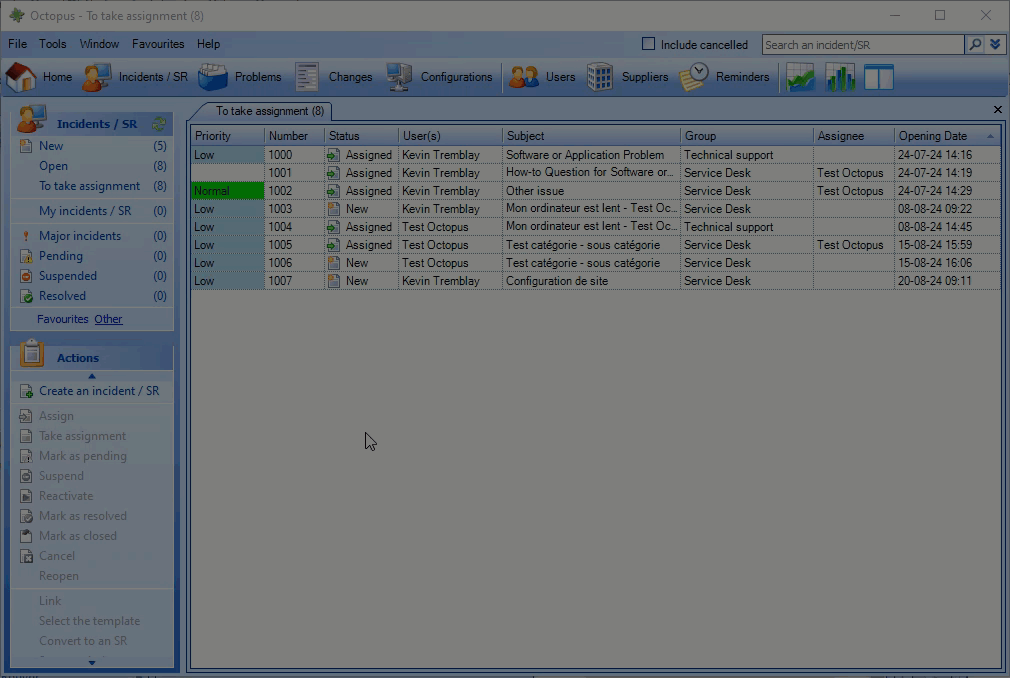
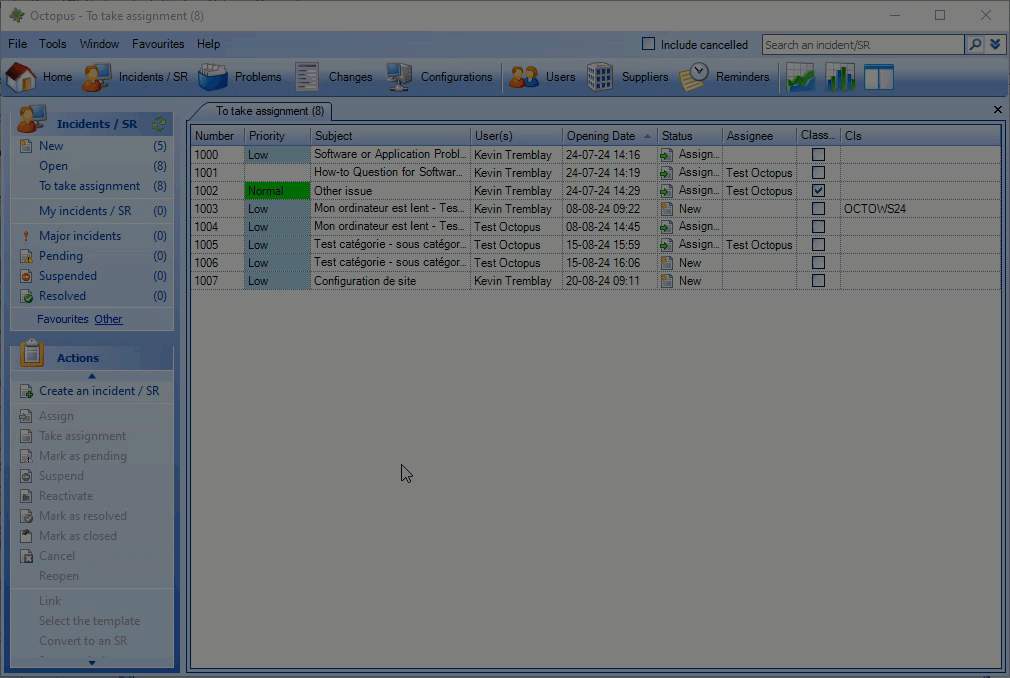
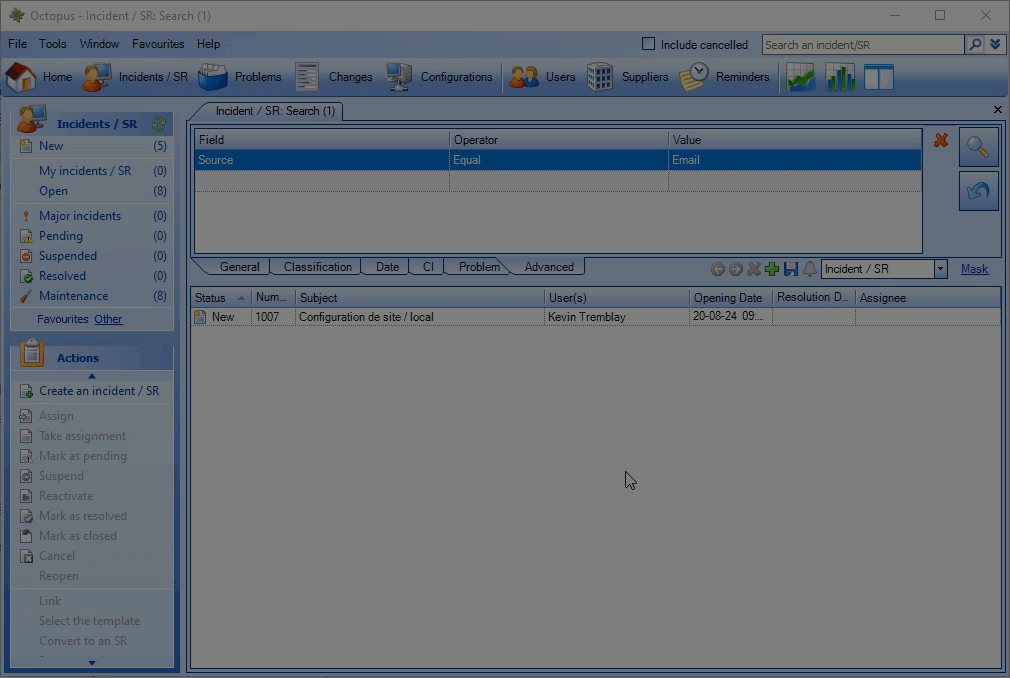
A list is created from an advanced search.
To avoid having to do the same advanced search over and over again, they can save their search and it will always be available in the lists section.
A list allows you to see the result of the advanced search at any time.
Where can I find lists?
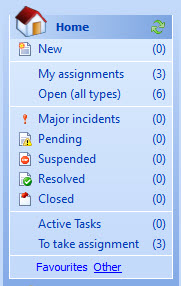
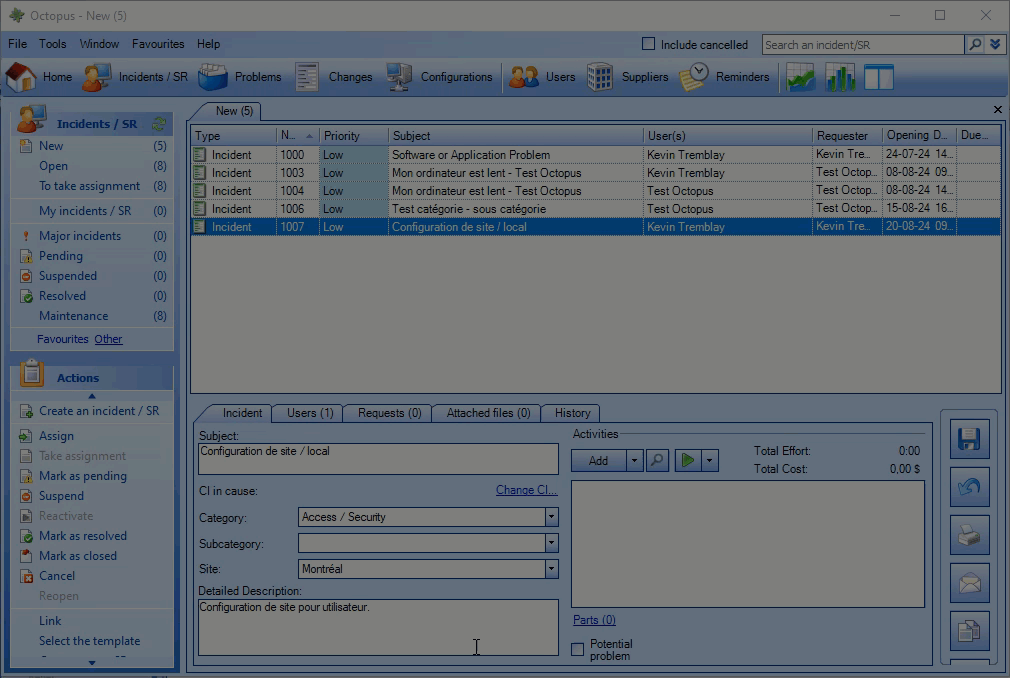
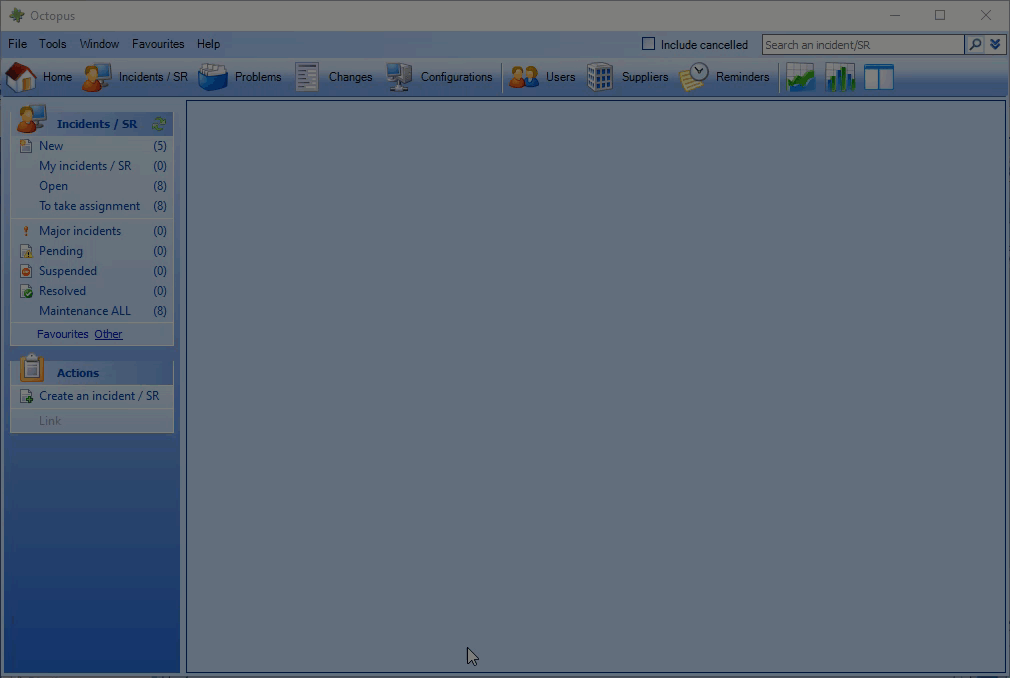
The lists are always in the same place: at the top left of the screen, for each of the modules.
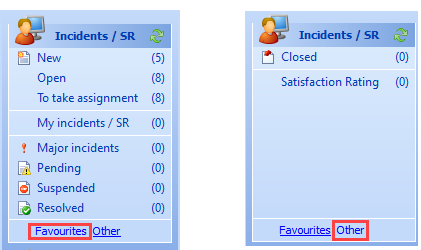
There are two levels of lists:
- Favourites
- Other
The Favourites page is always the one that will be displayed when a module is selected.
Basic List Manipulation
What is Home ?
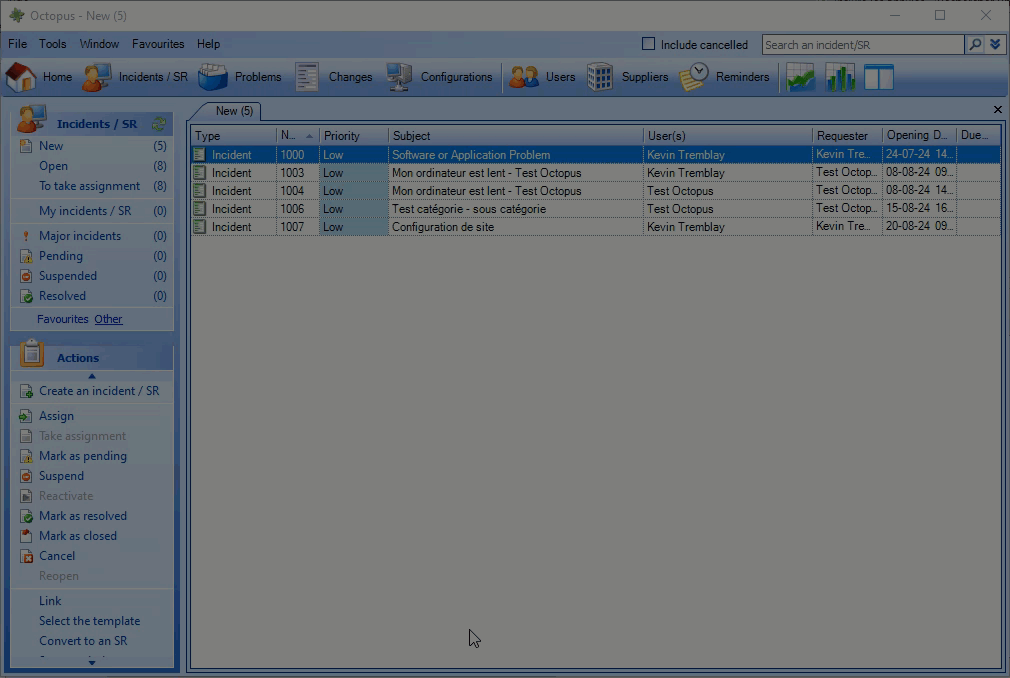
Home allows you to create a list that can contain all the fields of all types of Octopus queries (Incidents/SRs, Problems, Changes, Events, Tasks), as they are accessible for advanced search
Therefore, if the list must contain criteria for two or more types of searches, you must go through Home.
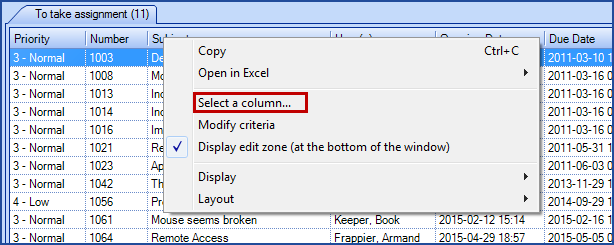
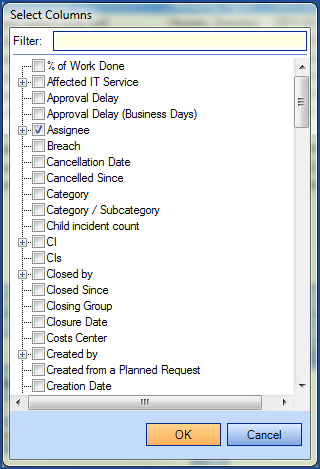
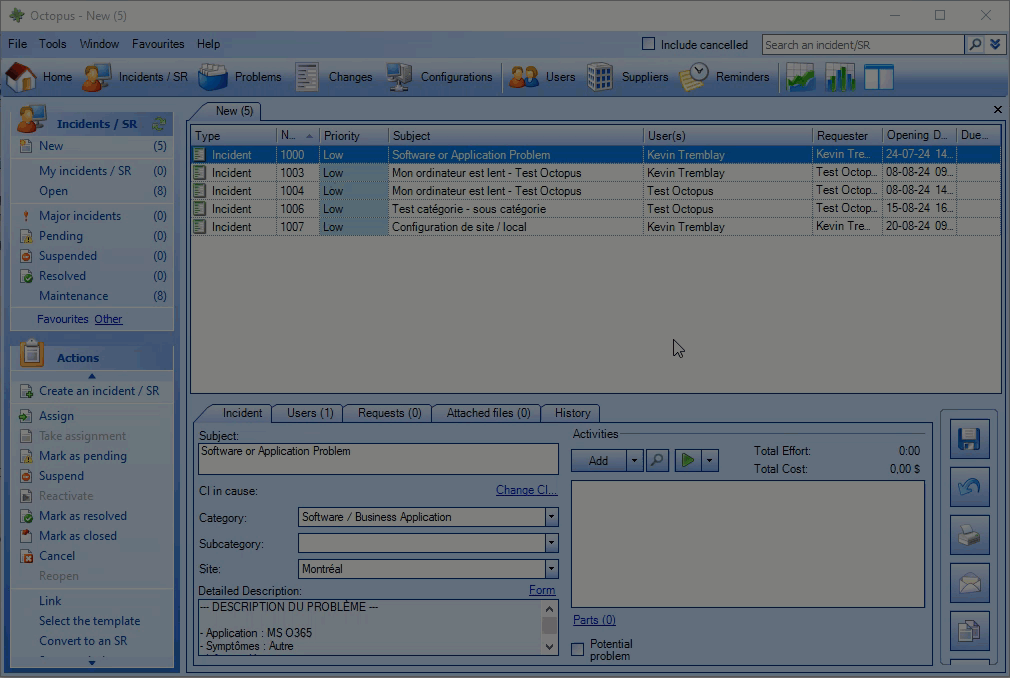
Adding/Removing Columns
Fields can be added or removed from a list. This allows you to customize it.
- ight-clicking at the top of the main area, where the list of records is located, will take you to the context menu and select a column.
- Multiple fields are available, simply check one or more fields to add them as a column or uncheck them to remove it.
- The Filter field makes it easy to search, simply write the name of a field or part of the name.
- If more than one field at a time is checked, the selection order will determine the order in which the columns are displayed.
- The column(s) are added to the far right.
Move a column
The order of the fields in a list can be changed, by selecting the column and dragging it to the desired location.
The changes made are saved in the Octopus speaker's profile and remain as defined for future sessions.
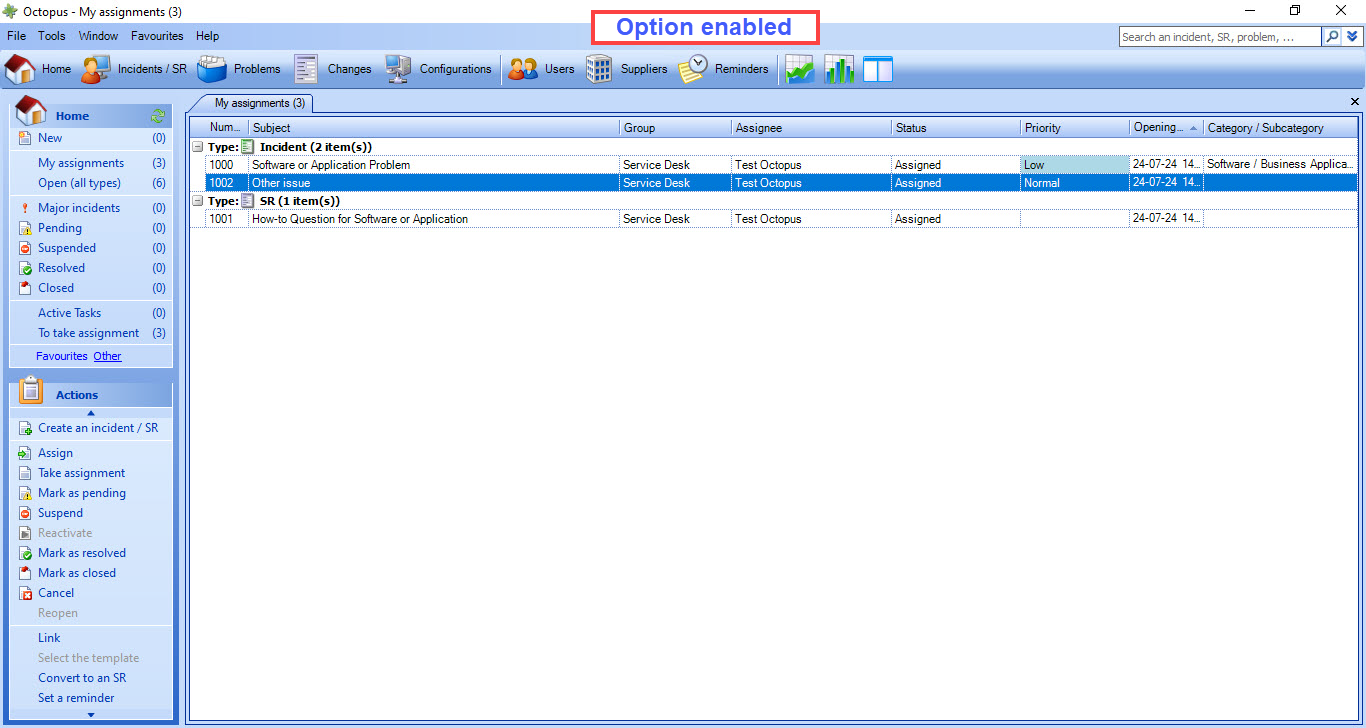
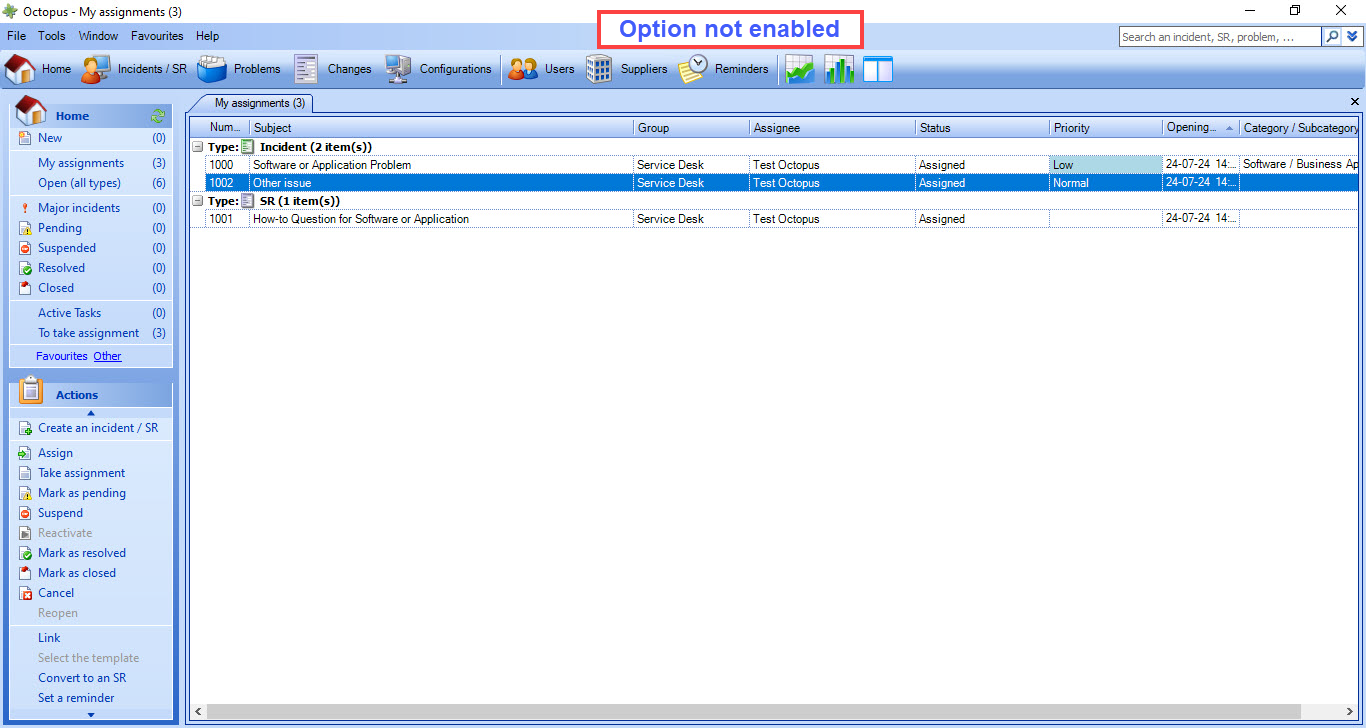
Automatic Column Adjustment
The Automatic column adjustments option allows you to choose the width of the columns or leave the system self-adjusting to the window.
When the option is enabled, the width of the columns automatically adjusts according to the size of the window.
When the option is not enabled, a left-right scroll bar appears at the bottom of the list to allow you to scroll and see all the fields in the list
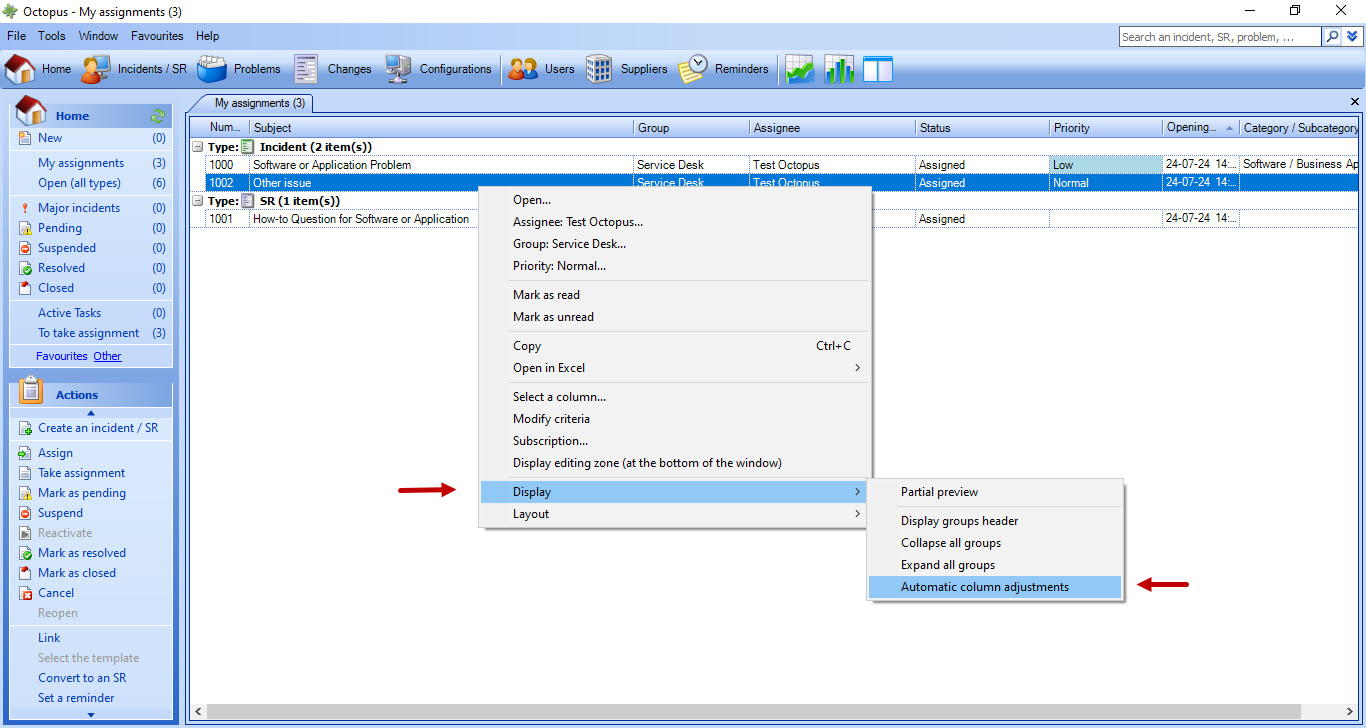
To change the option, you need to :
- From the search results list, right-click
- Select Display > Automatic column adjustments
- By default, this option is enabled.
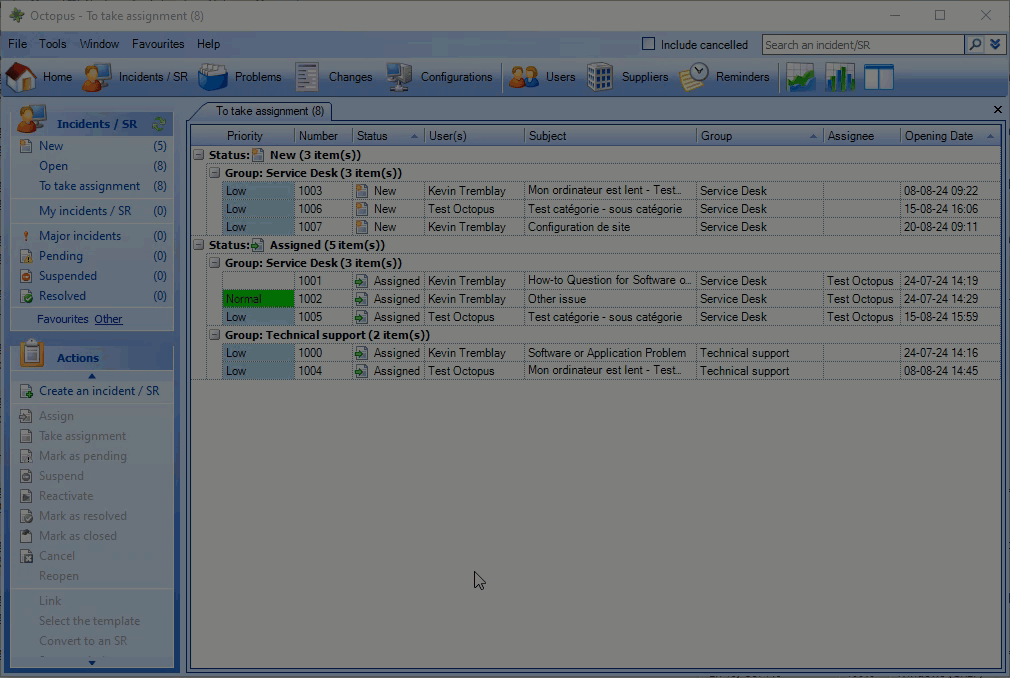
Group fields inside a list
Sometimes it can be useful to see filtered information on specific fields without necessarily remaking a new list or searching through the existing list.
This can be done by adding one or more groups within a list.
This also allows you to see subtotals on the number of records corresponding to the group created.
Add a group
To add a group, you need to :
- From the search results list, right-click on the column header of the desired field.
- Select Display > Group by this column
- It is possible to create a subgroup by performing the same operation.
Visual explanation
Remove a field from the group
To remove a field from the group, you must :
- From the search results list, right-click on the column header of the field you want to remove.
- Select Display > Do not group by this field
Visual explanation
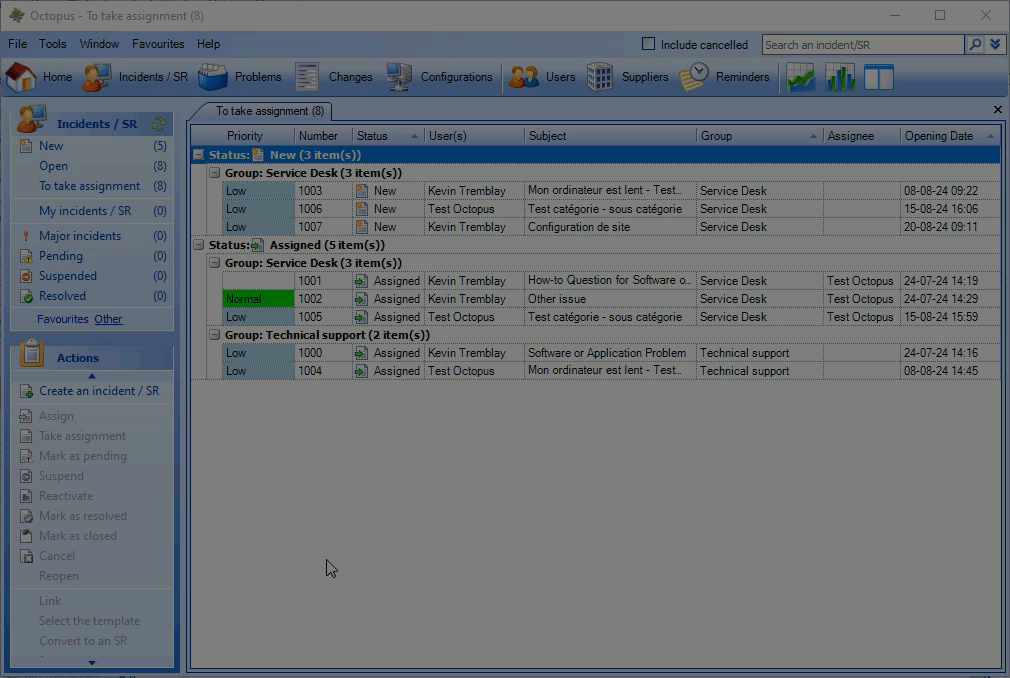
View or change the group by configuration
From the group header, it is possible to see on which field the list is grouped. You can even add, remove, or change the order of the groups from the header.
To access the group by header, you need to:
- From the search results list, right-click.
- Select Display > Display groups header
- To add a group, drag the desired column to the header
- To remove a group, drag the column you want to remove out of the header areae
- To change the order, choose and drag the items directly into the header
Visual explanation
To add a group directly in the header, the column must be in the list.
But once it has been added to the header, the column can be removed from the list, the grouping will not be affected.
Open/Close Groups
When grouping records into a list, the + and - symbol can be used to open or close one group at a time.
But it is also possible to close or open all groups at once.
Copy the layout of one list to another one
When creating/modifying lists, it is possible to reproduce the layout of one list and transfer it to another one without having to repeat the previous steps each time.
Note that this only works on lists of similar items, based on CIs for example.
- Click on a list, let's call it List 1.
- Press CTRL+SHIFT+C to copy the layout..
- Navigate to the list on which you want to reproduce this layout; List 2.
- Press CTRL+SHIFT+V to replicate the layout from List 1 to List 2.
Reset the layout of a list to its default
After making changes to the layout of a list, you may decide to revert to the default layout based on what the list administrator has set up.
To reset a list to the default layout, you must:
- From the search results list, right-click.
- Select Layout > Reset to default
How to export a search results list to Excel
Here are the steps you need to follow to export your data from Octopus to Excel
- View any list (list of incidents, CIs, scheduling items in scheduled queries, etc.) or perform a search
- Customize the list by changing the displayed columns and sorting
- Select one or more rows from the list
- If you want to transfer all the data in the list to Excel, there is no need to make a selection
- Right-click in the list and select Open in Excel from the context menu
- You will then have to choose between All Records or Selected Records
- You'll see the result in the generated Excel file (including the column headers).
For performance reasons, the displayed results are limited to 25000 rows.
If your list or search exceeds this limit, it is recommended that you refine the search criteria to reduce the number of results by making more than one list/search in order to obtain the desired data.
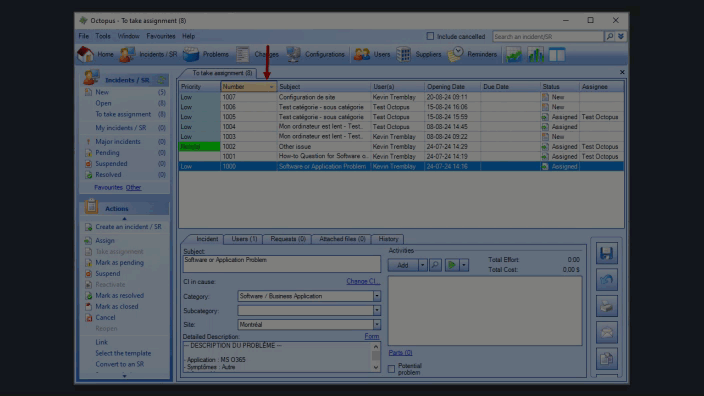
Sort on a column
Sorting a list can be done on one or more columns.
When a sort is active, a small triangle appears to the right of the column.
There are several ways to enable sorting
- Simply click on the column header.
- From Display > Ascending sort or Descending sort.
To sort on more than one field, hold down the SHIFT key and press the column corresponding to the field in question.
Edit zone
The edit zone allows you to view and edit certain information about the record selected in the list.
It is found at the bottom of the list.
By default, when creating a list, the option is enabled.
Each list can have a different configuration for the editing area (visible or not).
Configuring the List Menu
When a speaker starts Octopus for the first time, default lists are already present for each of the modules.
The performer can then change the layout of the lists (columns, sorting, grouping by) as mentioned in Basic List Manipulation section.
The list menu is customizable. It is possible to :
- Change the order of the list
- Add Existing Lists
- Remove lists
- Rename lists
- Insert a separator
- Establish a list as the main list of a module
- Reset the list menu to default
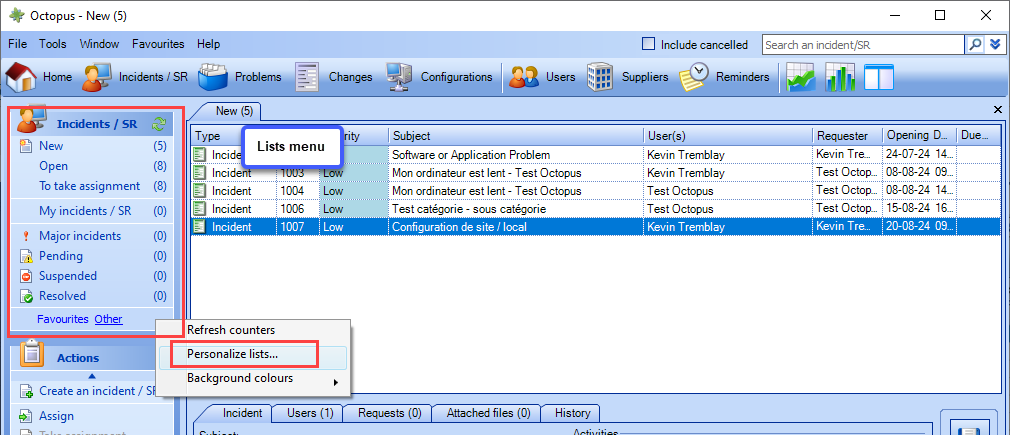
How to access the configuration
To access list customization:
- Right-click in the List Menu section to open the context menu and select Personalize Lists

The two menu levels for lists (Favourites / Other)
There are two levels of lists:
- Favourites
- Other
The Favourites page is always the one that will be displayed when a module is selected.
It's recommended to position the most used lists on the Favourites page and the occasional lists on the Other page.

Menu manipulation for a technician
The technician can customize the list menu in each of the Octopus modules.
Manipulations are always done from the Module lists customization.
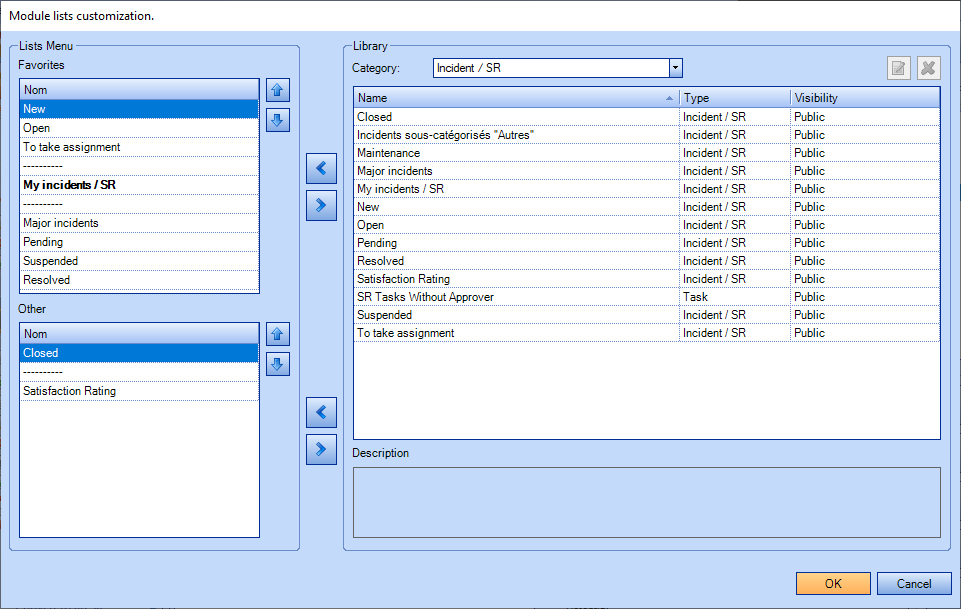
Add a list
To add a list to one of the two levels of lists, you must :
- Choose the desired list from the library.
- Use the arrow in the List Menu where the list is to be added.

Remove a list
There are several ways to remove a list.
In all cases, first select the list to be removed and then :
- Use the corresponding arrow in the List Menu where the list is to be removed.
- Press the Delete key on the keyboard.
- Right-click and select the Remove option.
Move a list
The order of the lists can be changed :
- Select the list you want to move.
- Use the arrow corresponding to the desired position.

Insert a separator
A separator in the list menu allows you to insert a line to group lists.
- Select the location where to insert a separator
-
Right-click and select the Insert Separator option or use the keyboard shortcut Ctrl + Ins.
Rename a list
A list in the list menu can be renamed.
- Select the list you want to rename
- Right-click and select the Rename option or use the F2 keyboard shortcut..
- Enter the new name of the list.

- The list is renamed only in the technician Lists Menu.
- The original list name appears in parentheses to the right of the new list name in List Customization.
Establish as the main list of the module
The technician has the possibility to determine the default list when opening the associated module in Octopus.
- Select the list that will default when the module opens.
- Right-click and select the Set as main list in module.
- The list set as the default always appears in bold in the list customization.
Reset the menu to default
After making changes to the list menu, the technician may decide to revert to the default list menu based on what the list administrator has established.
-
Right-click and select Revert to the default menu.

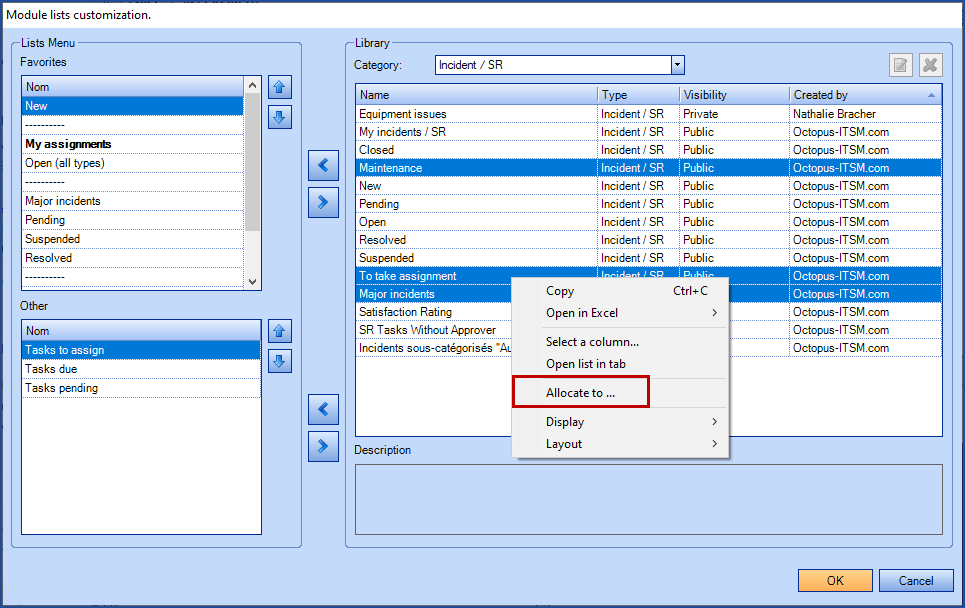
How does the list library work?
- The list library contains all the lists that are defined in Octopus.
- The lists are grouped by category for easy searching
- The Category drop-down list corresponds to the Octopus module..
- The technicians can quickly see the lists they have created, simply by selecting My Lists from the Category drop-down list.
- When selecting a list, if its description is present, it will be displayed in the Description field.
- If the technician is the creator of the list or has the permission Manage Lists, it is possible to:
- Edit the list
- Delete the list - Edit the list
 - Delete the list
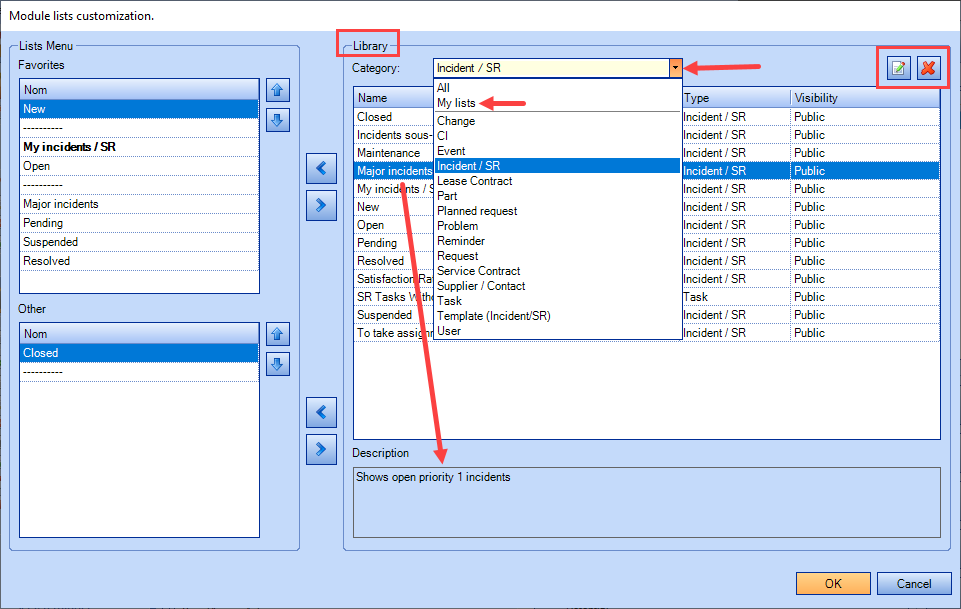
-
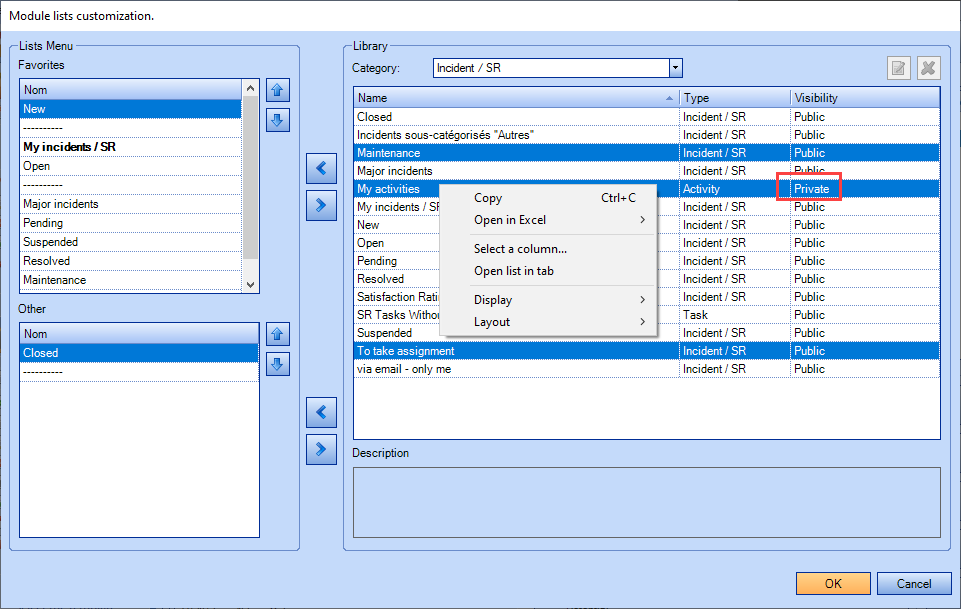
When a list is private, the only person who sees it in the library is the person who created it, even if other technicians have Manage Lists permission.
Edit a list
This option is available when the technician is the owner of a list or having the Manage Lists permission (for a public list).
This option allows you to:
- Rename the list
- Edit a category
- Modify a Category
- Add, edit, or remove an icon
- Add, edit list description
- Add the list to the favorites of the technician of the selected module.
How does a public list work ?
The options available for a public list will be different depending on the type of technician doing the changes.
Type of technicians possible :
- Standard :
- Technician who didn't create the et doesn't have the permission to Manage lists.
- List owner
- Technician who created the list.
- With the Manage lists permission :
- Technician who created the list or not, but having the permission do Manage lists.
| Option | Type of technician |
Behavior |
|---|---|---|
| Assign to... | Standard | Option not available |
| List Owner | ||
| With permission to administer the lists | The option is available and the technician can assign the list to one or more technicians. | |
| Modify criteria | Standard |
Option available but the technician can save the list as a new one only. |
| List Owner | Option is available and the technician can save the list under the same name or create a new one. | |
| With permission to administer the lists | ||
| Modify layout | Standard | The layout can be edited. |
| List Owner | ||
| With permission to administer the lists | The layout can be changed and it can set the default layout for the list. | |
| Reset layout to default | Standard | Option available |
| List Owner | ||
| With permission to administer the lists | ||
| Reset menu to default | Standard | Option available |
| List Owner | ||
| With permission to administer the lists | Option available and it can set the default list menu | |
| Delete a list | Standard | Option not available |
| List Owner |
Option available ATTENTION :It is important to know that when a public list is deleted, all technicians who use that list are affected.
|
|
| With permission to administer the lists |
Creating, editing, deleting a list
A list is created from an advanced search.
A list allows you to see the result of the advanced search at any time.
For more information, see article Advanced search.
Creation
Creating a new list
Instead of doing the same advanced search several times, you can save the search as a list.
After clicking on the save icon (floppy disk image) to save the list, the technician must:
- Name the list
- Choose the status of the list (checkbox); Public, anyone can access it. Private (box not checked), it will not be available to other users.
- Select the Category from the combo box (the category of the module will be displayed by default).
- Add an icon (image) that will be the illustration of the list
- Add the Description of the list; This is used to indicate what is in the list (reminder)
- Specify the module where the list should appear
The list will be automatically added to the designated module in the Favorites window.
If the list is Public, other technicians will be able to add it from the lists library.
Creating a list from an existing list
A list can be created from an existing list, you must first :
- Select the source list.
-
Right-click on the list results to open the context menu.
-
Select Modify criteria.
-
Proceed with the changes of the criteria according to the list you want to obtain.
-
Use the magnifying glass button to validate the results.
-
Click on the save icon.
-
Select Create a new list from the actual result.

- The following steps are the same as creating a new list.

- When a list is private, the only person who sees it in the library is the person who created it, even if the technician has the permission Manage Lists.
Editing a list
A list can be modified at any time by its creator.
In the case of a public list, all technicians with the Manage Lists permission can also edit the list.
- It is important to be aware that when you change a public list, it does not only affect the technician who makes the changes, but also all the ones who use that list.
- Changes to the public list will only be effective for other technicians who use the list after an Octopus restart.
- Octopus strongly recommends creating a new list from the list to be modified to lessen the impact of the change unless there is consensus on the change process to be made on the list in question.
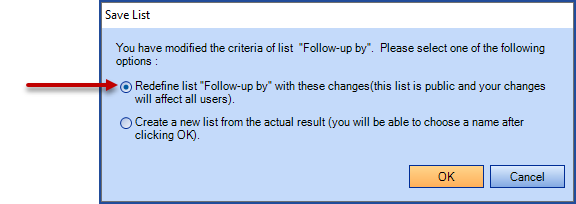
To edit a list, you must:
- Select the source list.
- Right-click in the list of records (top of the main area) to open the context menu.
- Select Modify criteria.
- Proceed with the additions/deletions of the criteria according to the list you want to obtain.
- Use the magnifying button to validate the results.
- Click on the save icon.
- Select Redefine list.
Delete a list from the library
A list can be deleted by its creator at any time.
In the case of a public list, all technicians with the Manage lists permission can also delete it.
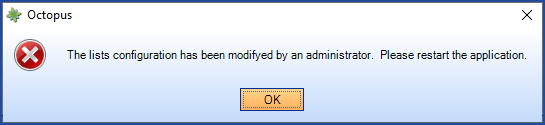
It is important to be aware that when a public list is deleted, it does not only affect the technician who deletes the list, but also all other ones who use it.
When the list is deleted from the library, all technicians who use the list will receive a message notifying them that the list has been deleted and that they need to restart Octopus.
To delete a list, you must :
- Right-click in the Lists Menu section to open the context menu and select Personalize lists.
- Select the list you want to delete from the library and press the at the top right.
-
A message appears on the screen asking for confirmation; click Yes
When a deleted list is selected by a performer from the list menu, a message appears on the screen advising that changes have been made and that the technician must restart Octopus.
Lists administration
Who is a list administrator
You do not need to have the Administer Octopus permission to be able to administer lists.
An Octopus technician simply needs to have the Manage lists permission.
It is recommended to give this permission to:
- Group Leader
- Team Leader
- Super-user
When technicians are list administrators, they can perform all the actions that are available in list customization on lists that they have created as well as on all lists that are public. In addition, they can access the following actions :
- Assign the layout of a list to a technician
- Establish the default layout of a list
- Assign a list to a technician
- Establish the default list menu for a module
It's important to be aware that when an administrator applies a change to a public list, it doesn't just affect the technician who did the action, but all those who use that list.
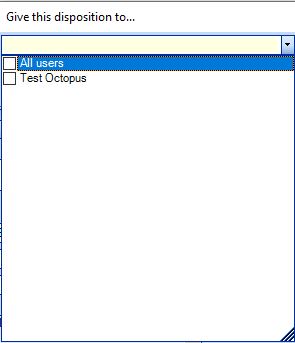
Assign the layout of a list to a technician
The layout of a list can be assigned to performers from the Layout > Allocate to action in a list's context menu.
- Only the layout of a public list can be assigned to another technician.
- The action won't be visible when it's a private list.
- The layout can be assigned to one, several, or all technicians.
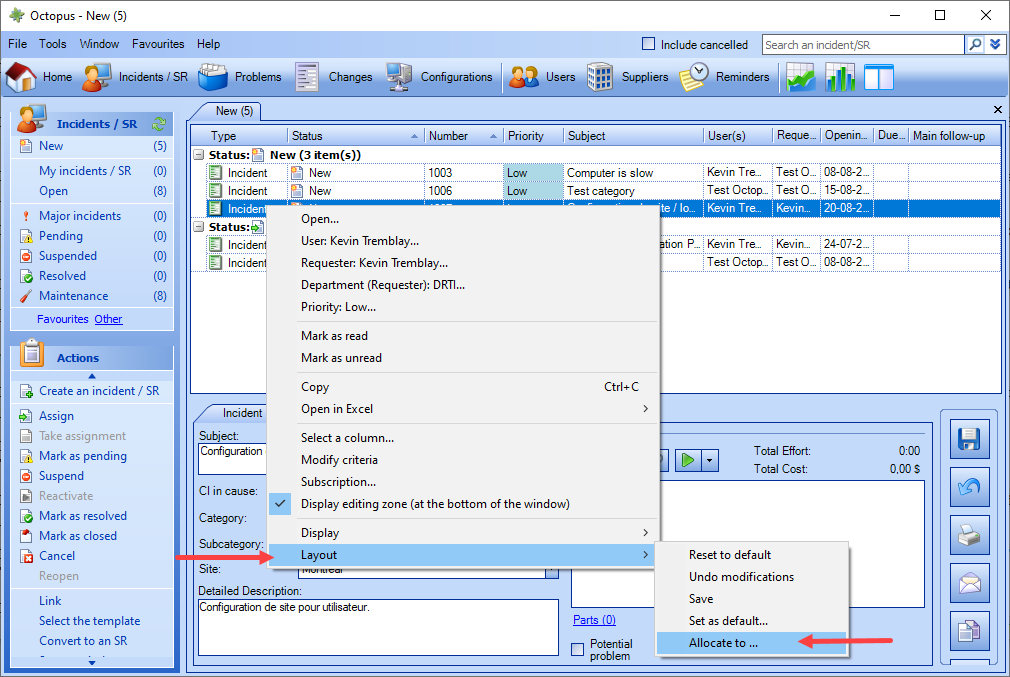
- The technician to whom the layout has been assigned must restart Octopus for the change to take effect.
- Technicians can make changes to their personal layout after an administrator assigns the layout.
Setting a list layout as default
The list administrator has the ability to set the default layout of a list for all technicians.
To set the default layout for a list, you need to:
- Make changes to the list layout if necessary.
- From the list of records, right-click the mouse.
- Select the option Layout > Set as default
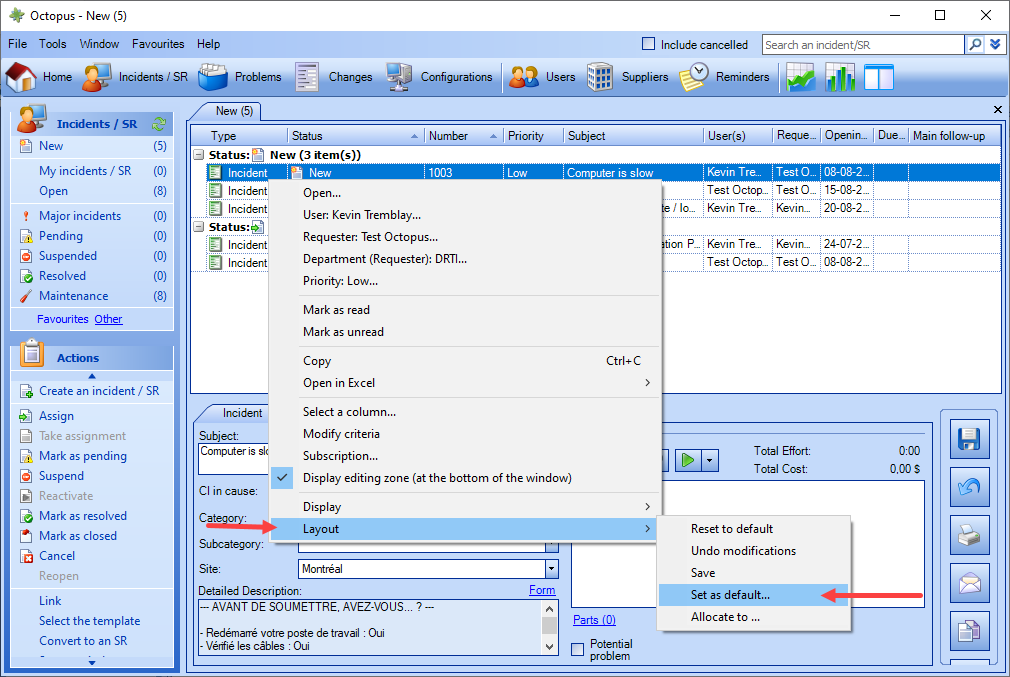
- Changes to the layout will be visible to those who add this list from the library or those who use the Layout > Reset to default option.
Assign a list to a technician
One or more lists can be assigned to technicians from the Allocated to action in a list's context menu.
- Only public lists can be assigned to another technician.
- The action won't be visible when it's a private list.
- Several lists can be assigned simultaneously to one or more technicians.
- The assigned list will be presented at the bottom of the list in the category's Favourites panel.
- If the technician already has the list, it will not be reassigned.
- The technician who is assigned a list can move or remove it from their list configuration.

- The technician who has been assigned a list must restart Octopus for the it to be visible.
Establish the default list menu for a module
The list administrator has the ability to set the default list menu for a module for all technicians
To set the default menu, you need to :
- Right-click in the List Menu section to open the context menu and select Personalize lists.
- Right-click in the List Menu section and select Set as default menu.
- Confirm the action of setting the menu as the default configuration by pressing Yes.
The other technicians must restart Octopus to have the new list menu by default.
Tips for new implementations
Octopus is installed with basic lists for each module.
We recommend that prior to implementation, the list menus be reviewed by the designated administrator and that the lists necessary for the work of each group be created.
Subsequently, the administrator can set the default lists for all of them.
After a few months of use, we suggest reviewing the lists and make adjustments if necessary.
Lists and notifications
Standard notifications exist in Octopus to notify the technician when a situation comes up.
The technician can decide whether or not to activate certain notifications, by choosing the type such as email, popup, or list. For more information, see the notifications wiki.
On the other hand, there are times when people involved in their work need to be notified when a given situation comes up, this is called a custom notification.
Custom notifications allow you to subscribe to a list and receive a notification about a new item added to the list or a changed value in the list.
Technicians who subscribe to one or more lists receive a notification that groups all the interventions on a given list, since the last notification cycle.
This cycle is around 5 minutes depending on the other tasks that run on the server in one after the other mode (batch). For more information, see the Custom Notifications wiki.
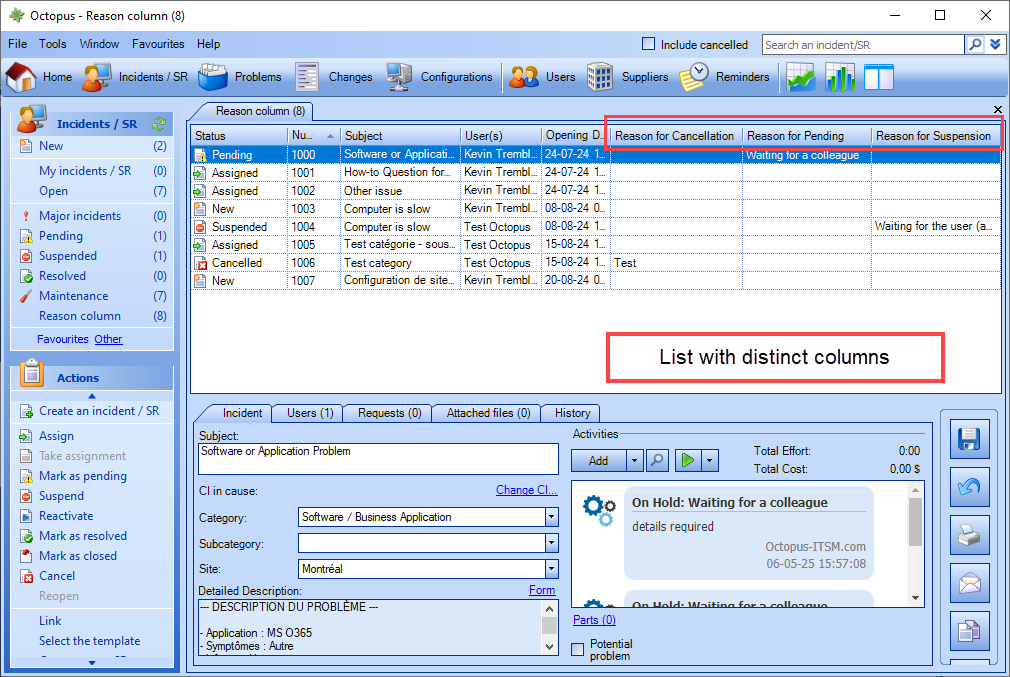
Suspension, Marking as pending and Cancel - reduce the number of columns
When a request is suspended, marked as pending, or canceled, Octopus asks you to choose a reason and a field is available to add a note to the current action.
It is possible to individually add a column to a list to determine the reason for :
- cancelling
- marking as pending
- suspension
Individual use of these columns is good in a list that contains only one of the statuses.
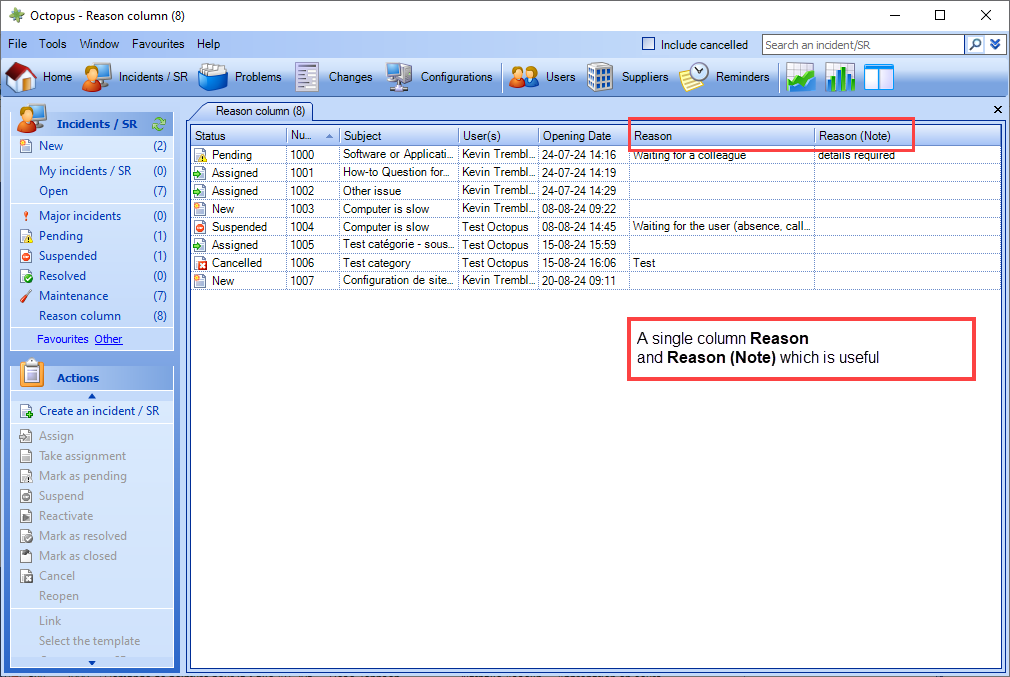
But for a list that contains suspended, pending, or canceled requests, we recommend using the Reason column that groups all of these statuses.
You can also refine the information by adding the Reason (Note) column that shows the note entered during the action.

Thank you, your message has been sent.