Table of contents
Related articles
Web Portal - Customizing the Home Page
Introduction
Two new modes can be activated on the Web Portal. The modern mode includes the tiles and the colours. Activating the modern mode requires modifications and preparation, but above all, it has an impact on all the teams that are visible on the Web Portal.
This article explains the different modes, the advantages and challenges of setting this up as well as how to prepare for it.
Possible options
There are 3 options:
- Option 1 - Tiles only
- Option 2 - Colours only
- Option 3 - Tiles and colours
Option 1 - Tiles only
- This option can be used with a Web Portal that has already been customized.
- The tiles will make the navigation in the Web Portal easy and pleasant.
Option 2 - New colours
- This option cannot be used with a Web Portal that has been customized, for example with the colours of the company.
- A single logo will be at the top left corner in the place of the Octopus one.
- Does not require any preparation to the structure of the requests or the teams when there are more than one.
Option 3 - Tiles and colours
- Includes both the tiles and colours for a complete experience.
Preparation
Before starting to modify the Web Portal, please validate the following information:
| Question | Yes | No |
|---|---|---|
|
Has the Web Portal been customized? |
Only option 1 can be activated | Activate options 1 and 2, as desired |
|
Is there more than one team on the Web Portal? |
The changes need to be coordinated with the other teams before the activation of option 1 |
Activate options 1 and 2, as desired |
Implementation: Option 1 - Adding the tiles
Setting up the tiles implies some preparation because of certain challenges.
Here is the list of elements to consider before going forward:
- Request structure
- The request structure (incident templates ans SR types) must be reviewed to properly work with the tiles.
- This restructurization will have an impact on the navigation for customers on the Web Portal and for Octopus users in Octopus.
- The categories with names that are too long need to be reviewed as well as the team names when applicable. (maximun approximatly 45 caracters)
- If more then one team is visible on the Web Portal, the restructurazation work must be done in all teams.
- Icons
- Icons are not mandatory, but the results are nicer.
- Icons must be found and added to represent the teams and the categories.
- The size of the images and the usage rights must be respected.
Prerequisites
- Get a test environment
- It is strongly recommended to configure and test this mode in a test environment.
- Get option 1 activated - Adding the tiles, by our Service Desk.
- Mention the WebUI.CreateRequestWizard.Enabled option.
- Download the proposed icons or use your own.
Prepare the tiles for the teams
If only one team is visible on the Web Portal, skip to the next section.
When multiple teams are visible on the Web Portal, it is possible to add and image for each team and rename them if required.
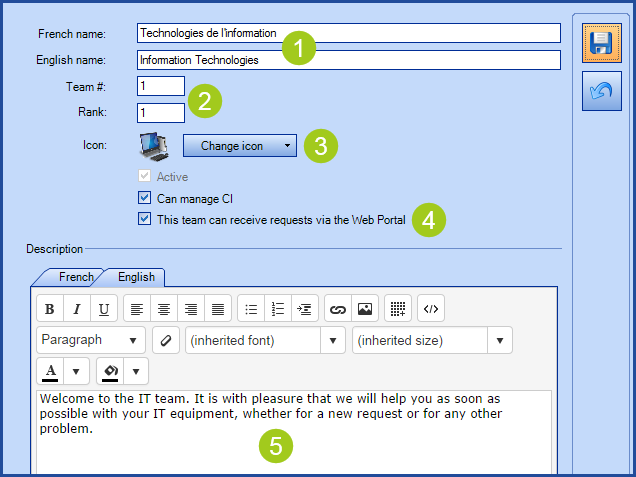
Go to the Tools > Reference data management > General > Teams menu and select the team to see the following window:
 Tip: Don't get distracted with the look of the image in the Reference data management. Sometimes the image does not look quite right, but on the Web Portal it can be fine. The opposite can also be true, so always look at the results on the Web Portal.
-
Represents the name that will be visible on the team's tile under the icon.
-
Allows to modify the rank of the team that will override the alphabetical order.
-
Allows to add an icon to represent the team.
-
If no icons are present, Octopus will show a small octopus.
-
-
This option makes the team visible or not on the Web Portal.
-
Allows to add a description to the team.
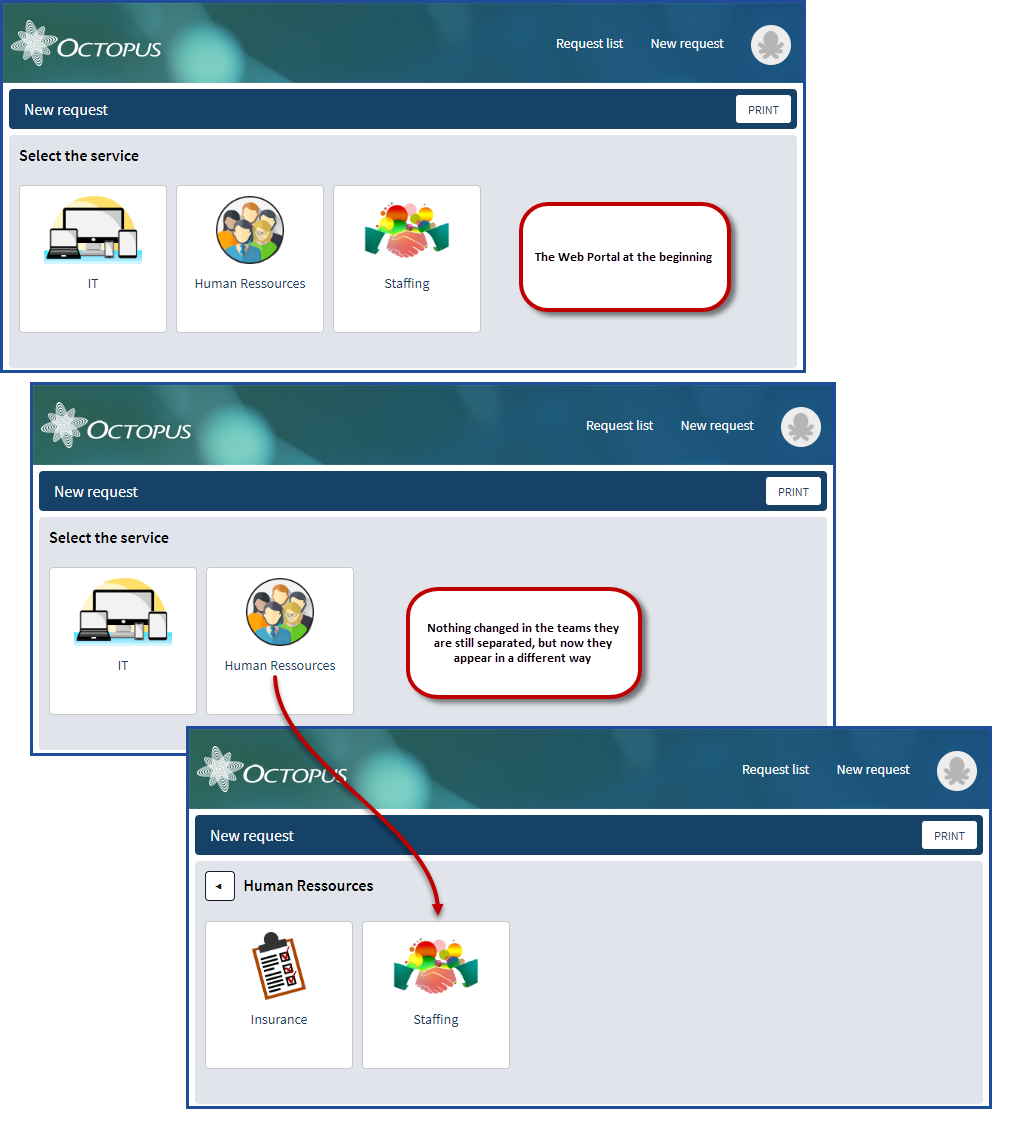
Place a team under another on the Web Portal
From the Web Portal only, it is possible to put the choice of one team under another.
This is to accommodate times when there will be more than one team in Octopus for a single service and to help users find things where they expect them to be.
For example, if in a database we have teams for IT , Human Resources and Staffing, we could put the Staffing team under Human Resources on the Web Portal.
However, the two teams, their requests and their respective data continue to be separated. Contact us for more information or to implement this option
Prepare the tiles for the requests
When only one team is visible on the Web Portal, the users are directly brought to the request structure. So there is no need to add an image or rename the team, as it is only visible when there are multiple teams.
Description
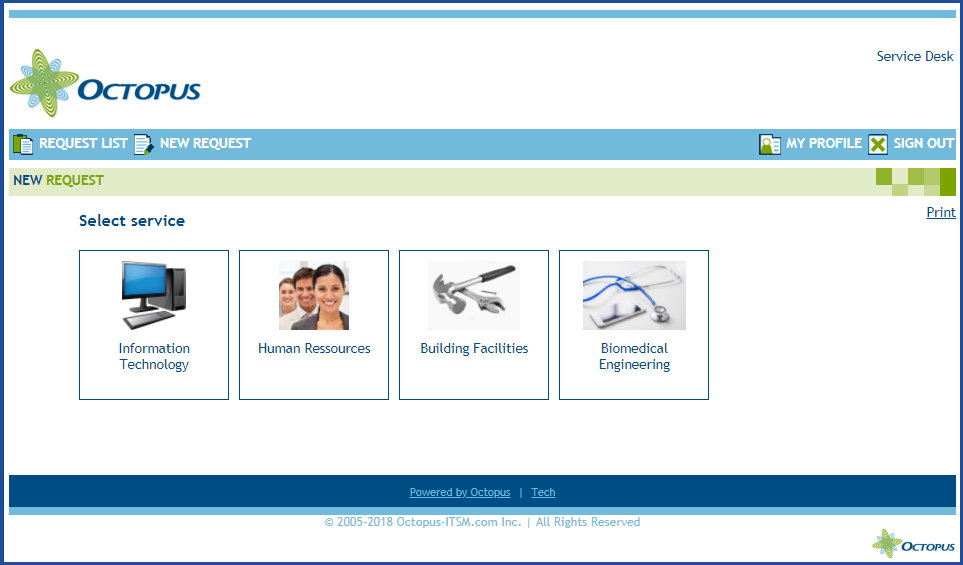
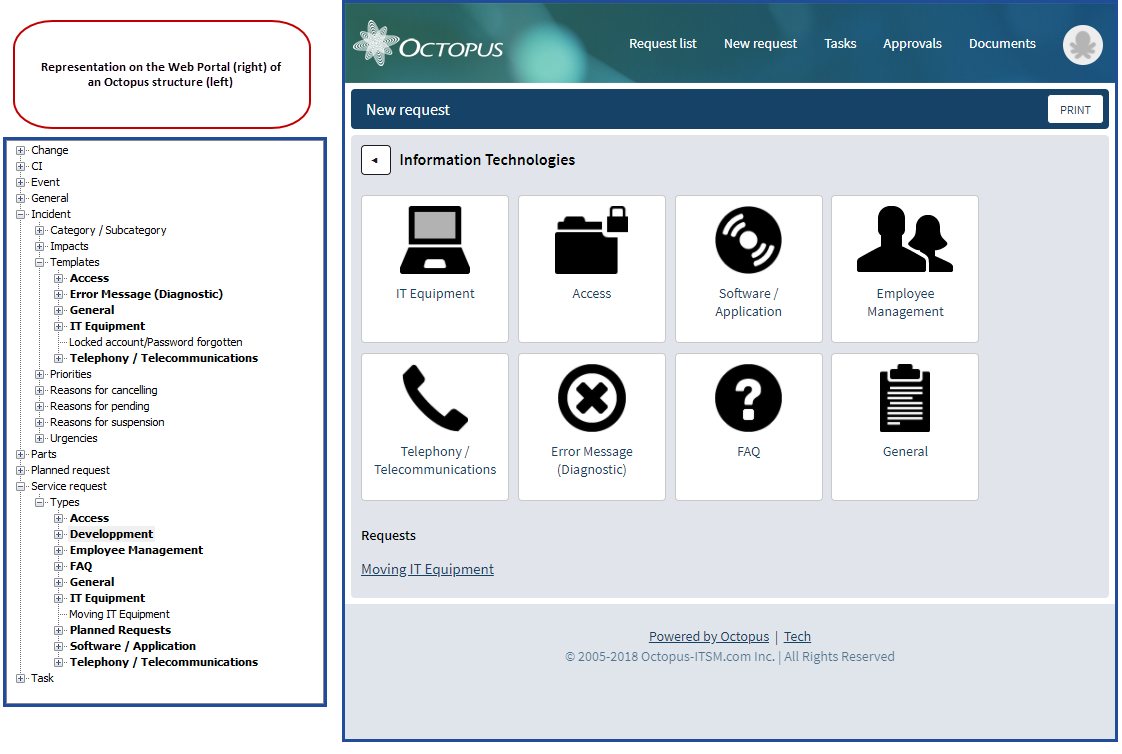
The following image represents what the Web Portal looks like and shows the configuration to do in Octopus.
- The tiles represent the categories used to classify the requests.
- Categories with the same name.
- When two categories have the same name (one in the SR types and one in the incident templates), they will automatically be merged on the Web Portal to show only one.
- Then the list of requests under the merged category will be displayed in alphabetical order regardless of the request type (incident or SR).
- If both categories contain a different icon, the one from the SR type will be shown.
- If no SR types are visible on the Web Portal, then the icon from the incident category will be shown.
- If both categories have a different rank, the one from the SR type will take precedence.
- When one or more forms are available at the same level as the categories, like the Move request in the following example, it will be found at the bottom of the screen in the Request section.
Example of the result of the Web Portal versus the Octopus configuration.
Preparation steps
- Review the structure of the SR types and incident templates.
- Define categories that will represent the tiles.
- Add icons to represent these categories, taking into consideration that the icons from the SR will take precedence.
- Adjust the rank of the categories as it overrides the alphabetical order.
- Add a description if required.
Adding icons to the categories
Adding tiles to the Web Portal allows not only to have an icon that represents the category, but also to modify the rank and add a description when required.
To modify the category go to Tools > Reference data management > Service request > Type (or Incident > Templates) and select the category to modify.
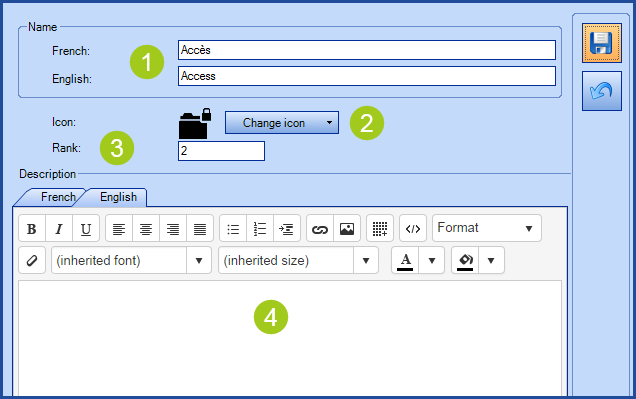
Tip: Don't get distracted with the look of the image in the Reference data management. Sometimes the image does not look quite right, but on the Web Portal it can be fine. The opposite can also be true, so always look at the results on the Web Portal.
- Represents the name that will be visible under the icon.
- Allows to add an icon te represent the category.
- If no icons are present, Octopus will show a small octopus.
- Allows to modify the rank of the team that will override the alphabetical order.
- Allows to add a description to the category.
Implementation: Option 2 - New colours
Activating option 2 does not require preparation, but certain modifications need to be done.
In can be activated from Tools > Options > Modern Web Portal section.
Preparation steps
If you have requested changes in the old mode of your Web Portal, you must take into consideration that some of these changes will not follow with the modern mode.
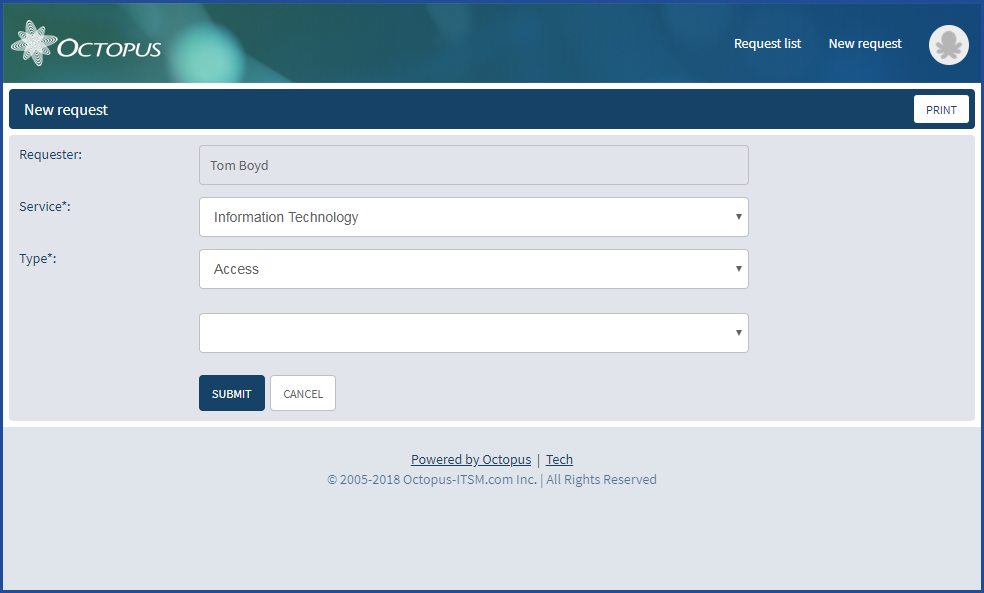
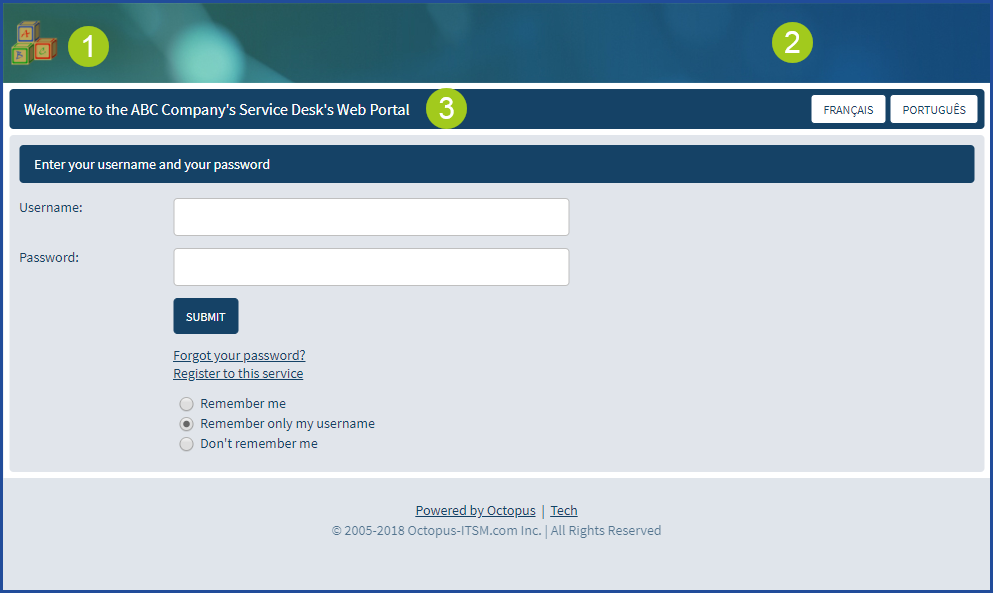
From the image bellow:
- Logos placed in the centre will automatically be moved to the left in the place of the Octopus logo.
- The information on the right will no longer be available in the modern mode.
- The service name, when modified, will be kept.
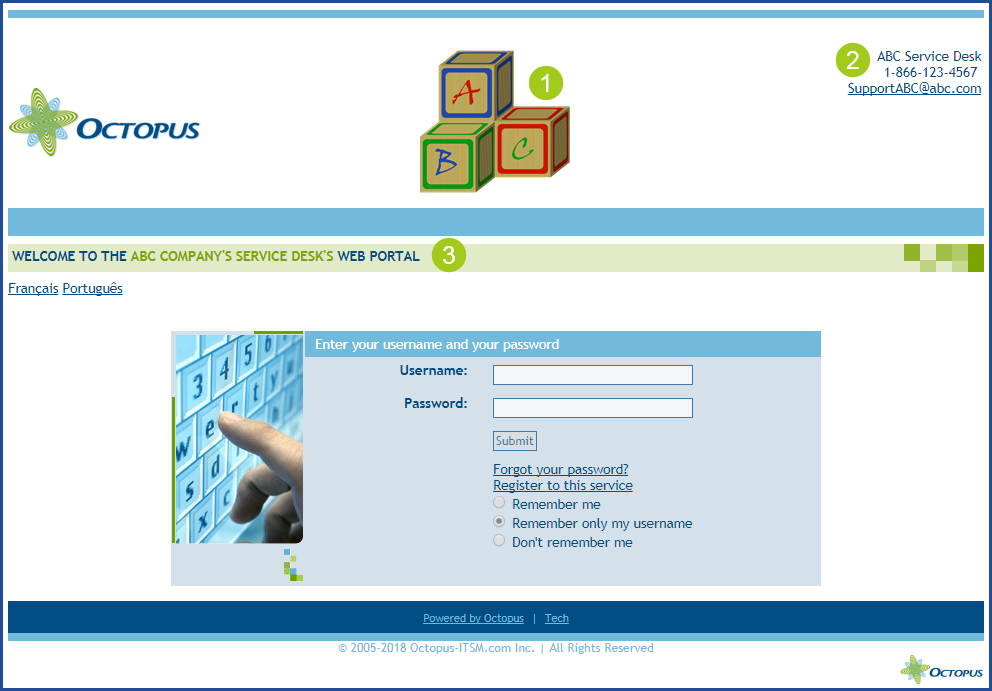
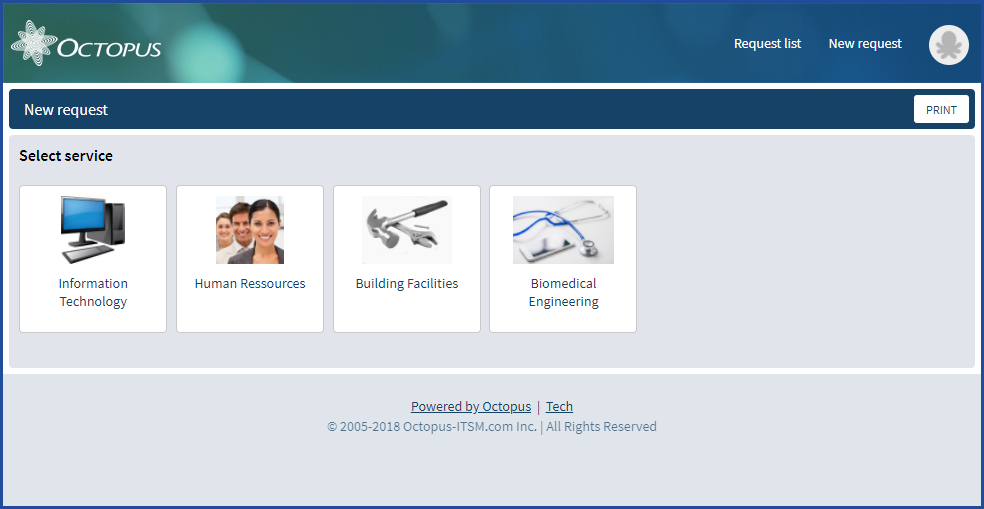
Results with the modern mode activated.
Thank you, your message has been sent.