Table of contents
Related Articles
- Service Asset and Configuration Management - Octopus Module
- DataImporter - Import attributes for CI types
- Value Lists
Introduction
The information contained in a CI record is very important for the Configuration Management and to control the inventory of a business.
In Octopus each CI type allows adding attributes that represent additional information important to manage this type of equipment.
In this article, we will explain in detail how attributes work and what their possibilities.
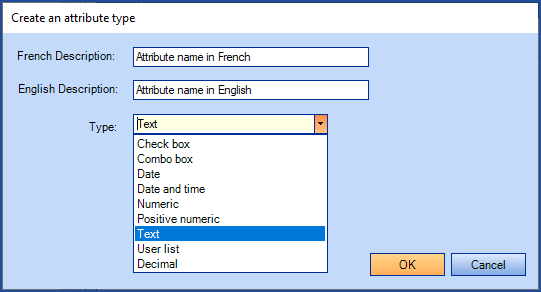
Types of CI Attributes
There are different types of attributes to control the data entered:
|
Check box
|
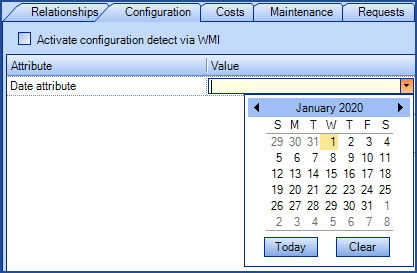
Date
|
|
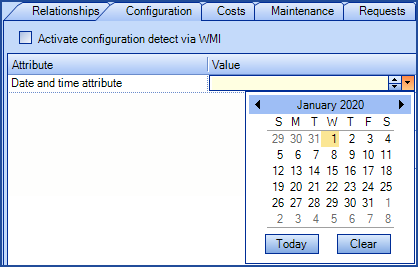
Date and time
|
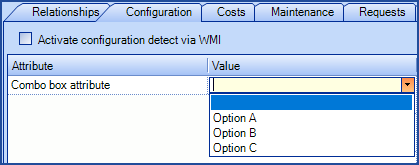
Combo box
|
|
Numeric
|
Positive numeric
|
|
Text
|
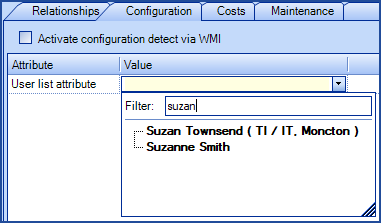
User list
|
|
Decimal
|
|
Configuration
You need the permission to administer Octopus to access the attribute configuration from the Tools > Reference data management > CI > Types menu.
If there are already some CIs with attributes in use, it is important to go through the data already in place before making any changes.
WMI Attributes
WMIUpdater is the tool that synchronizes the Windows computers to Octopus to extract the information related to the workstations, laptops and servers.
Because the WMI attributes are required by the system their type cannot be changed.
The WMI attributes are:
- Display adapter
- Hard drive capacity
- IP address
- MAC address
- Network adapter
- Network adapter speed
- Operating system
- Processor type
- RAM
* Note: When a CI is duplicated, the attributes that are used by WMI are never duplicated.
New Attributes
For a new implementation of Octopus or to create new attributes, follow the following steps:
- Tools > Reference data management > CI > Types.
- Choose the CI type.
- Go to the Attributes tab.
- Click the Create button.
- Add the description in both languages.
- In a unilingual context, you can copy / paste the same value in both places.
- Select the type.
- The default type is Text.
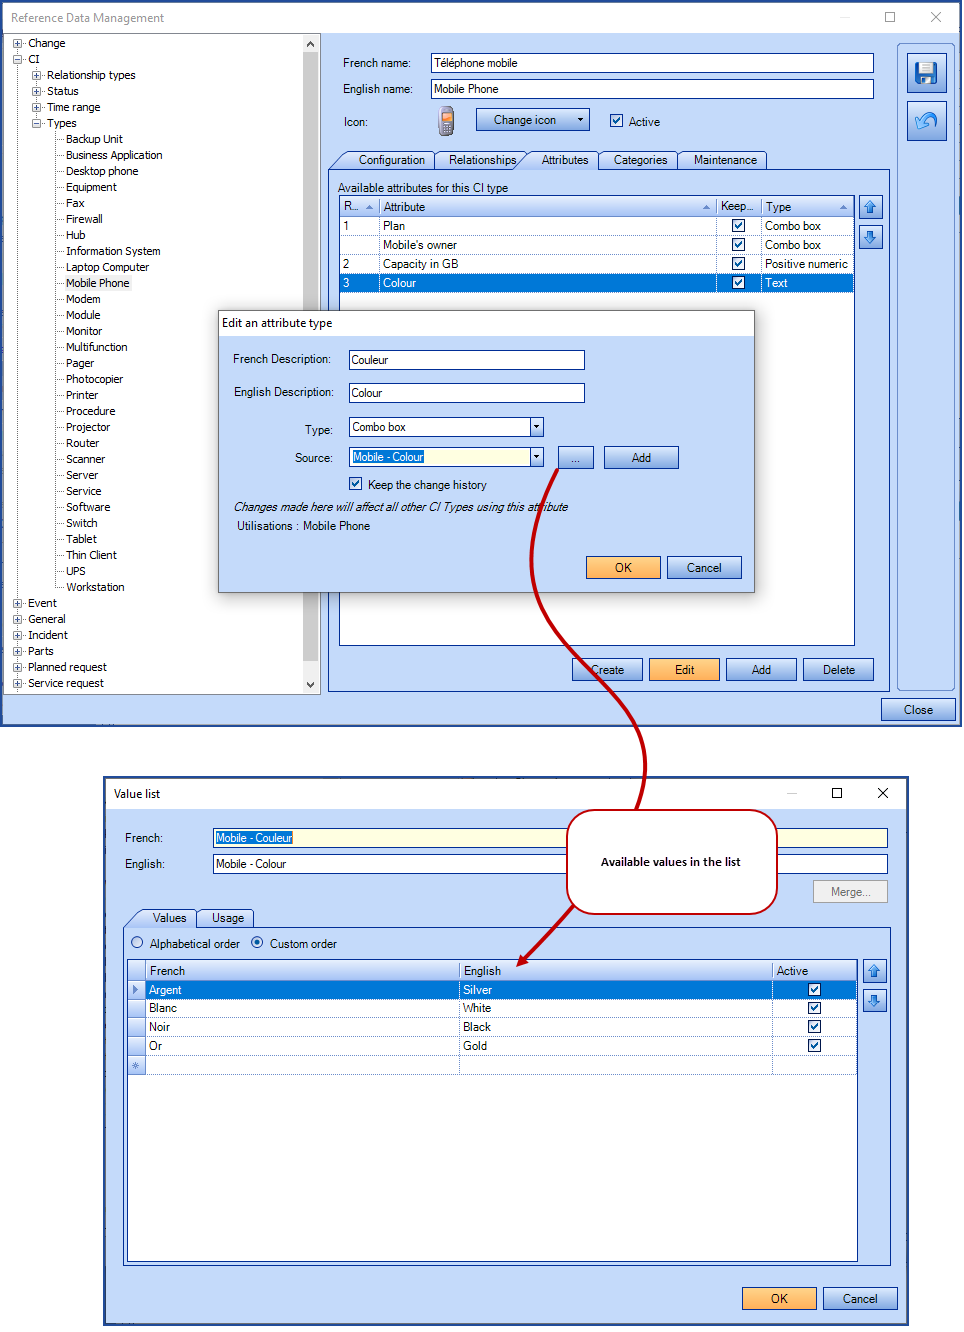
- For a Combo box type, chose or create the list.
- The choices presented in the Source field come from the CI Attribute or All categories of the value lists.
- Validate if Octopus should Keep the change history.
- Activated by default, the modifications made in a CI for this attribute will be visible in the CI's history.
- Typically this option is unchecked for very volatile attributes where there is no value to know by whom and when the modification was made.
- Finish the attribute creation with OK.

Modifying an Existing Attribute
 The modification of CI attributes must be done in parallel with a validation process of the information already entered in the CI attributes.
You must be vigilant because the modification of a type made without first checking the incompatible data with the new type could result in the permanent loss of some data.
Rank Modification
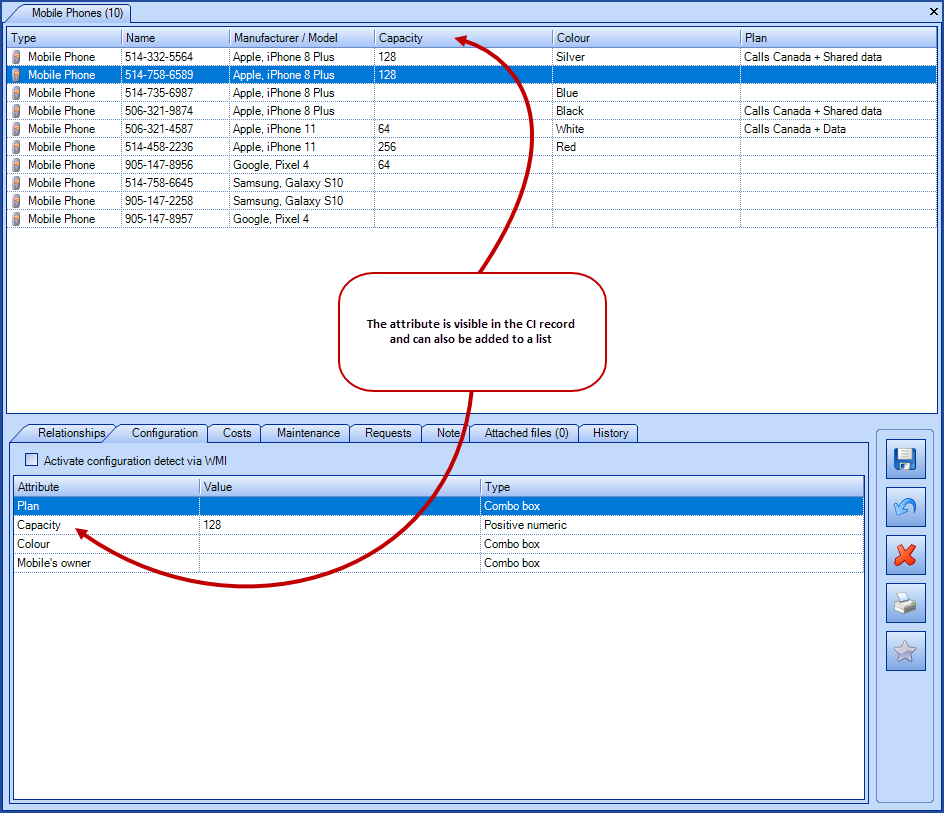
By default, the attributes are displayed in alphabetical order in the Configuration tab of the CI record.
It is possible to modify the order in which they appear when configuring the attributes of the CI type.

Name Modification
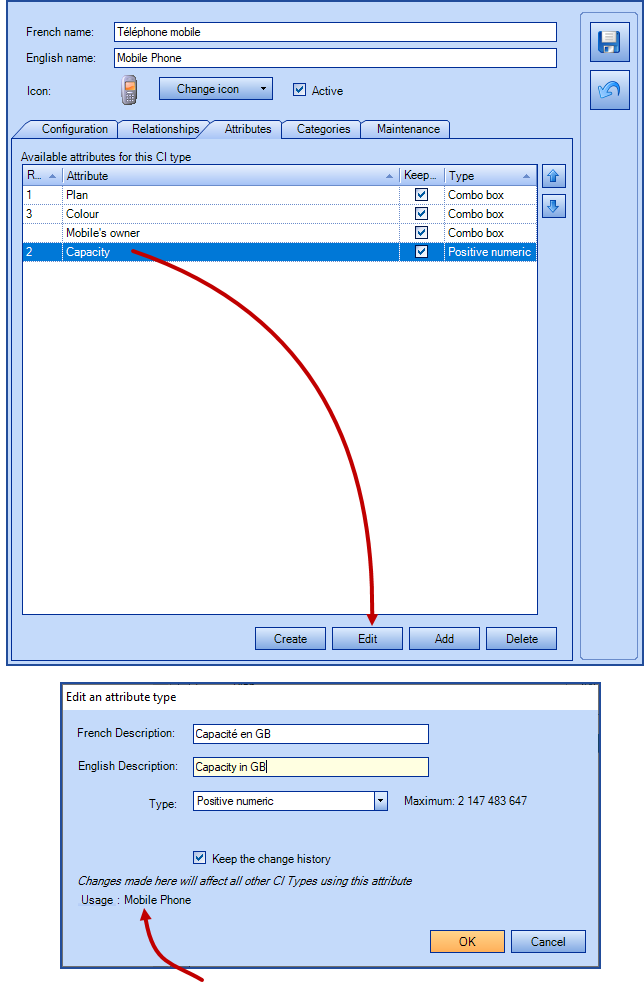
It is possible to modify the name of an attribute from the configuration of the CI type where it is located with the following steps:
- From the Attributes tab for the CI type that uses the attribute.
- Select the attribute and click on Edit.
- Check the Usage below the window to find out if more then one CI uses this attribute.
-
Modify the name.
-
Save with OK.
-
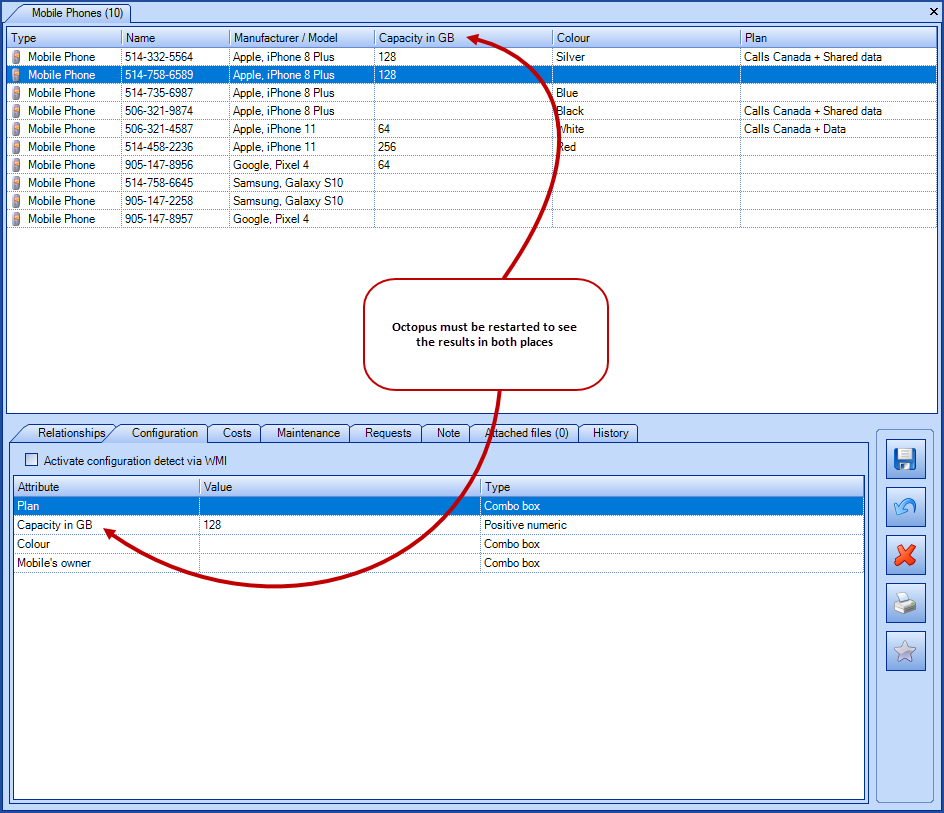
Note that Octopus must be restarted before the results are visible everywhere.
-
Type Modification
It is possible to take an attribute that already exists and change its type. Typically, we will take a text type attribute to change it to one of the other types.
If the attribute was already in use in one or more CIs, it's important to check the values that are in the CI attributes. Since a text type attribute allows to enter numbers as much as text, there is a risk of incompatible data with the new type.
The best strategy is to clean up the data before proceeding.
However if the attribute already exists in the CIs, but has never been filled, there will be no incompatible data and you can proceed with the change.
Follow these steps to modify the attribute type:
- Tools > Reference data management > CI > Types.
- Select the CI.
- Go to the Attributes tab.
- Select the attribute and click Edit.
- Check the Usage below the window to find out if more then one CI uses this attribute.
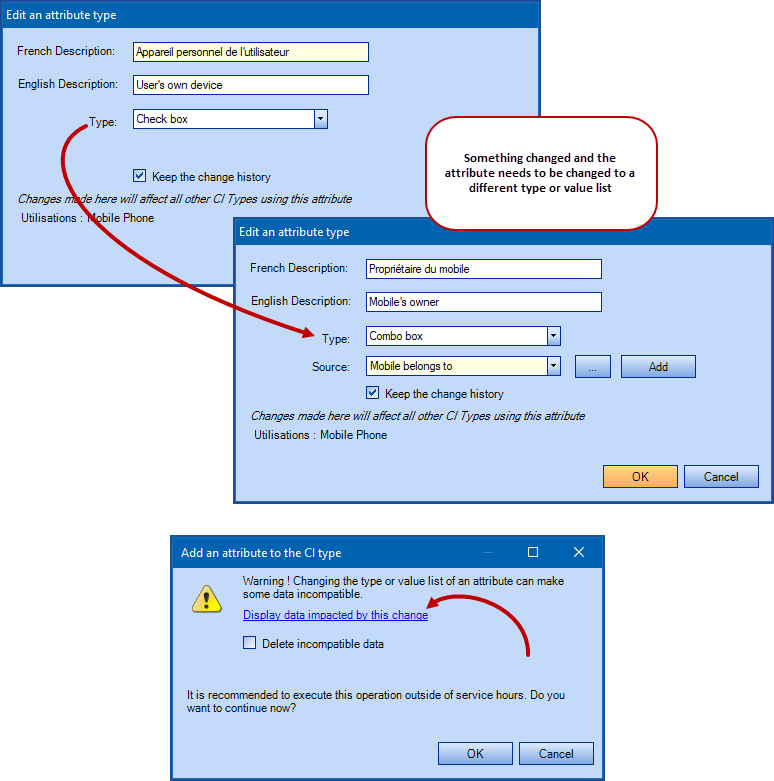
- Select the new attribute type.
- Confirm the selection with OK.
- The Type change window opens.
- This window is important as it allows to validate the elements that will be compatible but especially incompatible with the requested modification before the end of the process.
- It is therefore still possible to cancel the modification before it takes effect.
- The Display data impacted by this change link opens an Excel file with the information on what will be affected by the type modification.
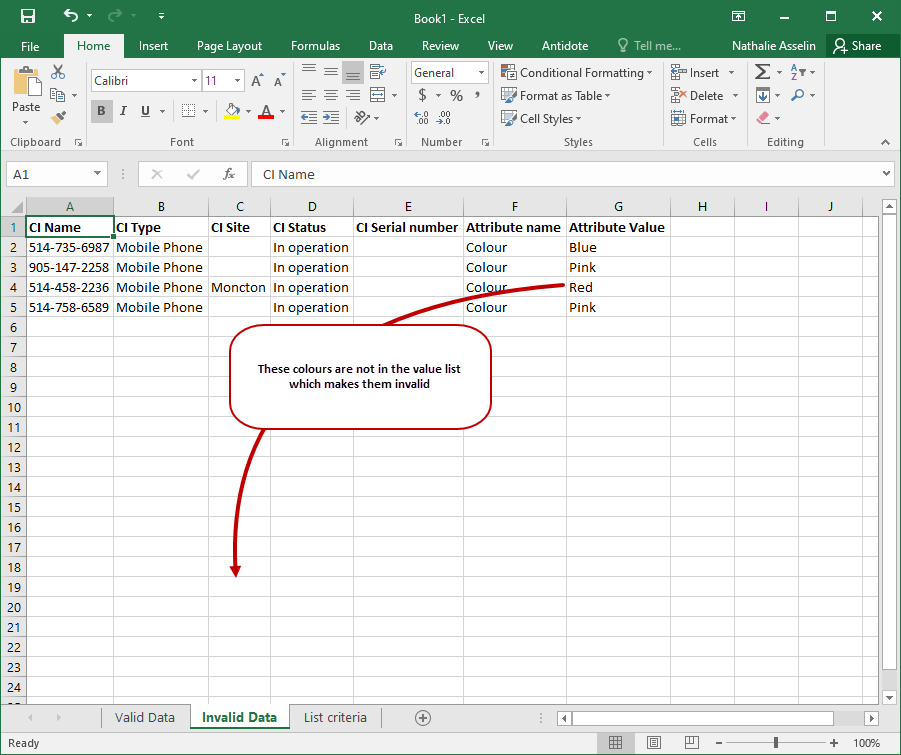
- The file opens in the Invalid Data tab, which allows you to see at once all the CIs whose data contained in the attribute does not fit with the new type.
- At this stage there are three possible choices to proceed:
- Save the Excel file and click on Cancel to clean up the data before redoing the conversion. This is the choice that we recommend.
- Save the Excel file and proceed with the conversion using the Delete incompatible data check box. The data will then be emptied of their value.
- Save the Excel file and proceed with the conversion without proceeding to Delete incompatible data. The data will remain in the individual CI records and can subsequently be modified for data that corresponds to the type.
- Click OK to finish the attribute conversion process.
 See a video example (with music)
The Importance of the Excel File
The Excel file serves as a safety net before completing the type conversion. It allows you to anticipate the results to help decide whether to go ahead with the conversion or if you cancel to go and correct the data before the conversion.
The file has three tabs:
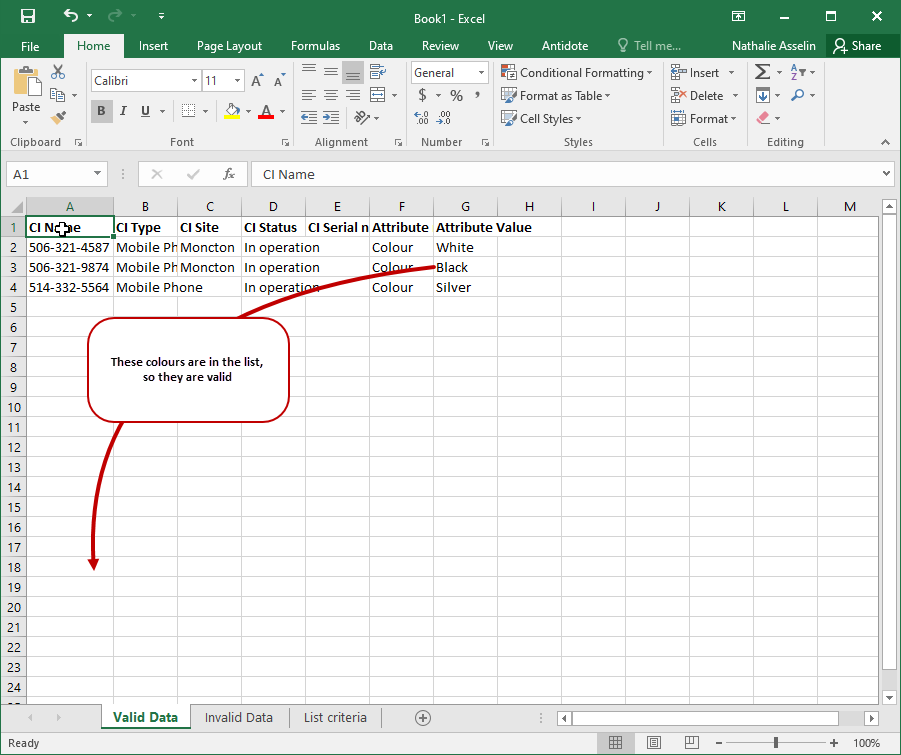
- Valid Data.
- Shows the CIs that will be compatible with the attribute type change.
- There is nothing to do with this data, everything will be fine.
- Invalid Data
- The Excel file opens in this tab by default.
- Shows CIs whose attribute data are not compatible with the new type.
- These CI attributes need to be modified before the conversion is finished if you want the data to be compatible.
- The system warns that if the conversion is carried out without modifying this data, it will from now on be incompatible and will be ignored by Octopus.
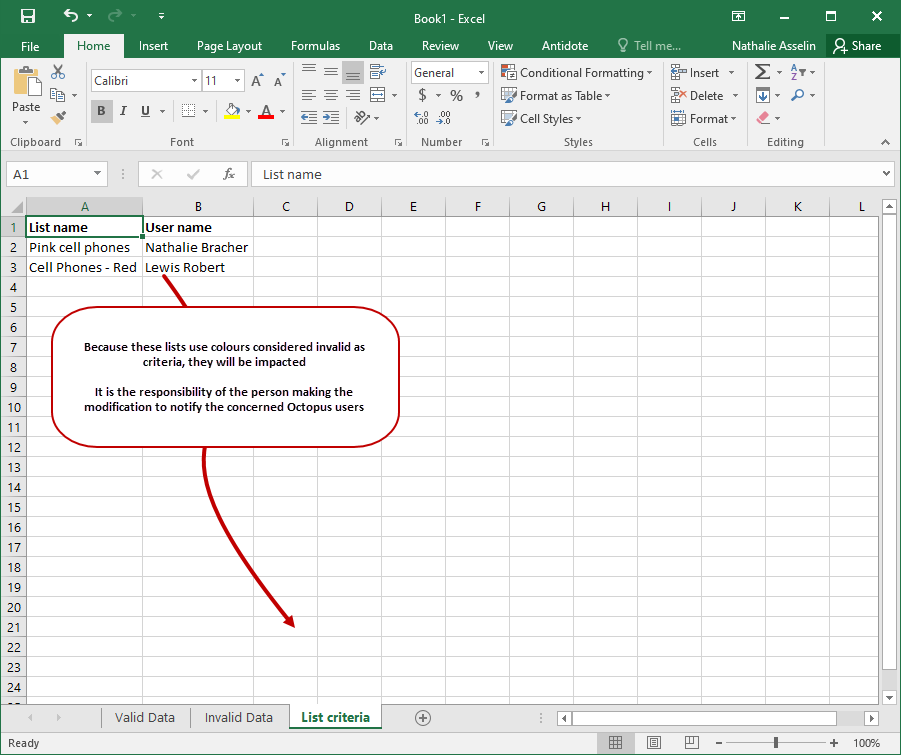
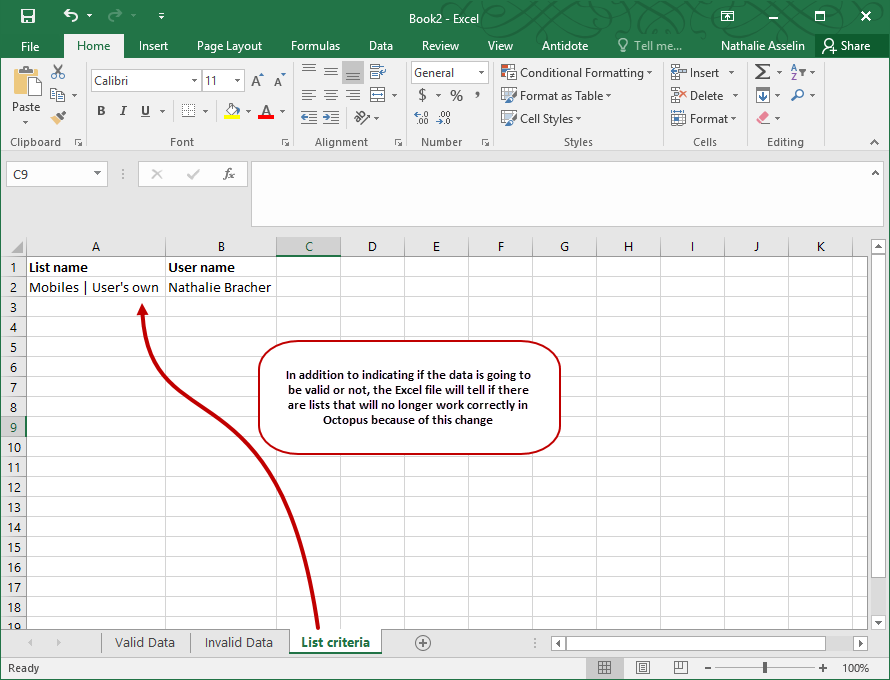
- List criteria.
- In this tab we find the lists for which one or more criteria will no longer be valid if we proceed with the conversion.
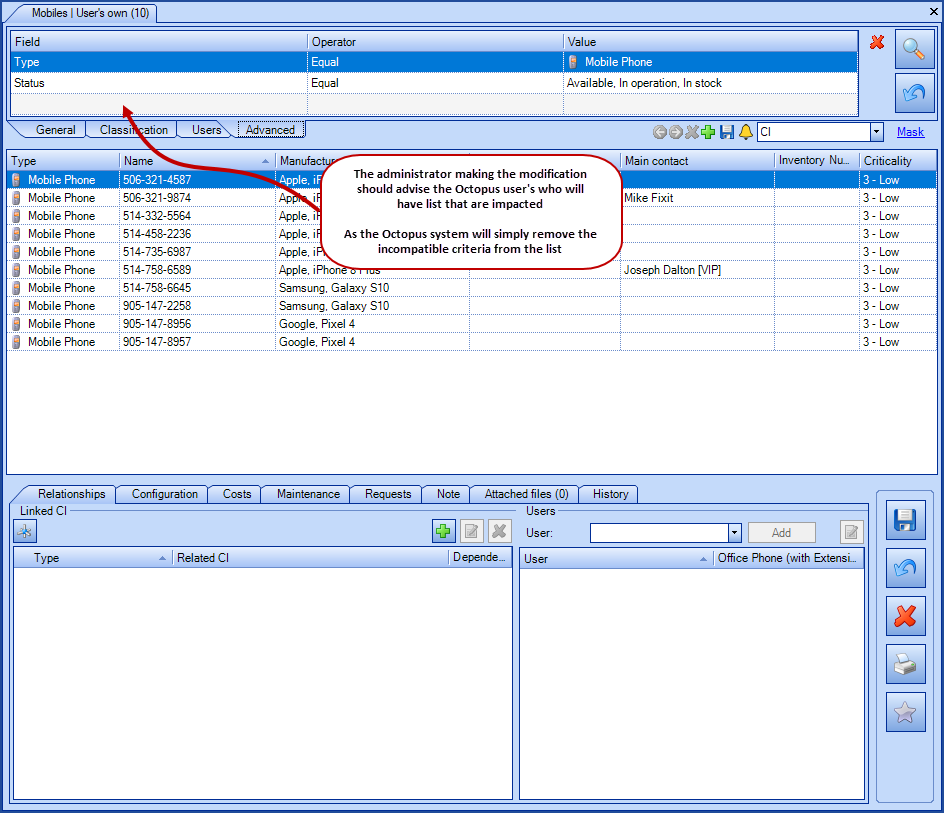
- If we proceed with the conversion, Octopus will delete the invalid criteria from these lists, because if they remain in place, the application will block.
- It is therefore important that the administrator making this change communicate with the people whose lists are affected to warn them to review their criteria for these lists.
When converting an attribute type, Octopus will try to integrate the data already there to add it in the new format.
The system will therefore try to recognize the dates, numbers and values contained in a list. But the data must correspond to the format to be compatible.
For example, the date format will not work if we have June 2019. We must find the year, month and day in the format YYYY-MM-DD.
History Choice Modification
By default, any modification to an attribute by an Octopus user or an automated system, such as WMIUpdater or DataImporter, is recorded in the CI history. Because the Keep the change history option is checked by default.
But if it is not selected then the value of the CI attribute will be the last value entered, but no history entry will be added during the modification.
Typically we deactivate this option for very volatile fields where there is no value as to know who and when the modification was made.
Delete an Attribute
Deleting an attribute does not destroy the attribute as such. Because an attribute can be linked to more than one CI type, it only removes the link and all the data contained in this attribute for the selected CI type.
But the attribute still exists in the list and can be added to other CI types.

When an attribute of a CI type is deleted, the values that were contained in this attribute are deleted.
If the deletion was made by mistake, even if the attribute is added back to the CI type, the values will remain empty and will need to be re-entered.
Usage
The CI attributes are used to gather specific information for an equipment type for which there is not already a field in the Octopus record.
The relevance of the data contained in the CIs is important because it is used by the Octopus users to manage the equipment.
Columns in the CI Record for Attributes
By default the columns visible in the Configuration tab of the CI are Attribute and Value.
But there are others to help manage the data contained in the attributes:
- Type
- Indicates the attribute type to know how to fill in the information.
- Incompatible
- Indicates if the value contained in the attribute is compatible with its type.
- Incompatible data value that was already in place during the conversion of the attribute and which was not deleted during the conversion.

Capture the Information in an Attribute
Once you add an attribute to a CI type, you can enter the information for this attribute in different ways:
- With WMIUpdater
- For WMI attributes only.
- Will get the information for computers, laptops and servers.
- With DataImporter
- To create or update CIs in batch.
- The format of the imported data must match the attribute type.
- Manually
-
The format of the attribute type must be respected.
-
In some cases, for example with a numeric field, you will not be able to enter letters. In other cases, as for a date, if text is entered, the value of the field will be emptied.
-
 See a video example (with music)
Incompatible Data
An attribute data can become incompatible under the following conditions:
- We convert an attribute type to another.
- For example, from text to combo box.
- The data was already in the attribute when the conversion took place.
- The data is not compatible with the new attribute type.
- In our example, the data in the field is not part of the value list.
- The Delete incompatible data option was not used upon conversion.
Once an attribute is considered incompatible by the system, it will continue to be visible in the CI, but completely ignored by the system. So, if for example we had a value which was not in the list during the conversion and which is added after, the incompatible attribute will not take the new value from the list.
Data considered incompatible must be updated manually or with DataImporter to become compatible again.
It's the reason why we advise to clean up the data and prepare the lists before converting the attribute types.
 See a video example (with music)
Incompatible Data that Can Affect a Custom List
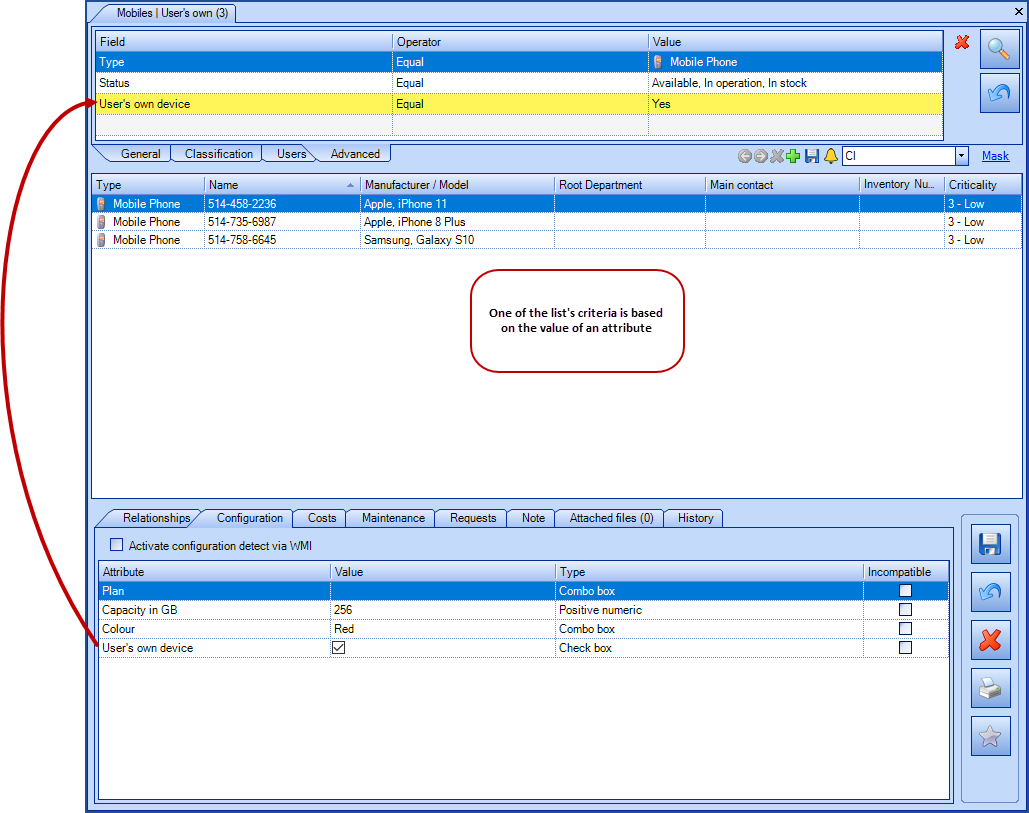
Custom lists in Octopus are very popular and it is possible to use attributes or even an attribute value as criteria for a list.
But if an attribute is modified to the point that a custom list criterion is no longer compatible, the criterion will simply be removed from the Octopus list to avoid a system error.
It is therefore important that the administrator making the change looks in the Excel file if one or more lists will be affected by the change and communicates the information appropriately.
Thank you, your message has been sent.


