Table of contents
Related article
Introduction
In the past, the access level of an Octopus user was determined by the selection of permissions from a list of all the permissions available. The modification of the permissions had to be done manually for each Octopus user. The notion of roles that will facilitate and improve the access management of Octopus and ensure the security level. Each role contains its own permissions and the Octopus users have one or more roles that automatically inherit the sum of the permissions from each role.
Overview
The license type determines the permissions that will be available at the creation of a role. It is possible to define more then one role with a same license. Each role can have different permissions.
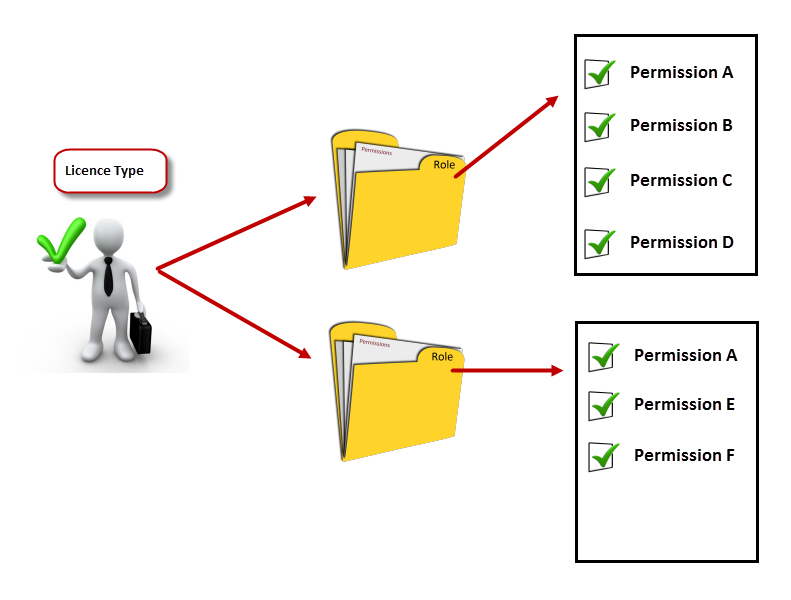
A user can only have one license type, but he can be associated to multiple roles. The permissions of a user are cumulative or add up with the addition of roles.
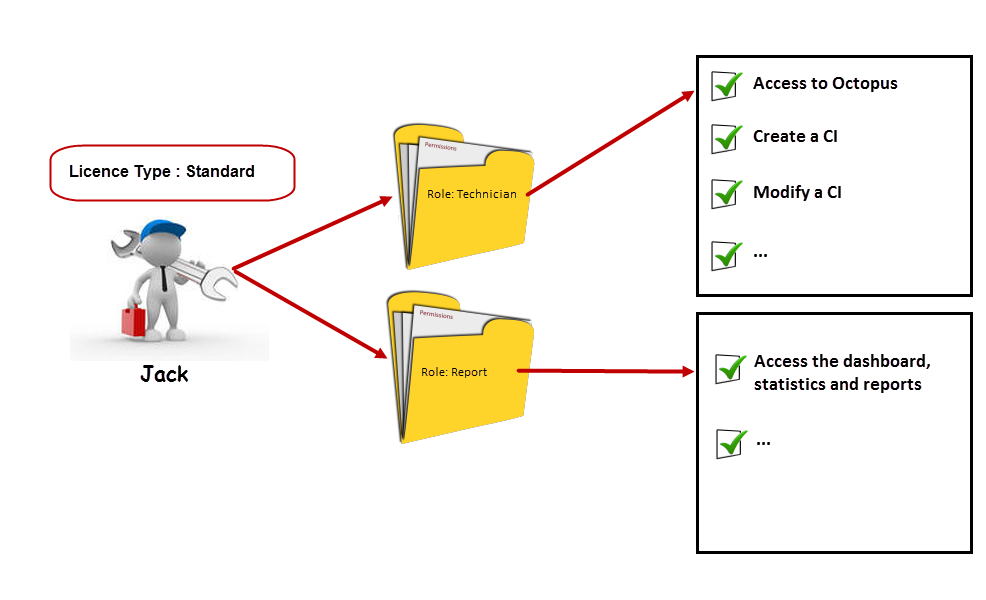
Here is an example: all the technicians have the Technician role, that has predefined permissions. Jack is a technician, but he must also have access to the Statistics module to produce operational reports. This permission is not part of the ones in the Technician role, but it exist in another role: Report. By giving Jack the Report role, he inherits the permissions from both roles.
Role Establishment
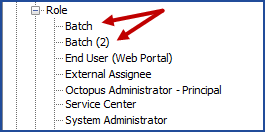
The Role Management is done from Tools > Reference data management > General > Role.
- Administer Octopus
- Modify a user
- Create and modify an Octopus user
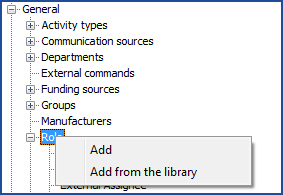
There are 2 ways to add a role: right click the Role node and select Add or Add from the library.
Add a role
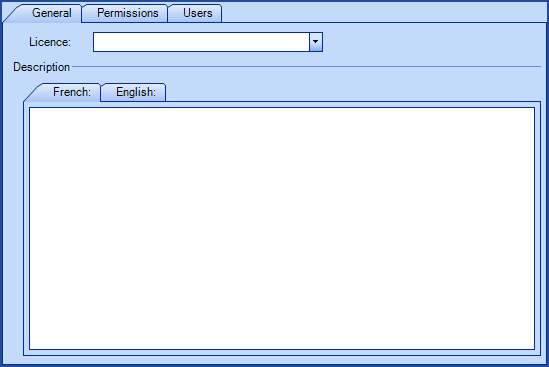
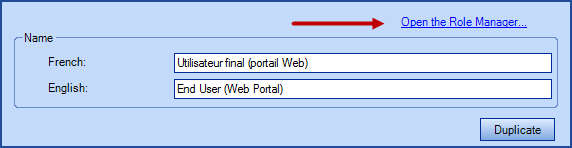
The add option opens the following window, where you find 3 tabs: General, Permissions and Users.
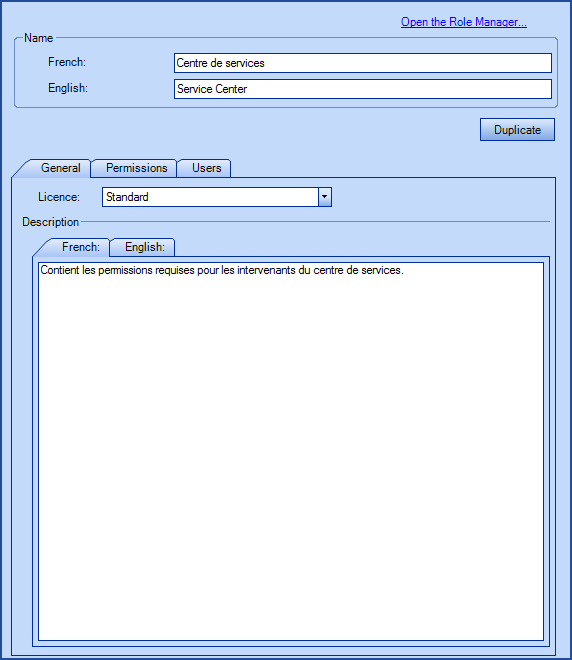
- Role name (French and English)
- The duplicate button....facilitates the creation of a new role from an existing role. What remains is to apply the modifications to the new role (name, license, permissions, etc.)
- Open the Role Manager link, opens the Role Manager (see the Role Manager section for more details),
General Tab
This tab is mainly use to attribute a license to the role.
- License: The license type determines the Octopus user type, based on:
- Batch: Use to execute recurring tasks such as ADSIReader. This license is free, this account cannot connect directly to Octopus
-
End User (Web Portal): allows users to connect to the Web Portal
- External Assignee: used for an assignee who is not part of the main team, allows to complete tasks from the Web Portal
-
Tradesman (Building facilities): reserved to the facilities teams who's workers only use Web Tech
- Standard: used for Octopus users, this gives full access to the application
- Description: Description (French and English) of the role
Permissions tab
This tab shows the permissions that can be granted according to the type of license selected in the General tab.
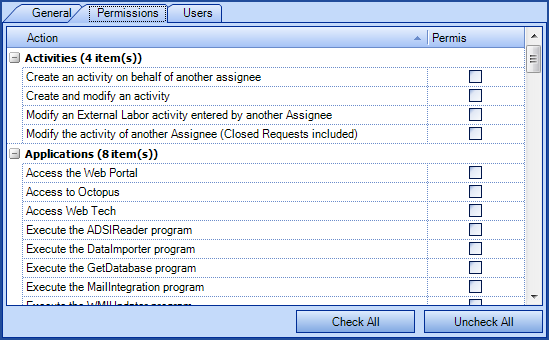
- Check the permissions granted for this role
The Check All and Uncheck All buttons add convenience to the selection of permissions.
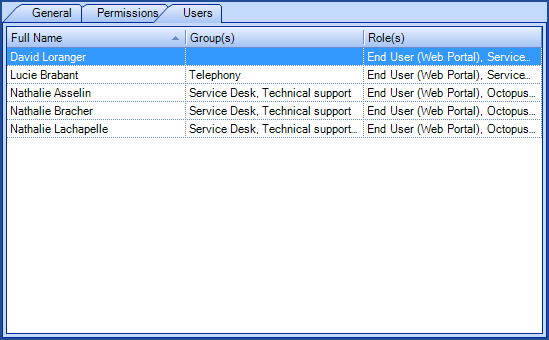
User tab
The User tab shows the list of the user who have this role.
Add from the library
To make Role Management more user friendly, you can use the roles we have created in the library to inspire the news ones you want to create. We granted the permissions efficiently according to our experience, but from one organization to the next, there can be variations. To add a role from the library:
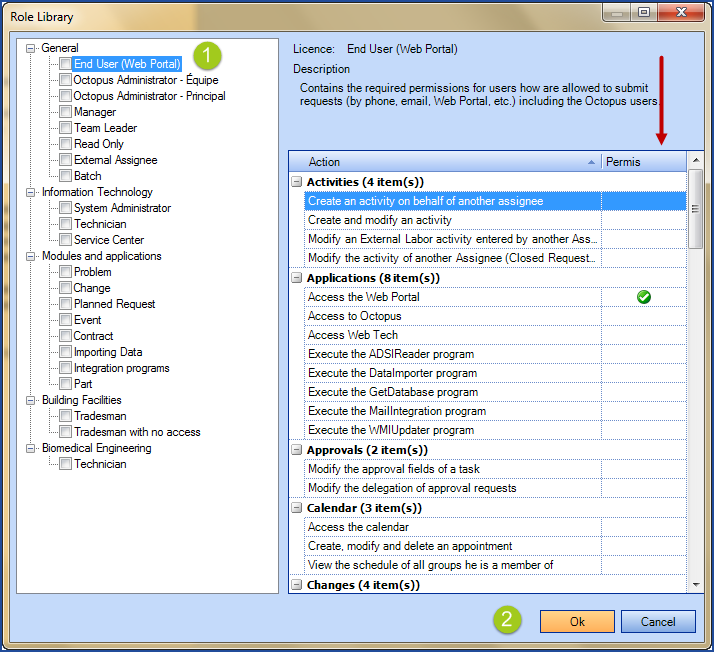
- Select the required role by checking it in the section from the left. The permissions associated to the role will appear in the section on the right
- Click the OK button
Later it is possible to add modifications to the role if you want it.
You will notice that we have created intuitive groupings such as Building Facilities, Information Technology, Biomedical Engineering...
If you select a role that already exist the system will create a duplicate
How to add a role to the library and why do it?
This option is only useful in a context where Octopus is used by multiple teams and there is a need.
But since more and more environments have more than 3 teams, often managed by IT, it is good to be able to reuse a role without having to recreate it in each team.
For example, Octopus users may need the same access in multiple teams. You can create a role from a team, give it a meaningful name and send it to the library. It will then be available at all times for all existing and future teams.
Many companies using the Web Portal that have generic accounts in Octopus will want to either give minimal permissions to these accounts or no access at all to the Web Portal. Creating a role for generic accounts allows you to manage permissions for these accounts in each team.
The creation is very simple:
- Create the role in a team
- Right click on the role
- Choose Send to library
Once available in the library, this role can be used like any other.

Role Manager
The Role Manager allows to see and modify all the roles and for each role, all its permissions
Access the Role Management
The link to access the Role Management is available from within a role.

- Field that allows to filter the list of permissions available in Octopus
- List of available permissions in Octopus
- Role defined in Octopus
- Permissions of the role
- Add a role; allows to add a role from the manager
- Export the list of the roles and permissions to Excel; allows to send all the roles present to Excel to facilitate reading of roles with respect to their permissions. It can also be used to keep a history of the changes applied to the different roles.
Modify roles from within the user's file
From within the user module you can modify the roles for one of more Octopus user at a time.
- Modify a user
- Create and modify an Octopus user
Modify one Octopus user at a time
To change the roles of only one Octopus user:
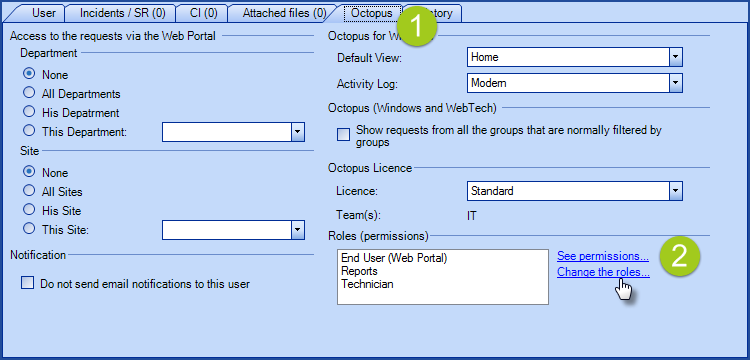
- Access the Octopus tab from the user's file
- Click the Change the roles button
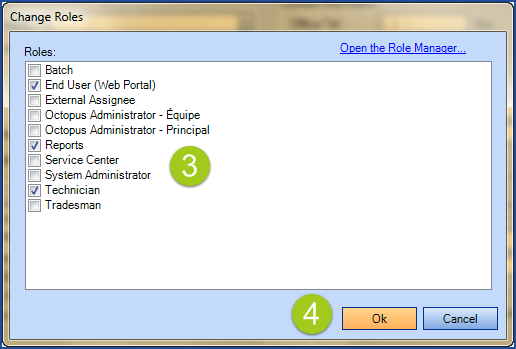
- Select or deselect the roles
- Confirm with OK
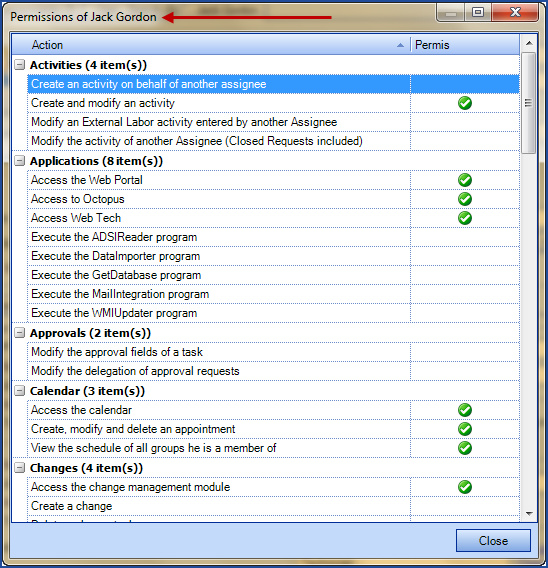
To see the complete list of an Octopus user's permissions, click the See permissions link from within the user's file.
Modify multiple Octopus users at once
If you need to add a new role to many users at once, you can do it form the User module.
-
Select the users from a list. You can use the Shift or Ctrl keys to help
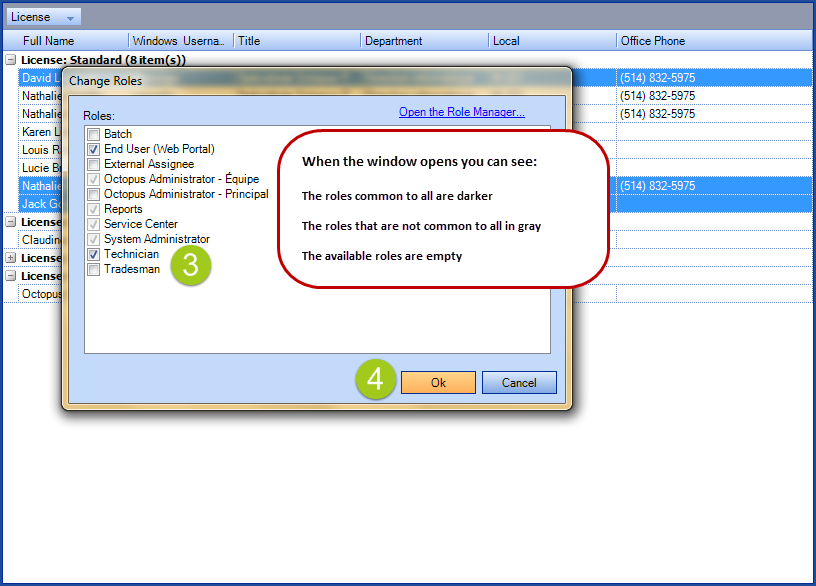
- Click on Change roles from the action menu on the left of the screen. When the window opens you can see:
- In dark, the roles common to all - that could be removed
- In gray, the roles that some have, but that are not common to all
- Empty, the available roles
- Select or deselect the roles
- Confirm with OK

Permissions
 Download the following document to see the list of Octopus permissions, a brief description and a template to assist in the preparation of roles:
When an Octopus user does not have the permission Consult data of all sites from the Users section. He will be able to see all the data of the sites to which he belongs, starting from his root site.
Example:
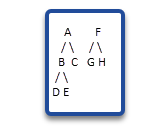
The Octopus user belongs to B site.
Without the permission, he will see all the data of the following sites :
- A
- B
- C
- D
- E
Customize permissions for a CI type
To allow the modification of certain types of CI, while protecting the data of other types, it is possible to make specific CI types read-only.
This is done through custom permissions set in relation to the types of CI to restrict.
Here are the steps to make a CI type read-only:
Creation of custom permission
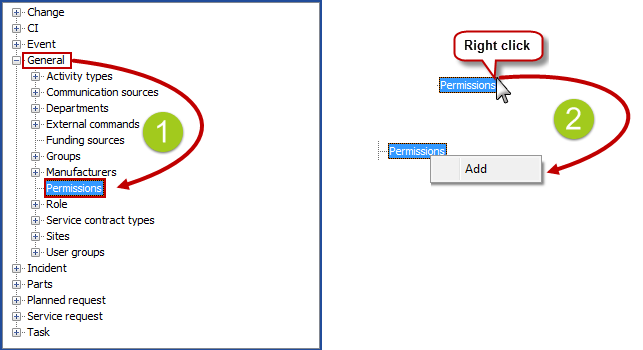
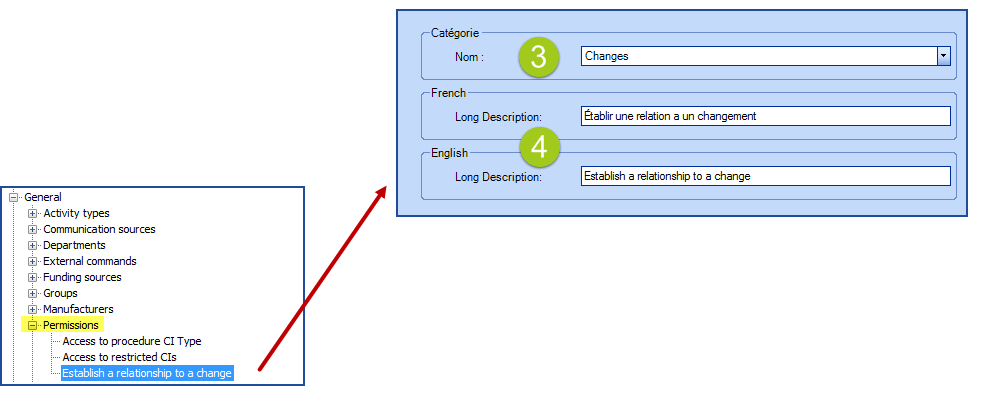
- From Reference data management, go to General > Permissions
- To create a new permission, right click on Permissions and then on Add
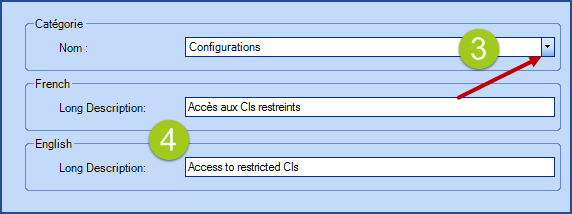
- As this permission will be in the list of all Octopus permissions, choose under what category it will be classified
- Enter a permission name in French and English long description fields
Restriction of CI type
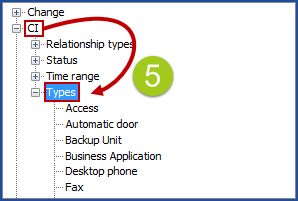
- From Reference data management, go to CI > Types
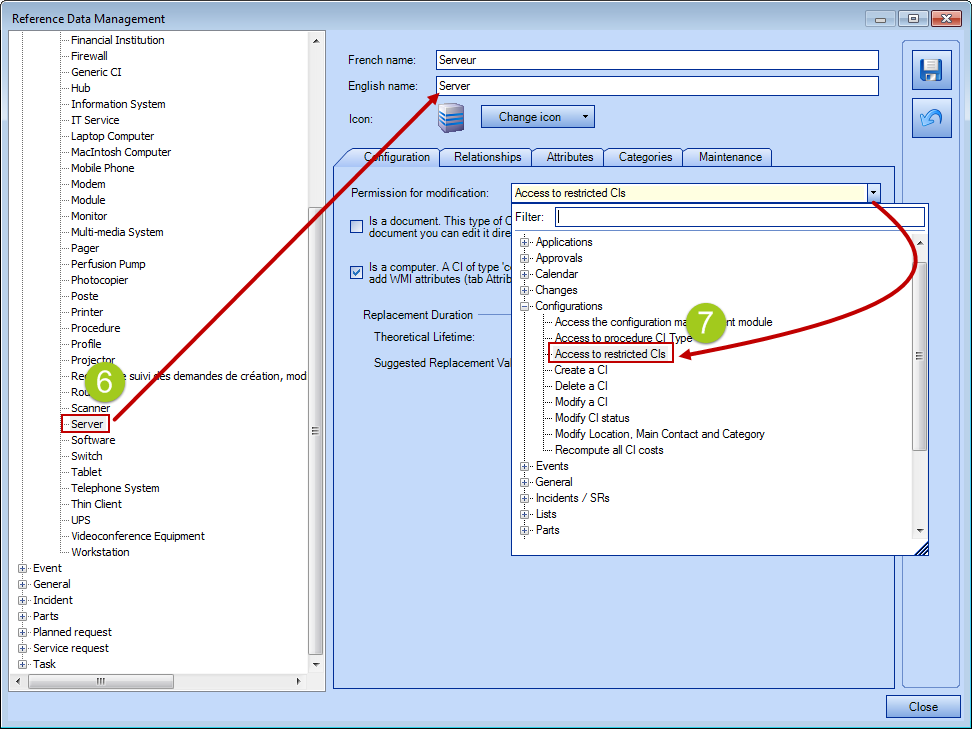
- Choose the CI type to be restricted
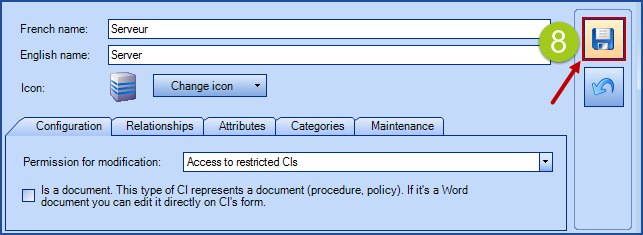
- In the field Permission formodification, select the custom permission previously created
- Save (if more than one CI must be restricted, repeat the previous steps)
Manage the new permission in roles
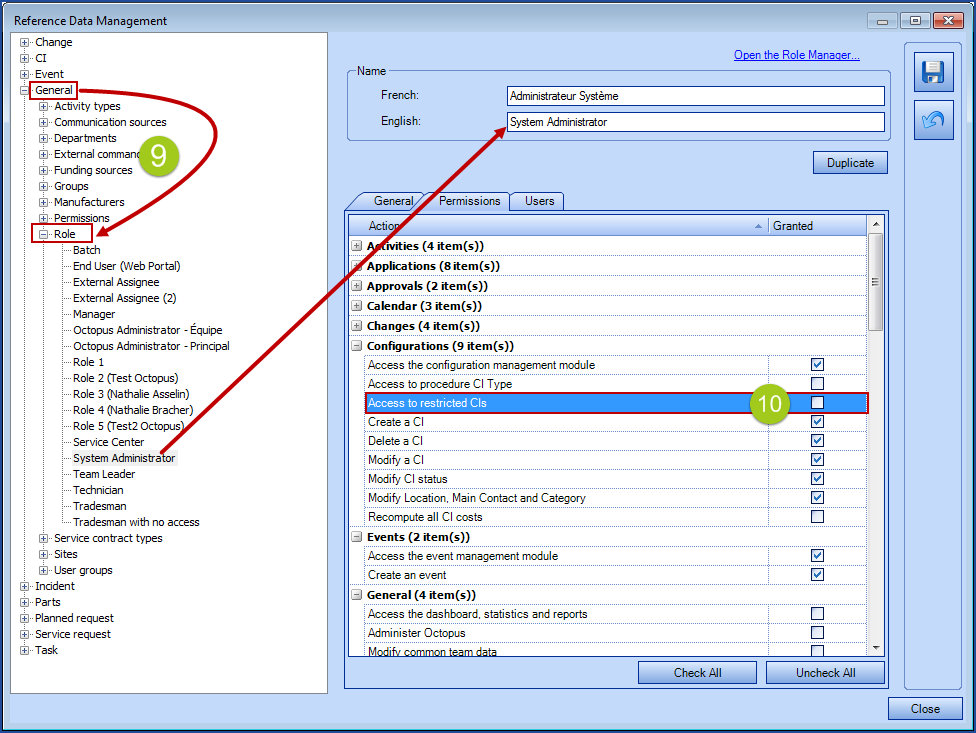
- From Reference data management, go to General > Roles
- Add the custom permission previously created to one or many roles that will be assigned to Octopus users
Customizing the required permissions to add or remove a request relationship
It is possible de create relationships between different request types in Octopus; by default, request relationship establisment is not restricted. You may want to allow specific Octopus user to make a relationship between one or many incidents and a change, by example. This is done with a custom permission associated to the relationship type to be restricted.
Follow the steps below to restrict the use of a relationship:
Creation of custom permission
- From Reference data management, go to General > Permissions
- To create a new permission, right click on Permissions and then on Add
- As this permission will be in the list of all Octopus permissions, choose under what category it will be classified
- nter a permission name in French and English long description fields
Restriction of one or several relationship types
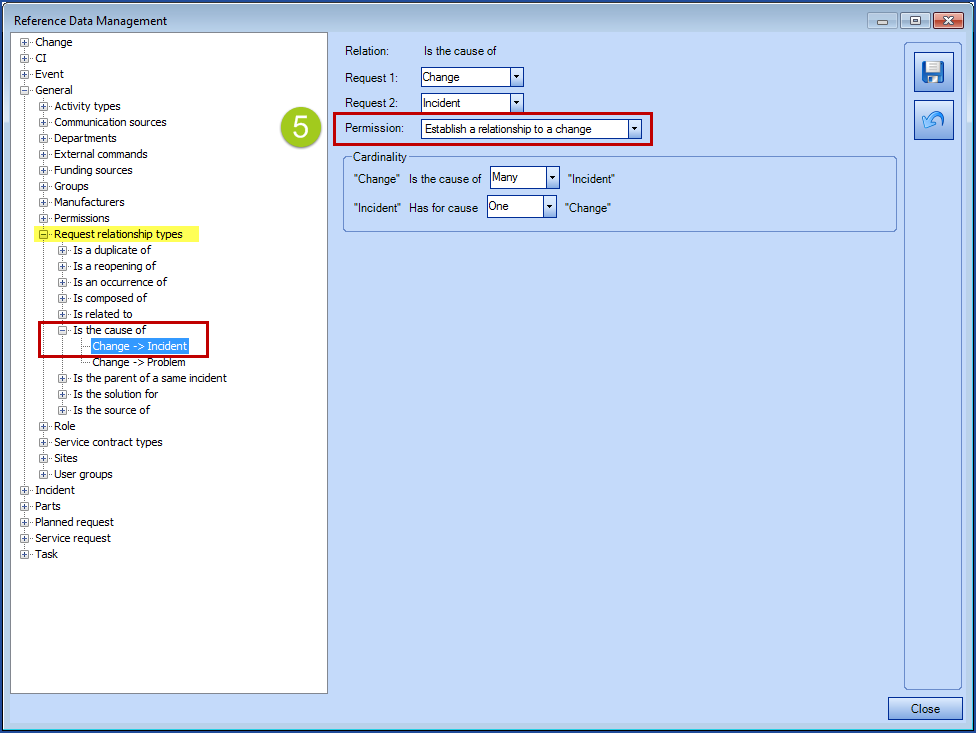
- From Reference data management, go to General > Request Relationship Types
- Open the relationship type and choose the request types to restrict
- In Permission field, select the custom permission previously created
- Save (if you need to restrict more than one relationship, repeat the previous steps)
Manage the new permission in roles
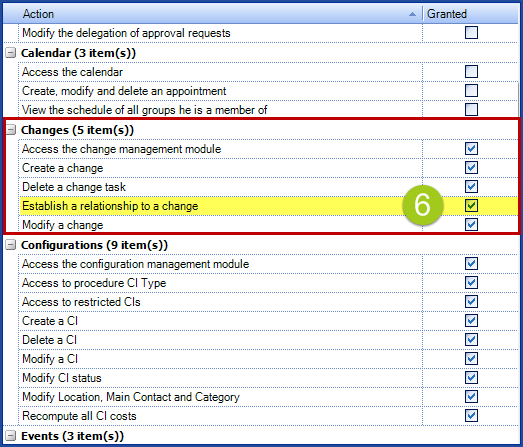
- From Reference data management, go to General > Roles
- Add the custom permission previously created to one or many roles that will be assigned to Octopus users
Thank you, your message has been sent.