Table of contents
Introduction
This article will enable you to create a list linked to a parent list. This linked list, which could also be called a secondary list, displays choices specific to the selection made in the parent list.
Configuration
Before configuring linked lists, please note that drop-down lists must first be created in the field library.
Step 1: Link the lists to a parent list
- Link lists to a parent list by going to the Value list
- Click on Tools menu, Data reference management > General > Value lists > Form
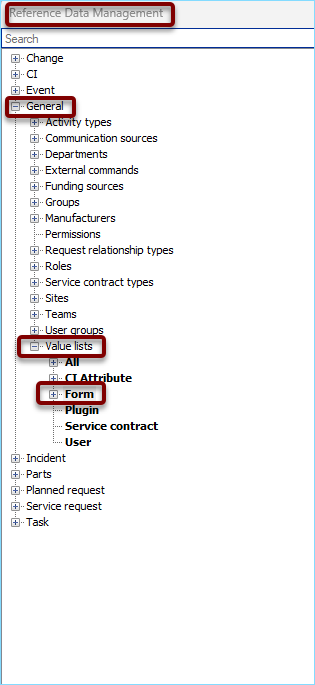
Lists of values are mainly used in forms for fields of type Drop-down list or Radio buttons, and in CI attributes with type Drop-down list. To find out more about value lists, how to create and use them, please consult the following article: Values lists
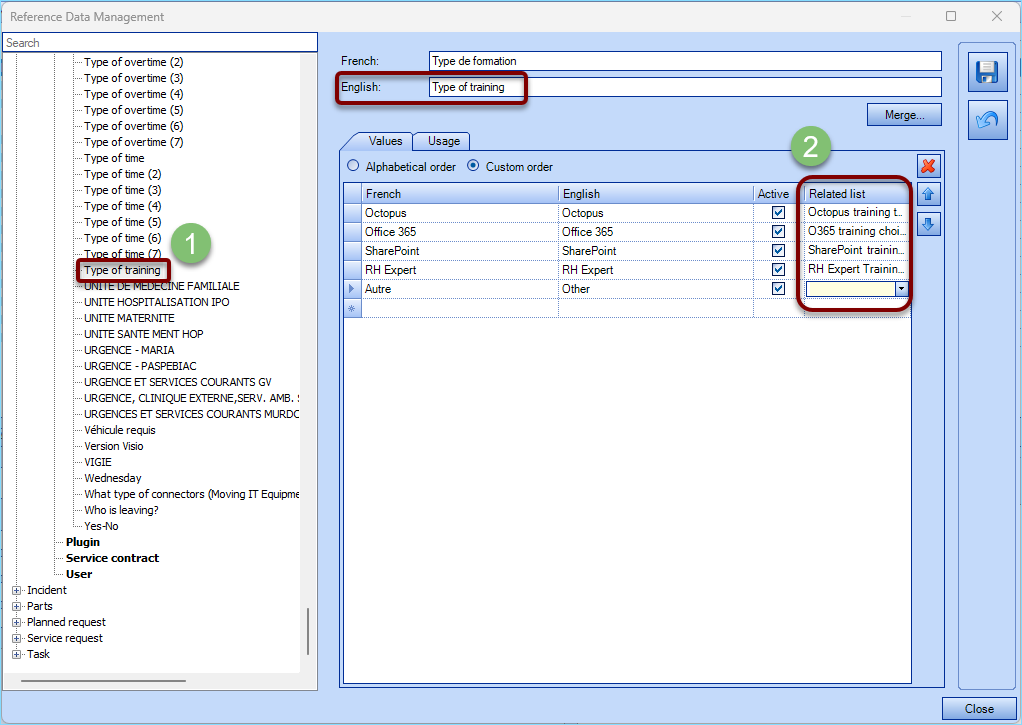
- Select the list you want to be the parent list (1), i.e. the one for which the customer will make his 1st selection
- In the window that appears, select for each choice, or those desired only, the related list in the column on the far right (2)
Step 2: Create à related combo box field
- Tools" menu, Reference data management
- Select the type of service request (form) where you wish to insert a linked list or create a new form
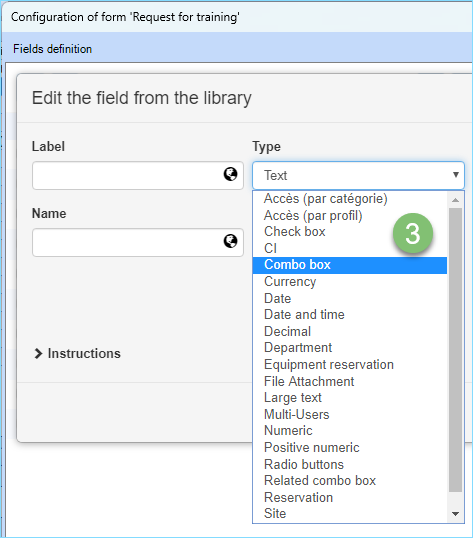
- In the form, create a new Related combo box field (steps 1,2,3)
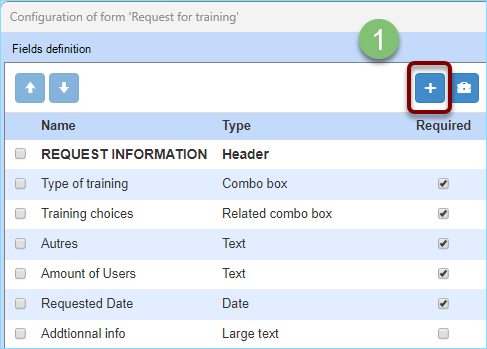
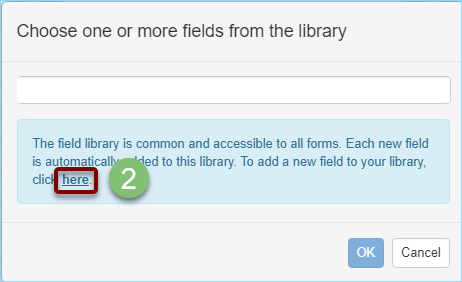
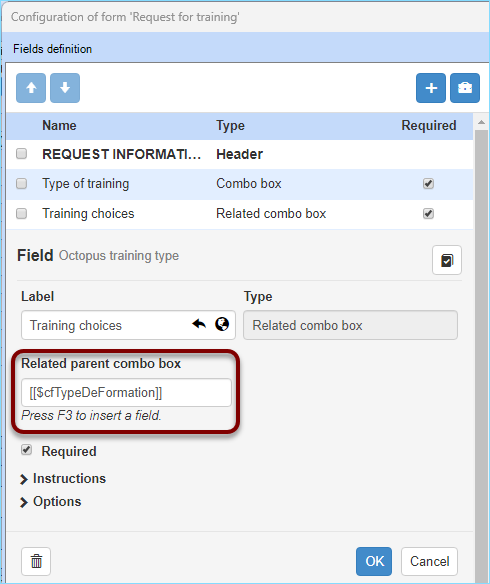
- Once the field has been created, use the F3 function to select the parent list, i.e. the list in which you have associated the related lists (see points 3 and 4).
- This allows you to display in a secondary field (related list) other choices specific to the selection in the parent list. Here are a few examples :


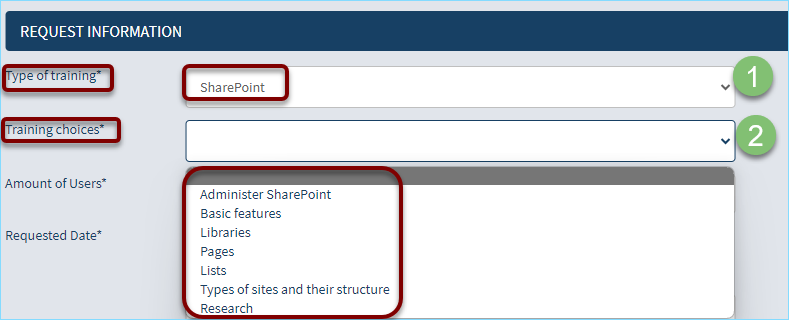
NOTE: There are no constraints on the number of times the "Linked list" field can be used in a form. It is possible to multiply the levels of a single parent list, or to create others within the same request form.
Thank you, your message has been sent.
