Table of contents
Related Articles
Introduction
The objective of this wiki is to provide information on managing service and lease contracts in Octopus.
This results in a better control over costs and renewals, as well as a for follow-up of equipment covered by valid service contracts. It allows to see if a CI related to a request is covered by a valid service contract.
General Concepts
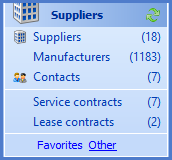
Service and lease contracts are available from the File > Supplier management menu.
From the lists, it is possible to access the various contracts by selecting the appropriate list.
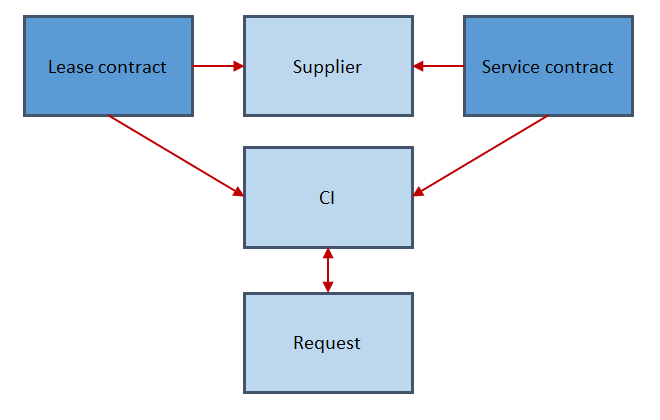
The relation between the different components in Octopus is as follows:
Supplier Management
From the File > Supplier management menu:
If the supplier of the contract does not exist, there are 2 options:
- Option 1: Enter the new supplier when you create the contract and Octopus will offer to it.
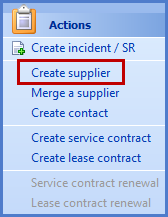
- Option 2: From the actions menu select Create supplier.
Creation of a Service Contract
From the supplier's record, there are 2 types of contracts:
- Service contract : Used for various types of contracts (Maintenance, Extended warranty, Parts and labour, etc.).
- Lease contract : Used to lease various CIs.
In both cases, these contacts have a start and end date and can be renewed.
From the actions menu, select Create a service contract.
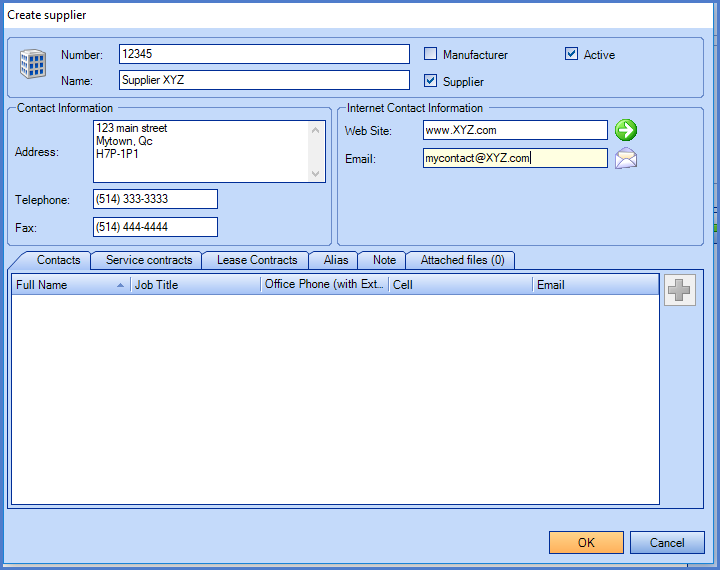
The contract window opens to input the required information.
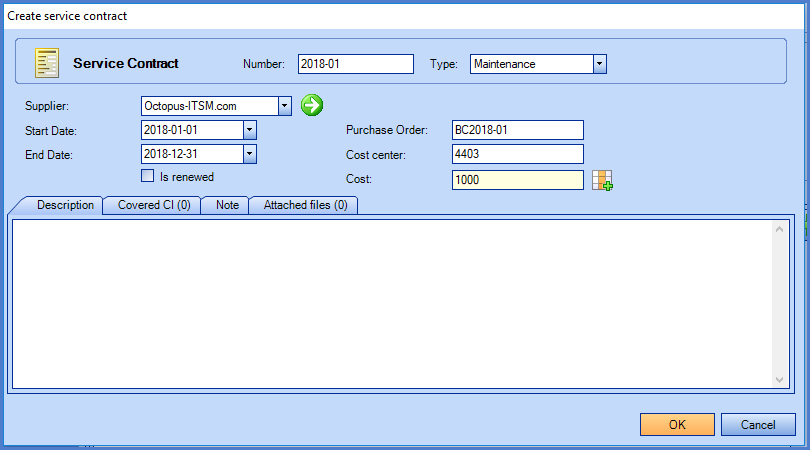
- Number
- Contract number.
- Type
- Allows to distinguish between the various types of contracts to manage.
- This list is managed from the Tools > Reference data management > Général > Service contract types menu.
- Supplier
- Name of the supplier, by default the name of the supplier selected at the time of the contract creation is displayed.
- If it is a new supplier, Octopus will offer to create it.
- Start Date
- Service contract start date.
- End Date
- Service contract end date.
- Purchase Order
- Internal purchase order, as a reference.
- Cost center
- Cost center associated to contract.
- Cost
- Total cost of the contract with the option to distribute the cost between the CIs with the icon on the right.
- The related CIs must be attached to the contract prior to distributing the costs.
- Note that even if there is only one CI, if you want the cost of the contract to the calculated in the CI's cost, you need to click the button to distribute the costs.

- Is renewed
- Indicates that a contract has been renewed.
- This field can be used as a search criteria or added as a column in a list.
-
The box will check itself if you renew the contract from the old one using the Service contract renewal action.
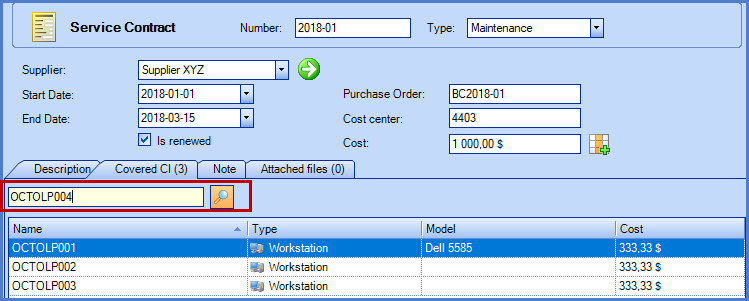
Adding the CIs Covered by the Contract
Adding the CIs is done from the Covered CI tab.
Use the search window from this tab to add one or more CIs to the contract.
Contract Cost Distribution
Click the icon on the right of the cost field, it will distribute the cost of the contract to the different CIs; Octopus will distribute the amount equally. Subsequently, it is possible to modify this distribution manually for each CI.

Creation of a Lease Contract
The creation of a lease contract follows the same logic as the service contract, from the actions menu, selecting Create a lease contract.

- Number
- Supplier contract number.
- Supplier
- Name of supplier, by default the supplier name selected at time the creation was initiated.
- If it is a new supplier, Octopus will offer to create it.
- Start date
- Lease contract start date.
- End date
- Lease contract end date.
- Site
- Site of the leased equipment.
- Invoice number
- The invoice number of the contract as a reference.
- Purchase order
- The internal PO number as a reference.
- Cost center
- Cost center linked to the contract.
- Cost
- The total cost of the lease contract.
- Is renewed
-
Indicates that a contract has been renewed.
-
This field can be used as a search criteria or added as a column in a list.
-
The box will check itself if you renew the contract from the old one using the Lease contract renewal action.
-
How to Work With Contracts
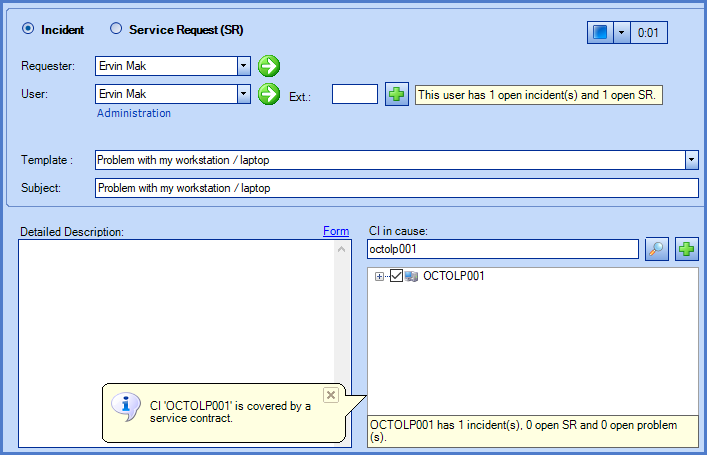
In Incident or Service Request Management
When creating a request with a CI covered by a service contract, a message will come up.
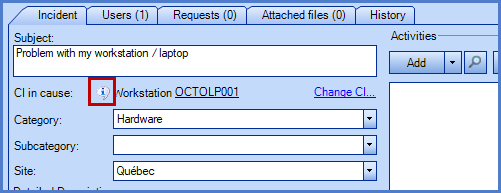
Once the request created, an indicator shows up next to the CI saying it is covered by a contract.
In Configuration Management

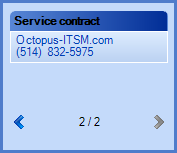
When reading an equipment record, the Service contract indicator appears if the equipment is covered by a contract; in cases where multiple contracts apply, a counter shows the number of contracts and arrows allow to move between contracts.
In the Cost tab of the CI, it is possible to view the costs of service contracts associated to the CI = distribution of the total cost to each CI in the contract.
Before seeing these costs, you may need to use the Recompute Costs link to update the information.
This cost calculation does not include the lease costs.
Managing Contracts Over Time
Once the various service and lease contracts are in place, it is important to manage them.
The previous section showed us how to identify equipment under contract when creating requests.
It is important to manage the contract renewals.
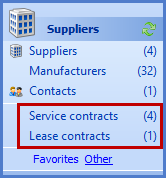
From the Lists
From the Suppliers module, there are many lists preconfigured to manage the various contracts:
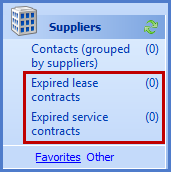
The expired contract list must be checked regularly as it implies that equipment covered by these contracts are no longer covered.
Renewal
When renewing a contract, in order to avoid retyping all the information, user the options Service contract renewal and Lease contract renewal in the actions menu.
Select a contract and click on the renewal button to create a new contract with the same content except for the variable fields; Number, Purchase order, Dates or Additional information.
Expiry Notifications
Octopus will inform you that a contract is near the expiration date.
To configure the notification, select Tools > Options and go to the Emails to technicians section and validate the following options:

This allows to define, depending on the type of contract, the period prior to expiry you want to receive the notification.
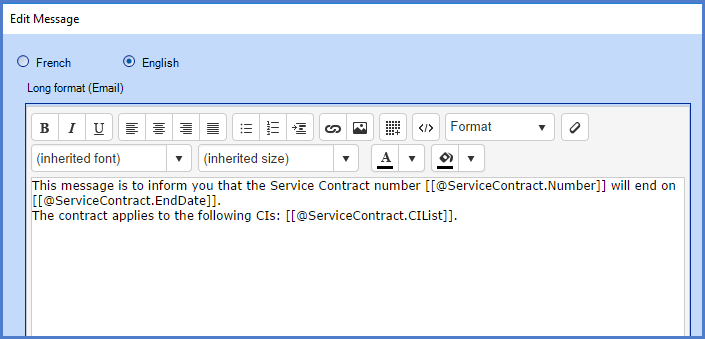
Click Edit message to modify the notification that will be sent.
Note that you must subscribe to the notification to receive a message before the expiry of a contract.
You could also create a custom list to receive a notification before a specific deadline for specific CIs or CI types.
For more information consult the Notifications or Personnalized notifications Wiki pages.Thank you, your message has been sent.