Table of contents
Related articles
Introduction
In most organizations, certain equipment or rooms of different types are available to users, but the management of these elements can be complex. Octopus allows to manage reservation with only a few simple configuration steps. Reservations are done via a Service request.
| NOTE: There is also a reservations plug-in that can be installed to manage reservations in a different way to that described in this article. For more details, see Webinaire : Reservation Management Webinar (February 10, 2021) in French only. A chart comparing the two reservation management solutions is also available here. |
Reservation request behavior
A request will be considered a reservation request by Octopus when a Web form includes a Reservation type field.
The behavior of this request type will be as follows:
- On the Web Portal, the status of the request will be Confirmed to inform the user that the reservation is really confirmed
- In Octopus; the request status will be Suspended and the reason Reservation in progress. This suspension reason is automatically selected by the system at request creation and cannot be reused if the request status is changed by an Octopus user
- The due date will be the end date of the last reservation of the request
- The resolution date will be the end date of the last reservation of the request.
- Once the last reservation is done, the request will automatically resolve itself, unless other tasks has been added for an Octopus user
- The item (CI) that will have been reserved will be linked to the reservation request, it will hence be possible to find out which item has had more reservation requests
In an environment where the team manages reservations and is involved in processing the request, it is possible to work with the flow of standard Octopus status instead of the automated reservation status:
- Confirmed on the Portal.
- Suspended; Reservation in progress in the application.
Contact the Octopus Service Desk to modify this option (IncidentReservationAutomaticStatusManagement.Enabled).
In this case you will have to change manually to perform the suspension and resolution. These two options go together, you can't change only one of them.
How to configure reservation management
The configuration of Management reservation is simple, since the solution has been designed to function in Octopus without the intervention of Octopus users.
You need to have the rights to administer Octopus in order to manager this type of request, you also need proper knowledge of the configuration the Octopus Web forms.
The solution only allows for one Reservation field in a Web form, hence it is not possible to reserve two items at once.
The satisfaction survey is not available in the context of a reservation. Contact the Octopus Service Desk to modify this option (SatisfactionSurveyOnReservationRequest.Enabled). When the option is activated, the reservation requests will participate in the satisfaction survey processes as for the other requests. They will then be considered by the KPI report.
Follow these steps to setup reservation management:
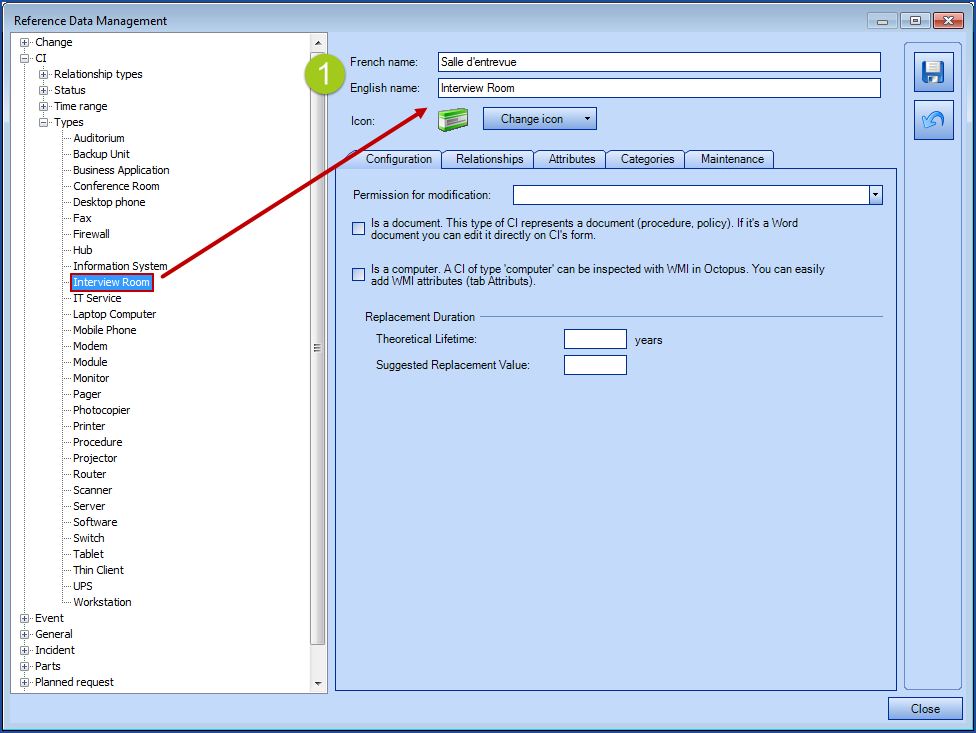
- Add the types of items that can be reserved to the CI types
- Go to Tools > Reference data management > CI > Types
- Add one or more types of items, like Conference Room, Interview Room, Training Room, etc.
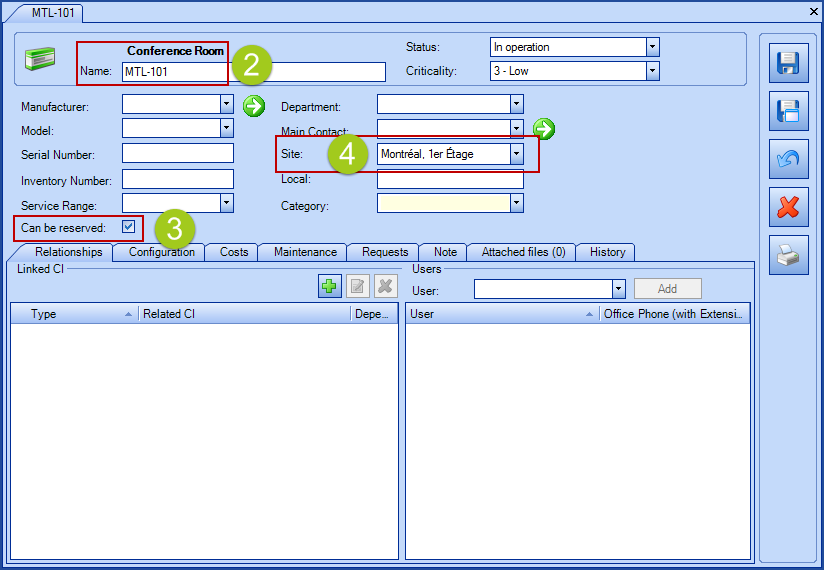
- Back in Octopus, to go the Configurations module and select Create CI
- Select the type of CI created in step 1
- Add the name of the item, for example the name of the room. As this is the name that will be visible to users, make sure it is a name they are familiar with
- In the CI file, check the Can be reserved box and enter the characteristics of the item if required
- Associate the item to a site and sub-site if this item is a fixed one
- Add more detail according to your needs
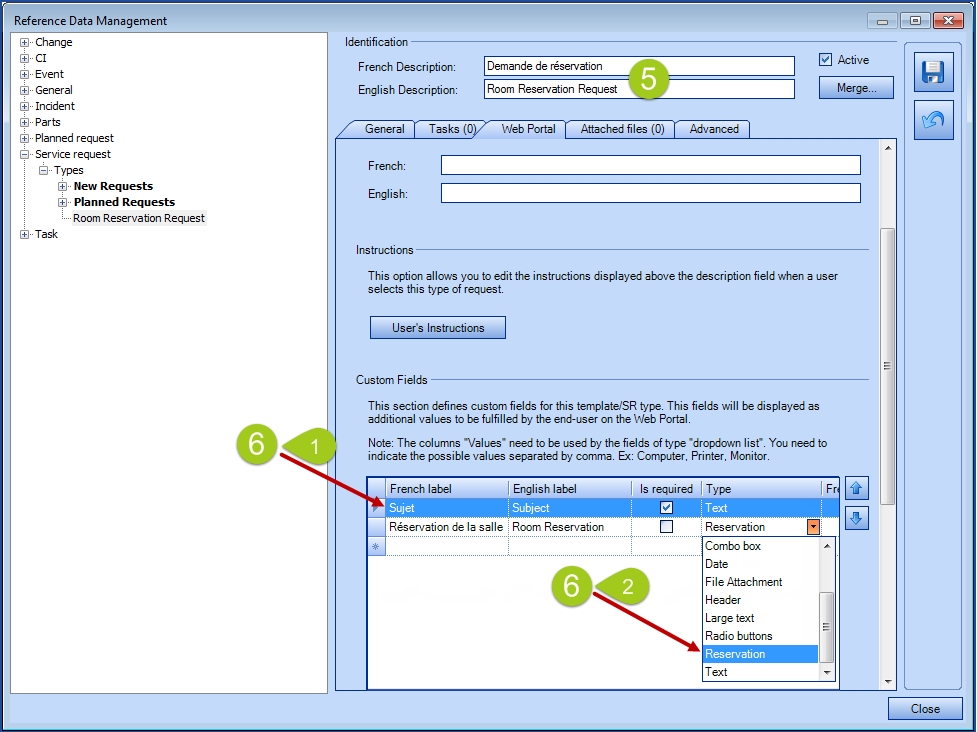
- Go to Tools > Reference data management > Service request > Types
- Add the new type of SR that will allow reservations
- We suggest you add it directly at the root of types in order for it to appear right away to users
- From the Web Portal tab, add the fields to configure the Web form
- A Text type field that will be named Subject
- It's important to name the field Sujet in French and Subject in English, as this field name has a specific function in Octopus
- This will force users to enter a subject to the reservation and it will be visible to the requester and to the people looking up reservations
- This allows for people with many reservations to know which is for what
-
A Reservation type field
-
Only one Reservation type field can be added per form
-
From the moment an SR has a Reservation type field, the form will be managed by Octopus as a Reservation request with the status and behavior related to this type of request
-
- A Text type field that will be named Subject
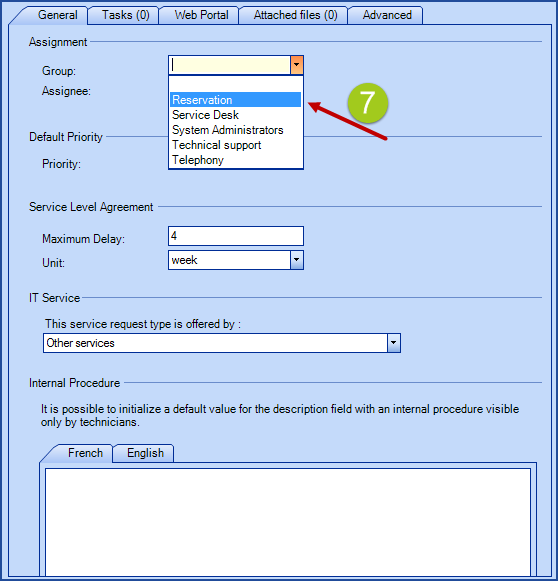
- The assignment can be done immediately to a group that does not participate in the execution of regular requests if the reservations are done without intervention
How to make a reservation from the Web Portal
All new, modification or cancelation of reservations must be done from the Web Portal by the requester or the user of the reservation request.
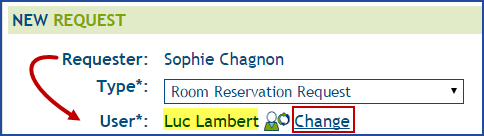
 Tip: At the creation of a reservation, if the requested add the name of another person as the user, it allows for tow people to be able to see and modify the reservation request.
New reservation
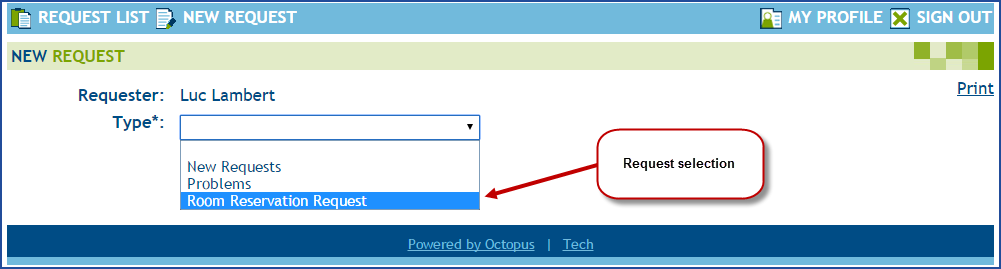
- From the Web Portal, go to New Request
- Select the reservation request that corresponds to the need
-
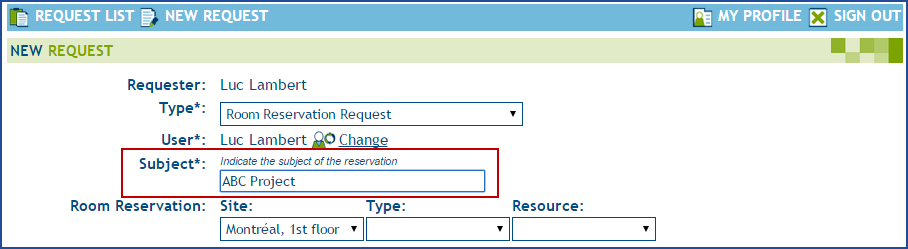
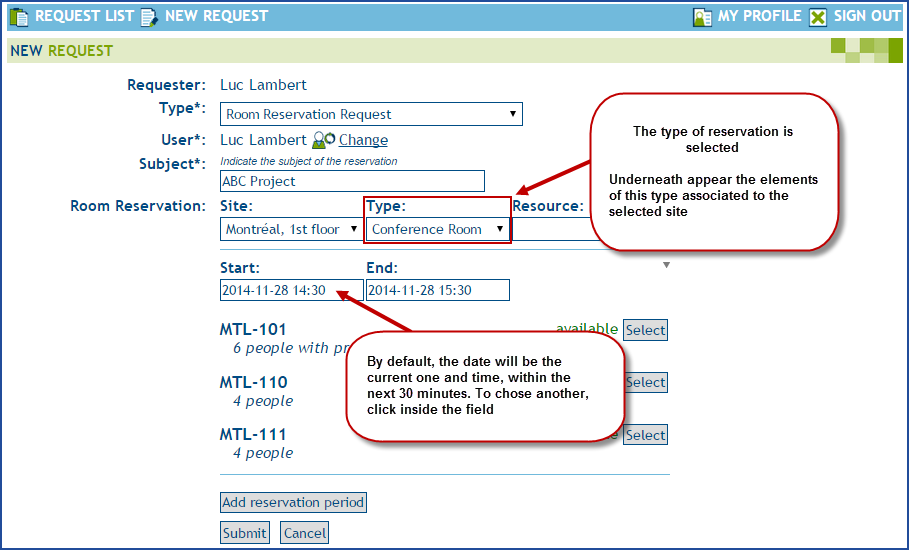
Write the subject of the reservation, this will help you later to remember what this reservation was for
- Select the site or go directly to the type
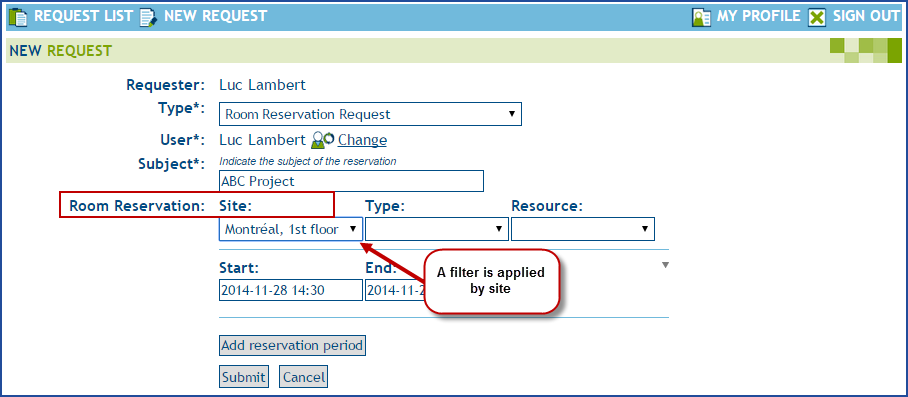
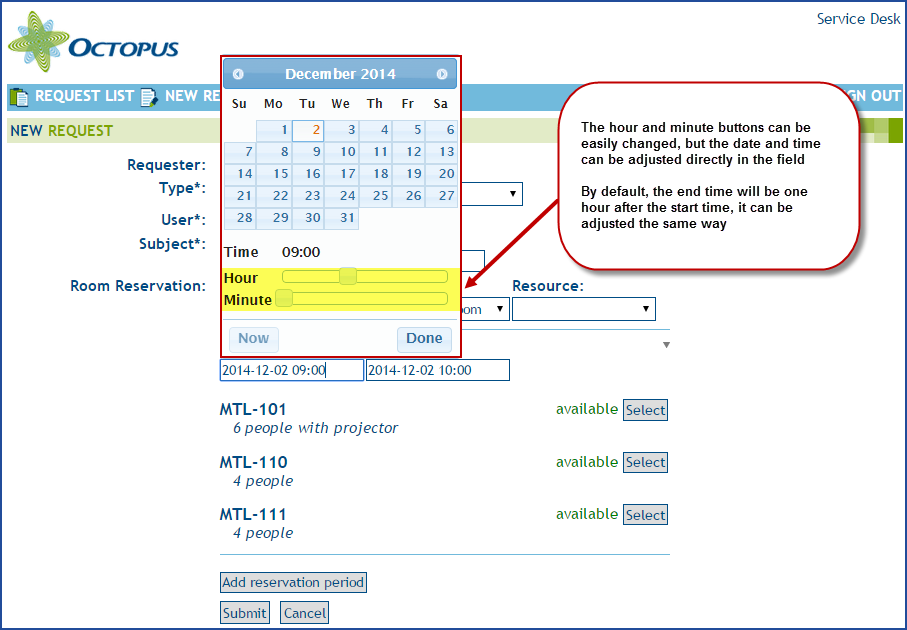
- Add the start date and time
- Adjust the end date and time
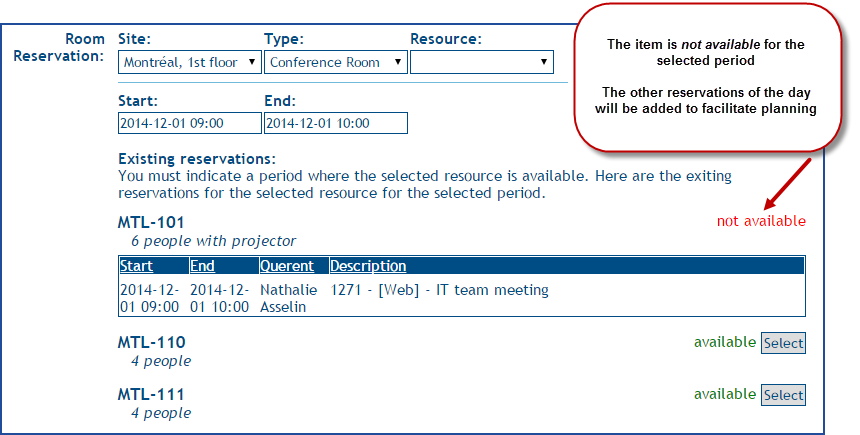
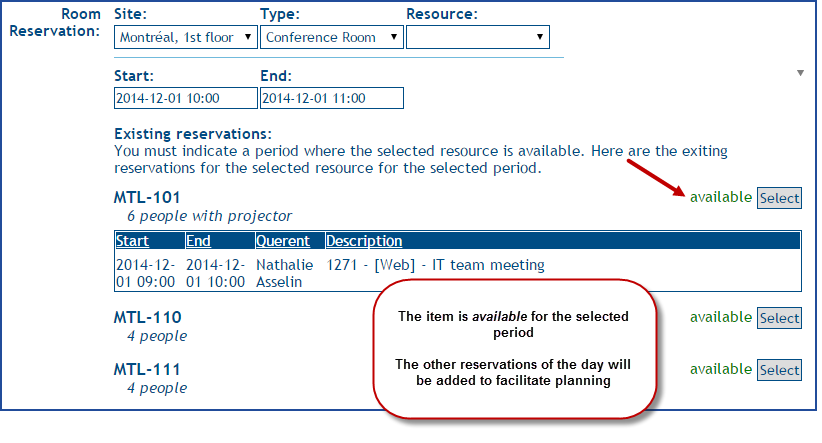
- The list of items will show you what is available for the selected period. It will also show other reservations of the items to help you see the availability if you need to select a different time
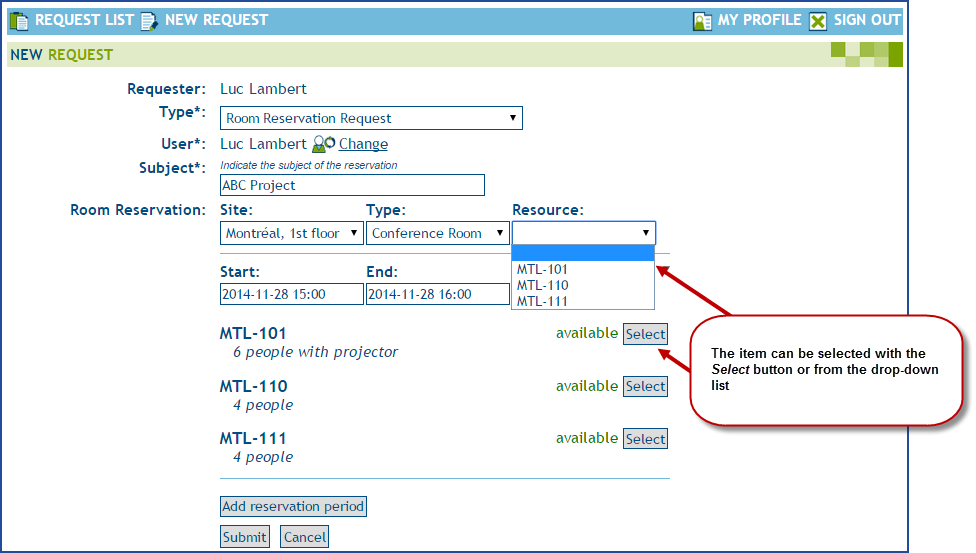
- Select the item either with the Select button or by selecting it from the Resource list
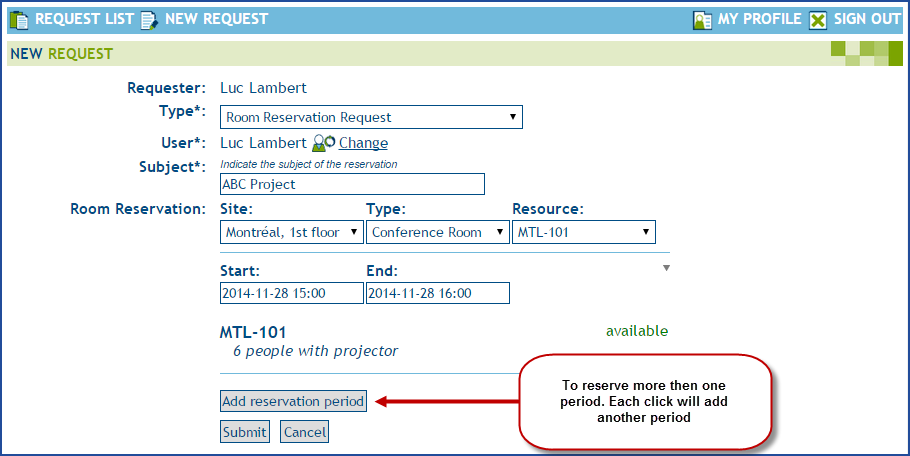
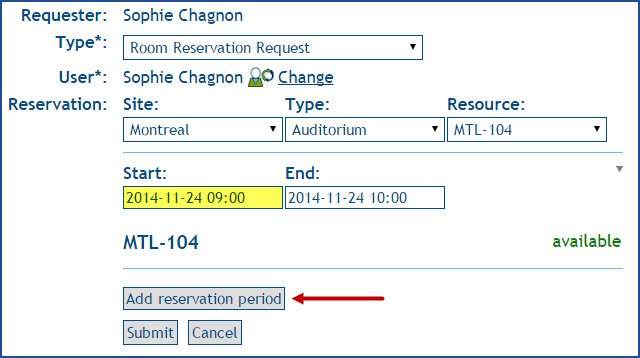
- Add other reservation periods if required
- Finish with the Submit button

How to see the availability
Items appear Available or Not available depending on the date and time selected. In order to help user to see the next reservations, all the reservations corresponding to the selected date are visible.
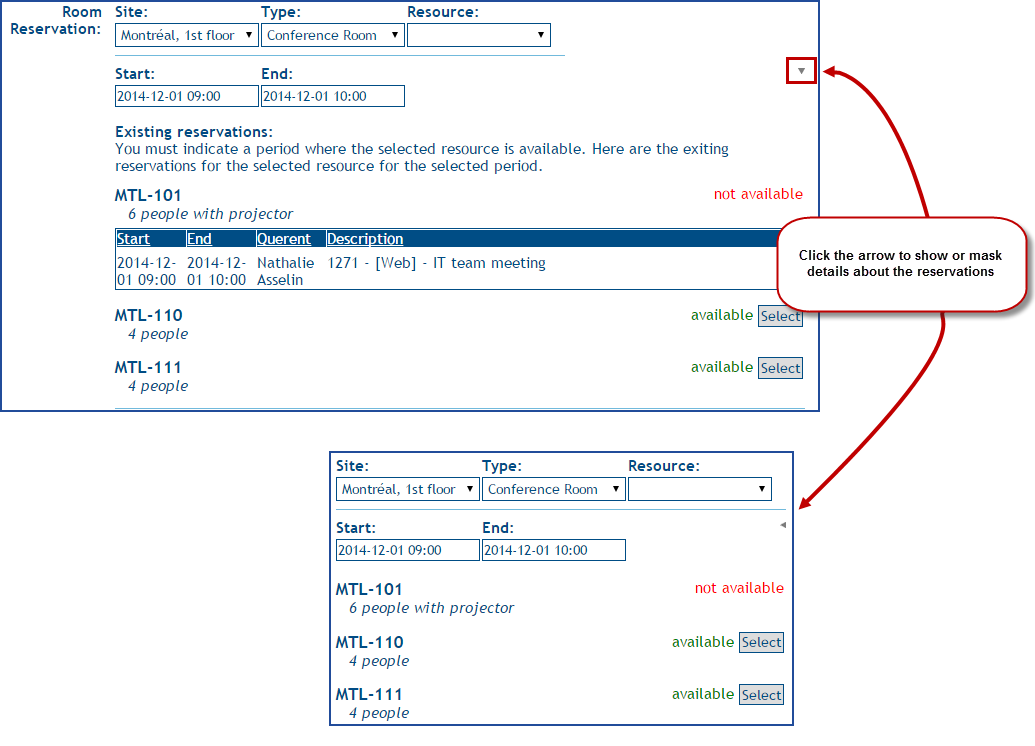
A little button in the form of a triangular arrow appears on the right side of the form  it allows to either see or collapse the details of the reservations, all you need to do is click the arrow to change the setting.
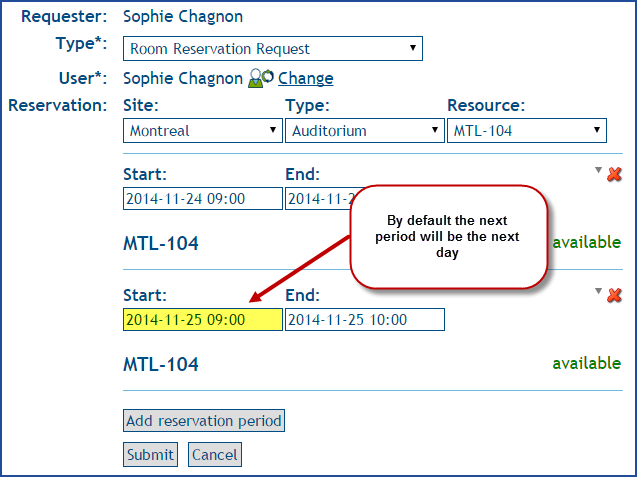
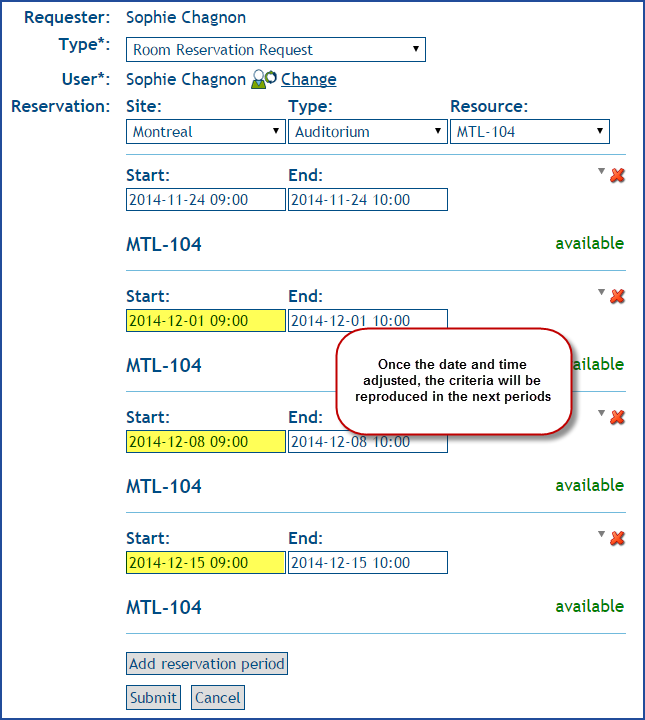
How to create more then one reservation period
Since it is possible to need the same item more the once, the system allows to add periods to the reservation request, by using the Add reservation period button.
By default, when adding a period the system will set the date to the next day, same time. If you change it to a date in two weeks for example, and you add more periods, the dates will alternate every two weeks. The system can recognize periods by number of days or weeks, so if you alter your periods within the same request, the system will follow the new rules as you go.
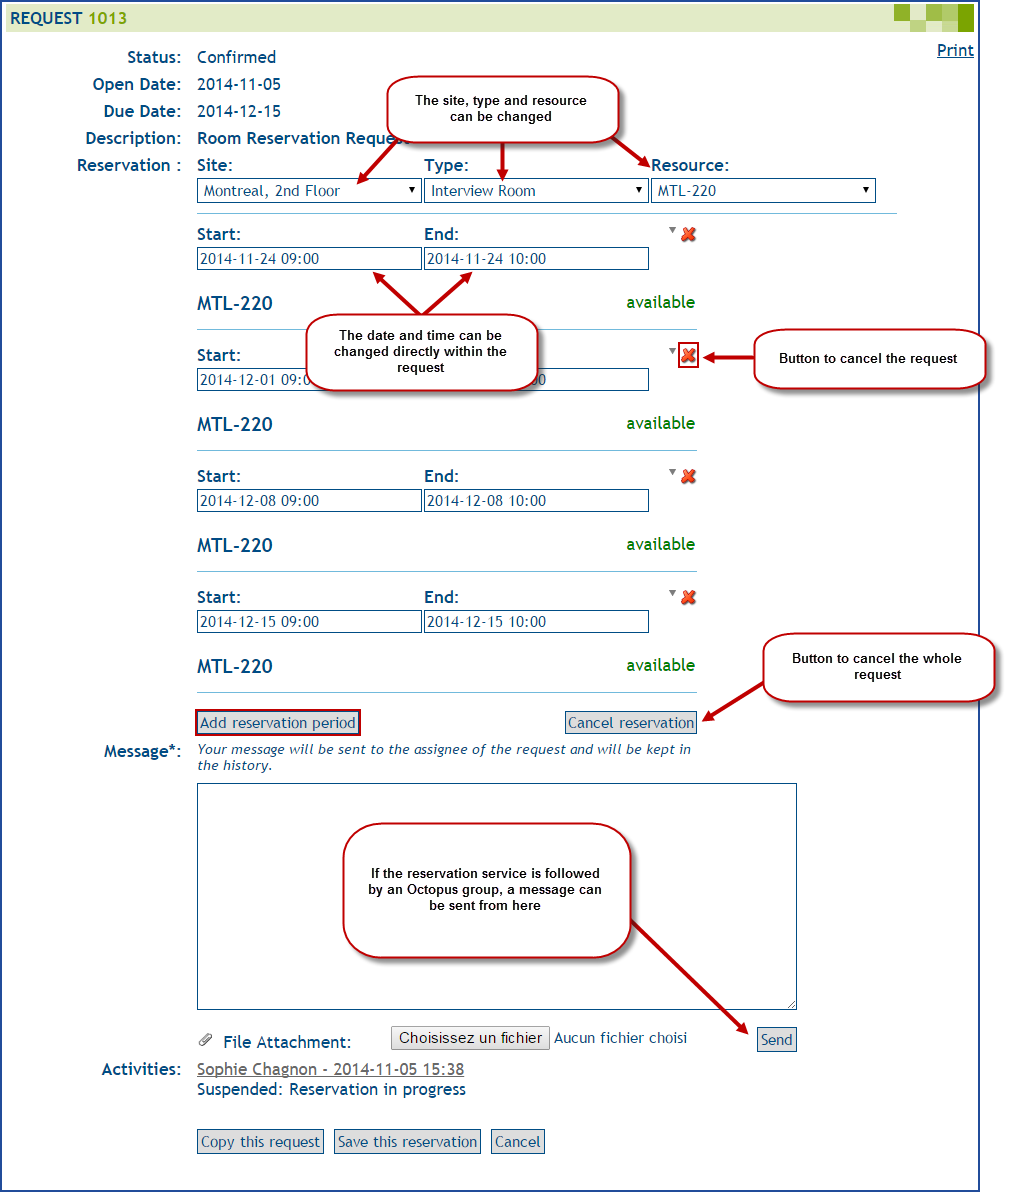
Reservation change
Plans often change and therefore reservations must be adjusted. As long as the reservation has not yet started, it is possible to change a reservation. However only the requester or user of a reservation can make the changes to a reservation.
From your request list, select the reservation to change. The following elements can be changed:
- The site
- The type of item
- The resource
- The date
- The time
- Add one of more periods
- Cancel one or more periods
- Cancel the whole reservation request
- Add a message to the Service center
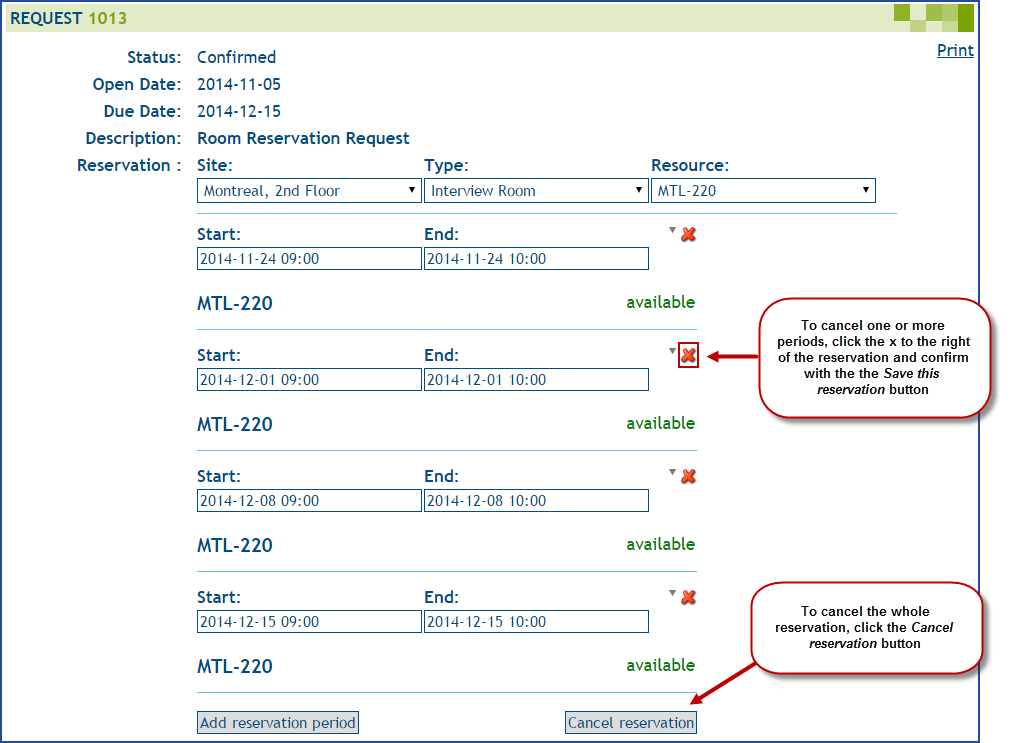
How to cancel a reservation
The requester or the user of a request can cancel one of more periods, or even the whole request. From your request list, select the reservation to change.
To cancel one of more periods to a reservation:
- User the
 on the right of the period
 - Confirm the change with the Save this reservation button
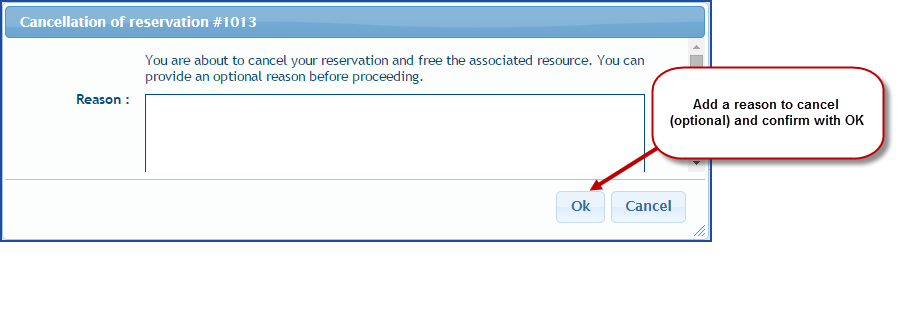
To cancel the whole reservation request:
- Use the Cancel reservation button
- A cancelation window will come up, you can fill in a reason for the cancelation (optional)
- Finish by clicking OK
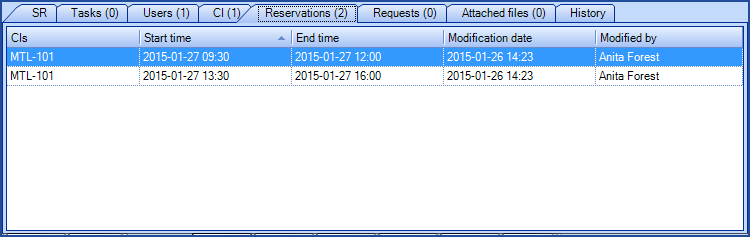
How to see reservations in Octopus
There is a tab called Reservations that appears only in reservation type service requests.
This tab contains the following information:
- Reserved CI
- Start time of each occurrence
- End time of each occurrence
- Modification date
- Modified by
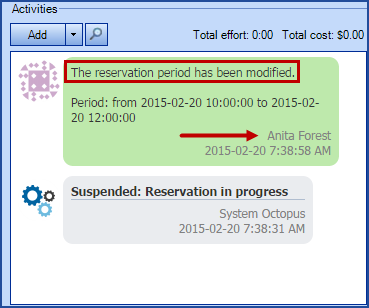
It is possible to see modifications done in a request as an activity is automatically added with the user's name when he makes changes to a reservation from the Web Portal. The activity describes the modification made by the user as you can see in the image bellow.
Thank you, your message has been sent.