Table of contents
Introduction
There is more than one way to create an incident in Octopus. The creation upon a phone call requires a quick reaction from the service desk analyst, so every click counts. We have thought about that aspect and made our tool according to this important requirement.
The Incidents / SR module allows the management of incidents and service requests. In this article, we are going to see the incident aspect (see Creation of a Service Request (SR) for precision on the "Service Request" aspect).
This article explains the efficient creation steps of an incident in a context where a user calls to address his needs to the Service Desk.
Some Definitions
According to the ITIL® framework, the objective of the Incidents Management process is to restore the service as soon as possible, by having the smallest minimum impact on current operations.
-
An Incident is an event that is not part of normal operations and that causes, or could cause, an interruption of service or a reduction of service quality.
-
A Service Request (SR) is a user request asking to receive specific information, a hint, to benefit from a standard change or to get access to an IT service. Service Requests are usually managed by the Service Desk, have defined execution steps, are pre-approved and have lesser impact on the infrastructure. The requests not part of this category are managed as Changes, in the Changes Management process.
Receiving a phone call
When receiving a phone call, proceed this way:
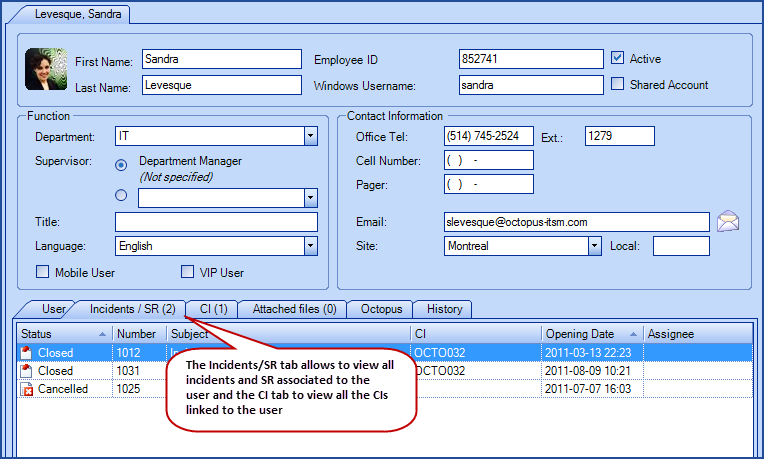
- Click on the Users button (or press F3) to open the Users Management module (F3 allows to open the Users module and position the cursor in the Search field)
- Search the user (using their first or last name, Windows username or phone extension)
- Once the user has been found, you can access his existing requests and inform him of any developments (in that case, we recommend adding an activity into the journal to indicate that the user called in for a follow up)
- Or open a new request
- Click on Create an incident / SR action (or press F4).
Create an incident
- The Incident option is selected by default
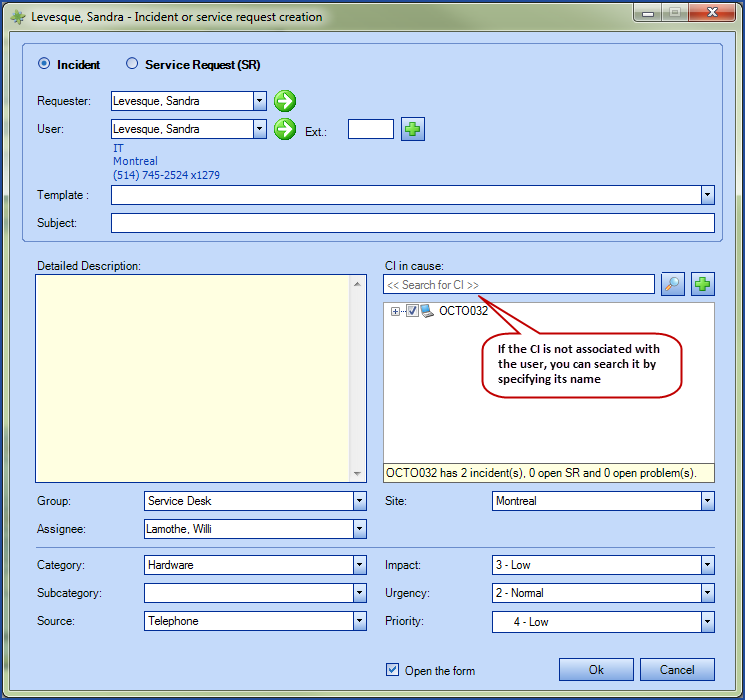
- Enter the information linked to the incident :
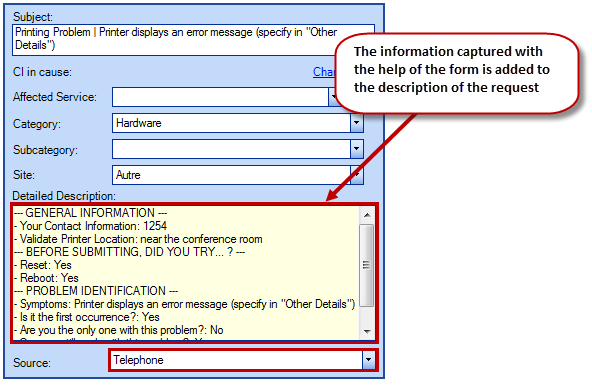
- Enter a subject and a detailed description or select an incident template (previously configured)
- The subject must be as clear and complete as possible since it will be visible in the requests list and must resume rapidly the nature of the incident
When a template is selected, some fields are filed to accelerate the incident creation
- The subject must be as clear and complete as possible since it will be visible in the requests list and must resume rapidly the nature of the incident
- Select the category and the sub-category
- The Service Desk must identify the incident's category and sub-category, according to the information provided by the user
- Add the CI in cause
- Enter the CI that seems to be the origin of the incident; this information could be corrected at the resolution when the real cause will be identified
- For information on the behaviour of the CI in cause in an incident, see the Incident | Understanding the CI in Cause article.
- Establish the priority
- The due date will be determined according to the chosen priority. It is possible to use an urgency and impact as well to let the system automatically choose the priority
- For additional information on how to automatically establish a priority, please consult the following article Priority definitions
- Assign a group or an assignee
- By default, an incident will be assigned to its creator. To reassign it to a group, the creator must remove his name from the "Assignee" field
- Enter a subject and a detailed description or select an incident template (previously configured)
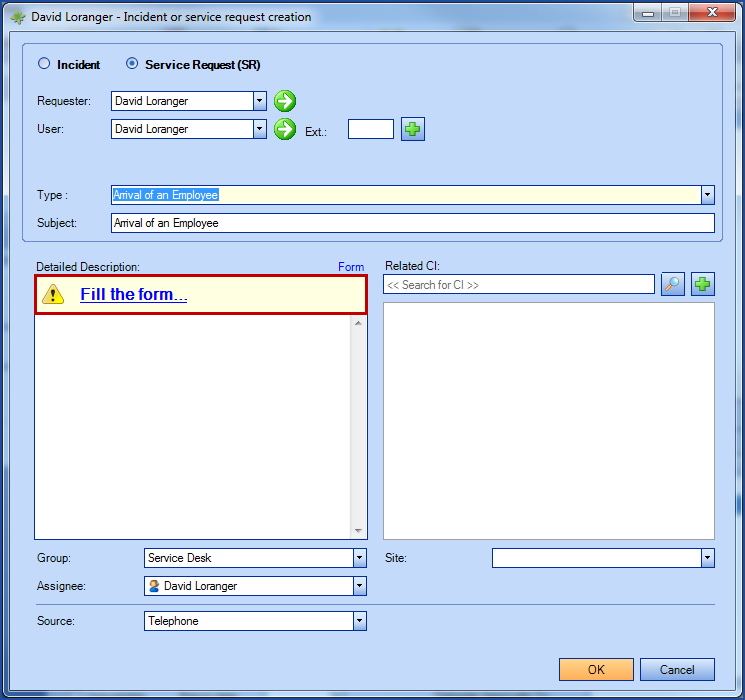
- At this step, the creator can check the Open the form option to access the screen that will allow him to add more information to the incident
- Click OK
- The Subject field allows manually entering a subject or selecting an incident template form the scrolling list
- The Source field indicates the incident's origin. By default, the source will be Telephone, but if the incident has been created from the Web Portal or by email, the field will automatically be modified accordingly to Web Portal or Email.
- If required, the default source (Sources.UseDefaultValue) can be modified by the Octopus Service Desk.
- Note that if the criticality of the CI in cause is high or medium, the system displays a tooltip information and automatically designates the impact as high or medium
Using an incident template
In order to assist the Service Desk in giving an similar service experience to customers and help with statistics on similar issues, you can use the templates that have been preconfigured in Octopus. You can configure a Web form with specific questions to ask users for certain types of request. It is also possible to add instructions for technicians based on these same templates.
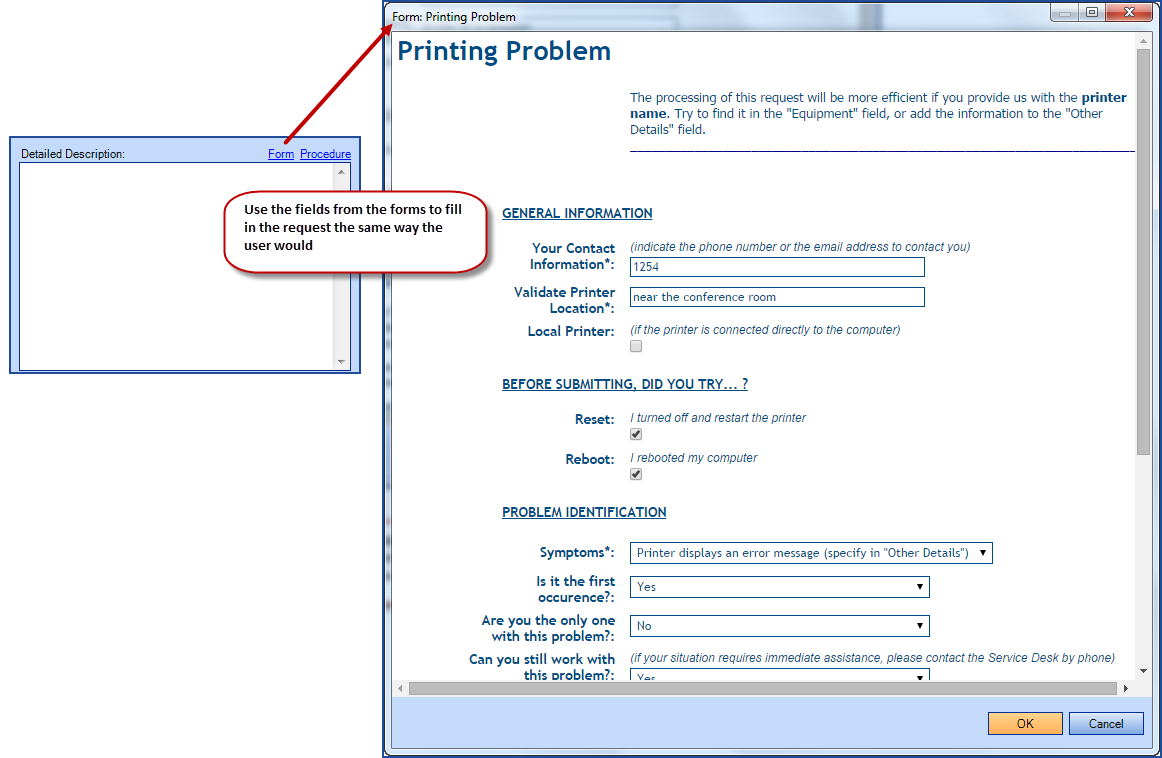
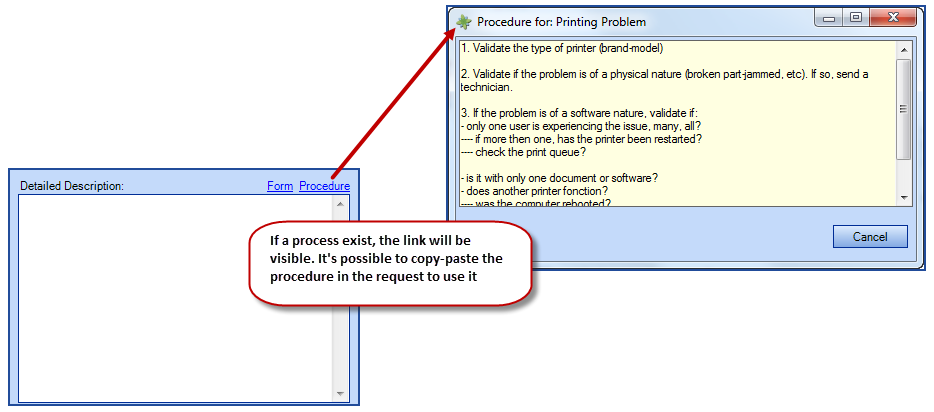
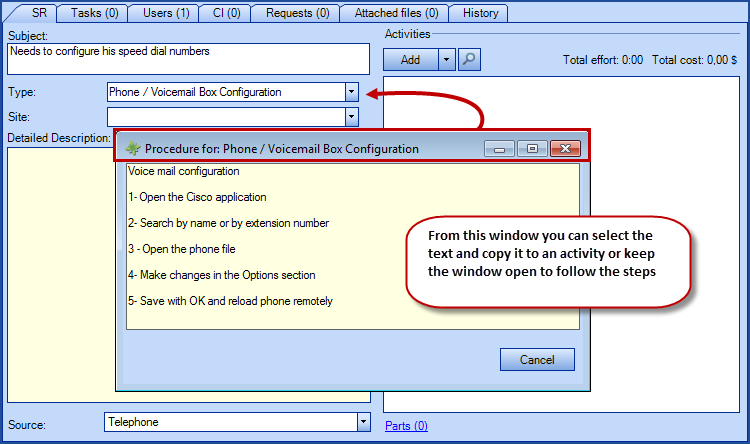
When creating the incident from within Octopus, if a Web form or a procedure exists for the selected template, a link called Form or Procedure will appear above the Detailed Description window.
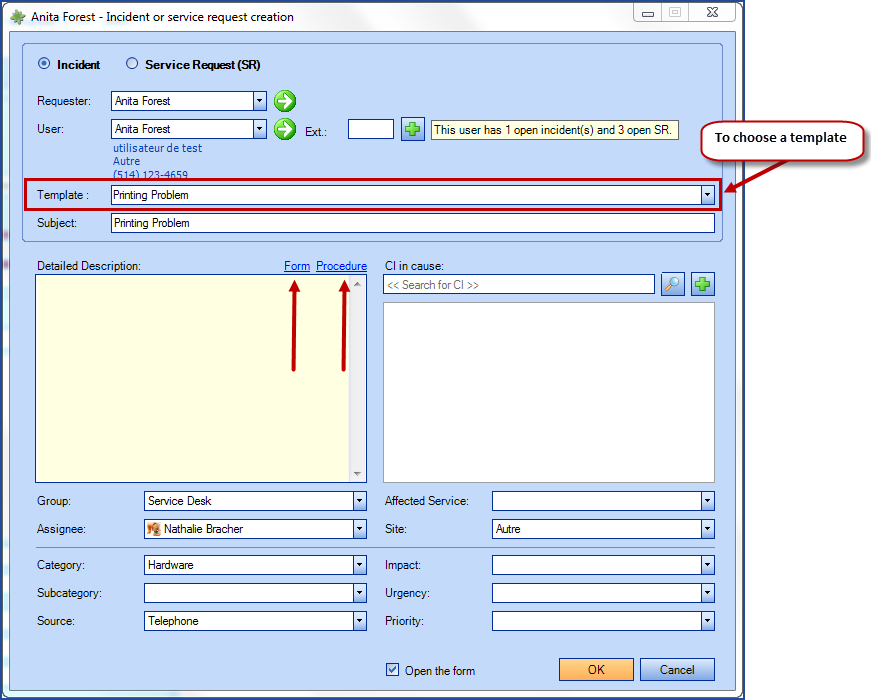
Use the Form and Procedure link when they are available to help you with data entry and troubleshooting. If the form is mandatory, a yellow bar will prompt the technician to Fill the form.
Opening of the Form
Clicking on "Open the form" brings a separated window, giving access to additional fields. Some fields differ between the Incident form and the Service Request form, without forgetting that according to the initial Octopus configuration, some fields can be visible or not, mandatory or not.
Upper part of the form

- Users section
- A difference exists between requester and user. The user is the person affected by the service interruption or degradation. The requester, if it differs from the user, represents the situation where someone makes a request for another user
- The green arrow located besides the user or requester's name allows a quick access to their user record
- When required, a name of an alternate contact can be added to the incident
- Assignment section
- The Group field represents the group which the assignee is part of. It is possible to assign an incident to only a group, or to a group and an assignee
- The Follow-up by field allows to keep the incident in the owner's list to keep an eye on it until its closure. Once the incident has been resolved, the assignee of the incident will become the one identified in the Follow-up by field until the complete closure
- Dates section
- The Due date is automatically chosen by the system (if the SLA option is enabled) and is based on the established resolution delay for each priority
Bottom left part of the form
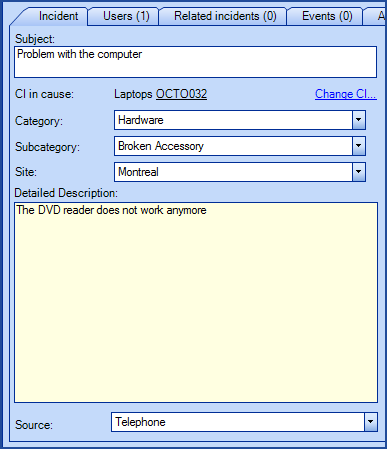
This section describes and classifies the incident.
-
Incident tab allows to describe and categorize an incident
-
Users tab allows to link users into an incident
-
Related Incidents tab can link an incident to another one
-
Events tab allows to link an event to an incident
-
Attached files tab includes a file into an incident
-
History allows to view the modification history of an incident
Bottom right part of the form
All request related activities are kept in the "Activities" section. It reflects the steps taken to bring the incident to a resolution. We have also integrated the communications performed through the self-service Web portal. At last, we have established a color code to better identify the nature of different activities:
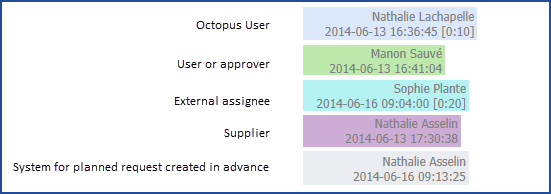
The resolution activity is a specific activity in Octopus. It always has a different appearance than the others to make is easily recognizable. In the "Modern" view, it is preceded by the "Resolution" title and has a green checkmark on the side.
For more information see Activities in Octopus article.
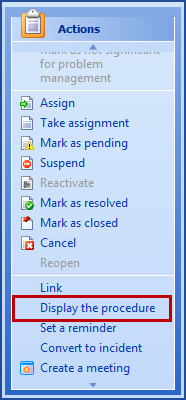
Action: Display the procedure
The Display the procedure action is always visible; it will be grayed out if there is no procedure to consult and available if there is one. This information is configured from the Data reference management, see the How to add an internal procedure section of the Basic Configuration - Incident wiki for more information.
Adding an activity
To add an activity, click on the Add button.
- Using "Activity type" allows a quicker selection of the described activity. This list can be configured from the "Tools > Reference Data Management" menu
-
We can specify in minutes the length of activities to obtain metrics about efforts put in the request execution. If this metric is required, it is recommended to make this field mandatory to force the constant usage of the field by the technicians
-
We can indicate that an on-site visit was required while performing the activity (On-site visit = yes)
-
The "Communication" section appears when the "Allow to send activities via email" option is enabled (Tools > Options...). We can render the activity visible on the self-service Web portal and/or send an email message to all kinds of recipients

- The total effort includes the sum of all individual efforts entered in all incident activities
- The total cost represents an approximative amount of the incident's execution cost. Furthermore, when the CIs are linked to incidents, we can find in the "Cost" tab the total cost of ownership (TCO), which includes the initial cost and maintenance costs (parts, internal and external labor, preventive maintenance, service contract, etc.) associated with the CI
- The total cost of the incident form includes the total effort multiplied by the resources cost, the costs related to labor activities and costs related to parts.
Useful buttons
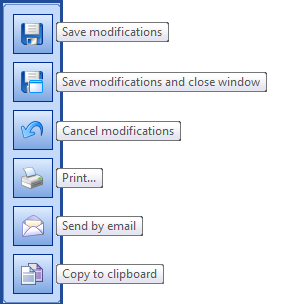
To the right of an incident record, there is a list of buttons that allow us to quickly do very useful actions:
- Save modifications: Saves the modified items and stays in the incident window.

- Save modifications and close window: Saves the modified items and closes the incident window.
- Cancel modifications: Cancels the modification done since the incident was last saved and stays in the incident window.
- Print: Opens the Print window.
- Send by email: Allows sending the request by email outside of Octopus, by opening the email account and software (Microsoft Outlook, Lotus Notes, etc.) configured on the workstation.
* * Task activities are not included.
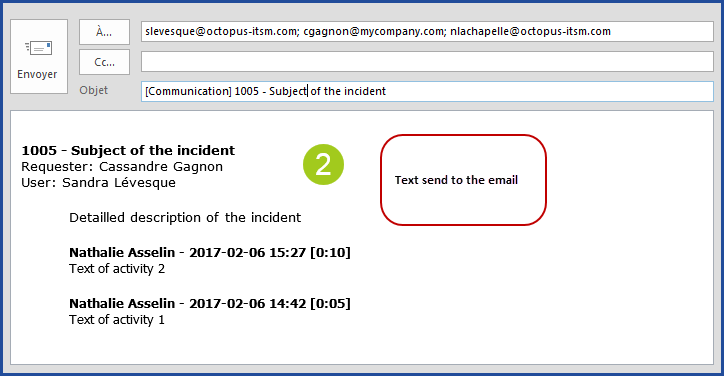
When you click the button from within the incident:
- Octopus will offer to send the email to the following people, on the condition that they have an email address in their file: the requester, the user, the Octopus user, Other, All.
- Than, Octopus will open the workstation email software and copy the following items:
- In the email subject
- [Communication] Incident number, Subject
- In the email body
- Incident number, Subject
- Requester's name
- User's name
- Detailed description
- Activity log
* * In the event of an error in the detection of your email software, HTML formatting cannot be performed and the email will be in plain text format only.
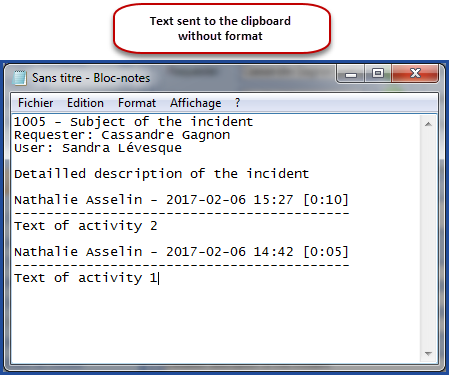
- Copy to clipboard: Copies the following items to the clipboard so they can be pasted elsewhere:
-
Incident number, Subject
-
Requester's name
-
User's name
-
Detailed description
-
Activity log
-
Example of what is sent by email

Example of what is sent to the clipboard
How Incidents link to other modules
Creation of a new request
There may be reasons to want to create other request types from an incident, for this we have two parts:
- The action to create from an incident
- The relationship types
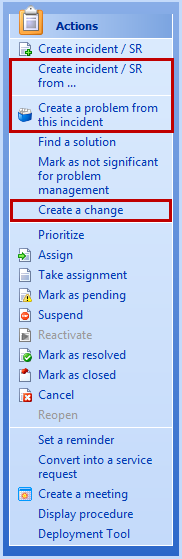
From an incident, the actions available are located at the bottom right. You can:
- Create an incident or SR from ....
- Create a problem from this incident
- Create a change
Some of the actions described above are available with the Octopus version 4 and on, via extension plug-ins that can be requested to our Service Desk.
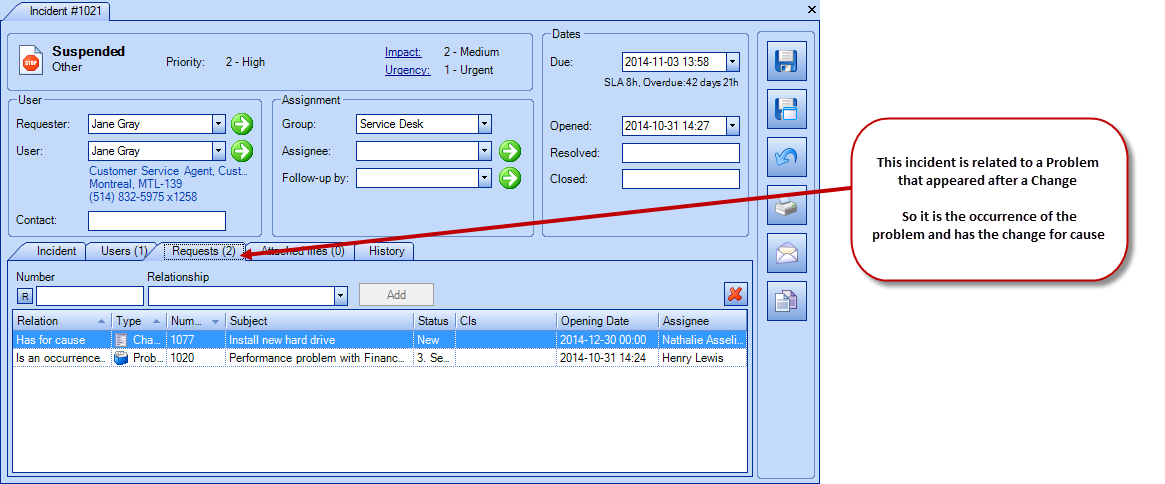
The relationships that will link the incidents to the other request will be dictated by the kind of request and the situation. The relations you can see are:
- Is related to
- Has been used to create
- Is the parent of a same incident
- Is the child of a same incident
- Is an occurrence of
- Has for occurrence
- Is the cause of
- Has for cause
- Etc.
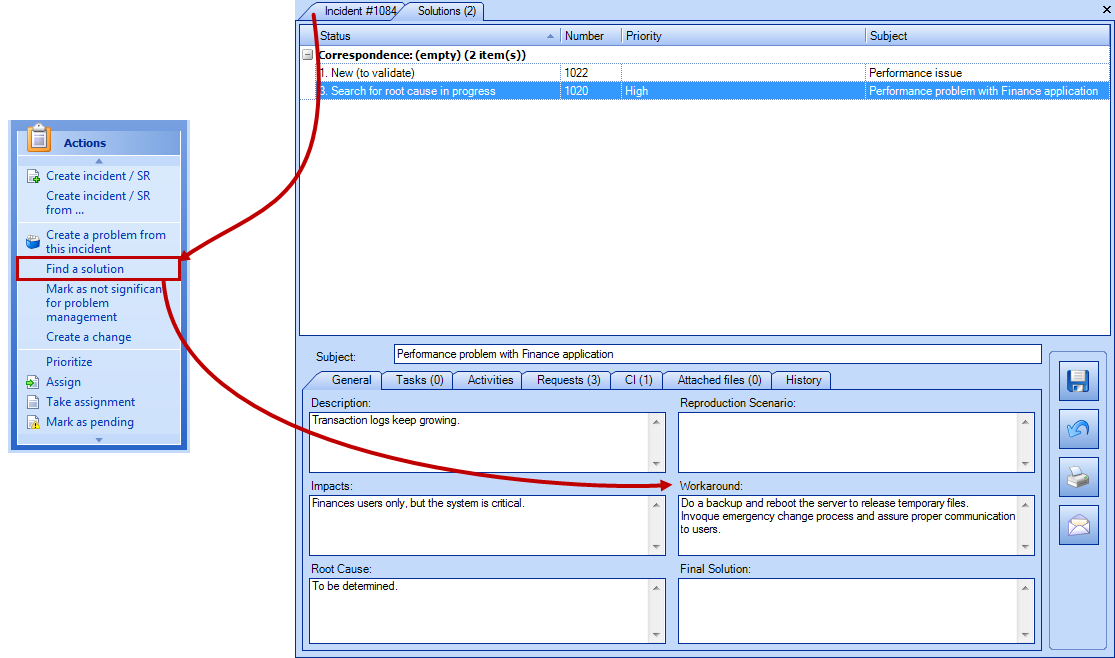
Search for a Known Error
If an existing problem record can relate to the incident being created, it can be found by using the Find a solution action on the bottom right. This will bring you to the list of Known errors for this type of situation.
Thank you, your message has been sent.