Table of contents
Related articles
Introduction
Information provided by the user within the request submit form is important and we have worked on conditions on forms and tasks to better exploit it. The conditions allow forms to be dynamic and to ask questions to the user based on his previous responses. In addition, with the conditions it is possible to adapt the workflow of the request by selecting which tasks will be generated.
Conditions apply on two types of actions:
-
Fields to display in a form.
-
The generation of a task in a service request.
Basis for the conditions
Conditions can be based on:
- The value of a field in the custom form.
- The value of a field in the request.
- Whether or not a field was filled.

How it works
To add conditions to a field in a form or a task, you need to use the F3 key to see available fields and to add the description of a condition.
Configuration of a condition in a form
In the dynamic form creation, the form fields and those from the request are the criteria that will be used as conditions to determine if the field is to be displayed or not to the user.
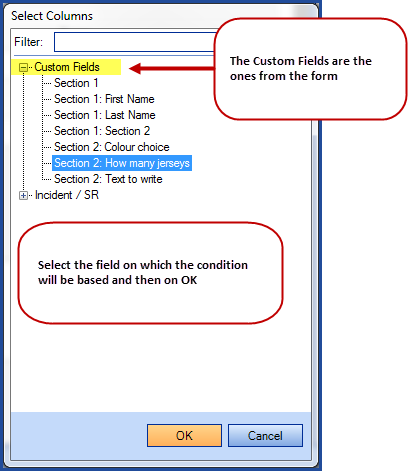
Follow these steps to add a Display condition:
- Go to Options section.
- Place the mouse in the Display condition field.
- Press F3 on the keyboard.
- Choose the field on which the condition will be based on.
- Add the displayed condition.
- Test the form to make sure everything works.
- Make corrections if needed.
- Finish with OK in the field and proceed with the configuration of the rest of the form.

Configuration of a condition for a task
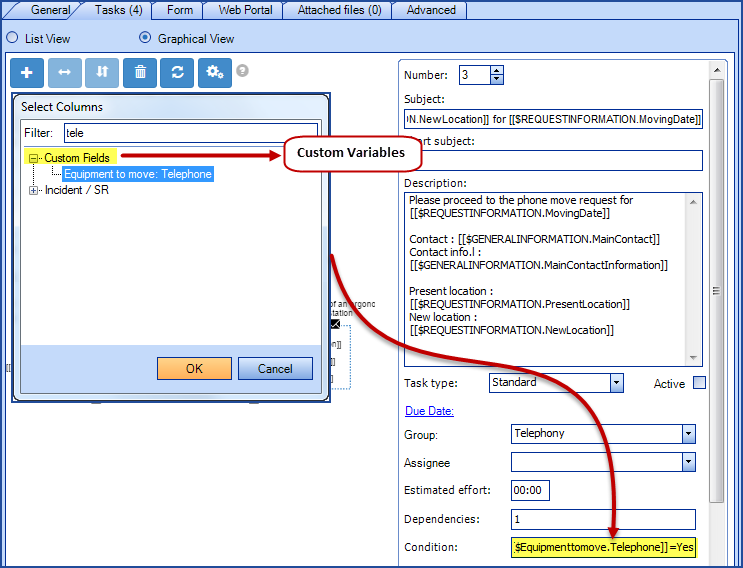
When generating tasks, fields from request and form can be used as variables. These variables can then be put into the Condition field control task creation.
Follow these steps to add a condition for task creation:
- Place the mouse cursor in the Condition field.
- Press F3 on the keyboard to display the custom and request fields available.
- Make your selection and confirm with OK.
How to build conditions and the available operators
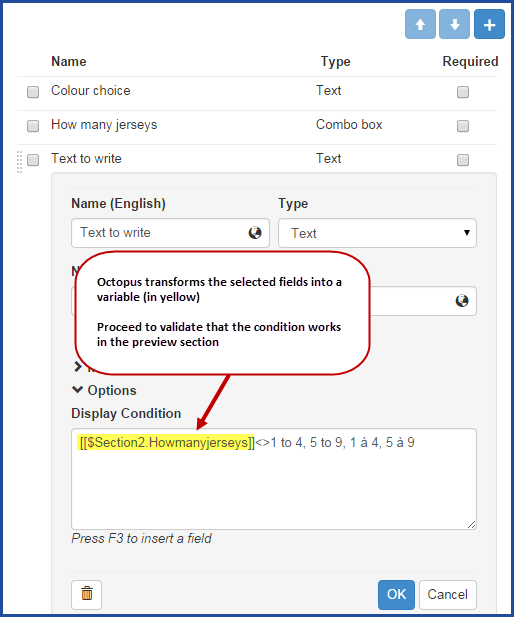
Whether the conditions are used in a form or a task, the method to configure the condition is the same. As it is easier to see and validate on the visualization screen, the following examples are shown in forms.
When you prepare task conditions, test the conditions as a field display condition first, since it is the easiest way to determine if the conditions work.
You can't use a variable after the operator. It is absolutely necessary to test it with a value, as shown in the following examples.
In bilingual environments, it is important to build the value list tied to combo list or radio buttons field types in both languages. The use of a comma is very useful in this mode.
Be careful when renaming a field or a choice in a value list, since it could well render a condition invalid. Use the display screen to properly validate conditions.
The comma
- To add more then one choice to a condition, they must be separated by a comma.
- Blue, White, Red
- In a bilingual mode, this is how to account for both languages.
- Yes, Oui
Quotation marks
- Quotation marks encloses the response for text, large text, or value list value containing a comma in it. As explained in the previous point, the comma is used to separate the different valid responses in a condition. They will be used in elements of a list like:
- iPhone 6, grey
- iPhone 6, silver
- LG G5, black
- Samsung Galaxy S7, black
- A condition based on these fields will need quotation marks to work properly:
- NameOfTheVariable="iPhone 6, grey", "iPhone 6, silver"
Is equal to
- Use the equal sign = in a condition based on a Combo list or Radio button type field.
- To indicate the choice or choices that will make the condition true.
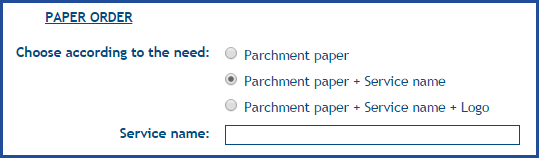
A choice is presented to the user to have some paper prepared for a service.
There are 3 options:
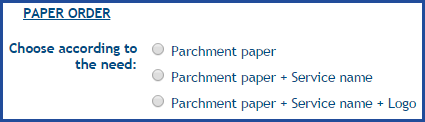
For the choice with logo, the user will need to add an image.
The image only needs to be asked for the logo, so the question will only appear if the user's choice is equal to Parchment paper + Service name + Logo.
From the Add the logo file field, add a display condition.
- With F3 you can obtain the name of the variable:
- $Paperorder.Chooseaccordingtotheneed
- Then add the equal = sign.
- And add the choice that will make the condition true.
- Parchment paper + Service name + Logo
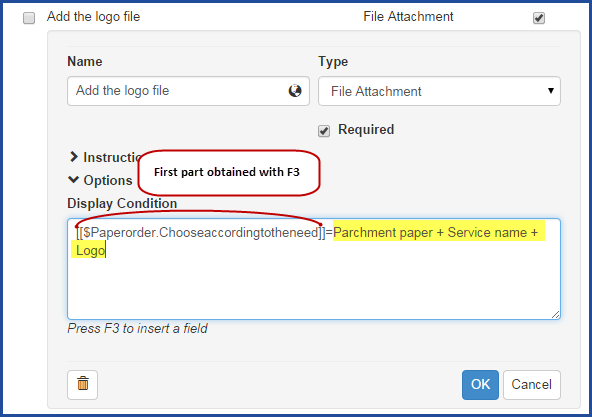
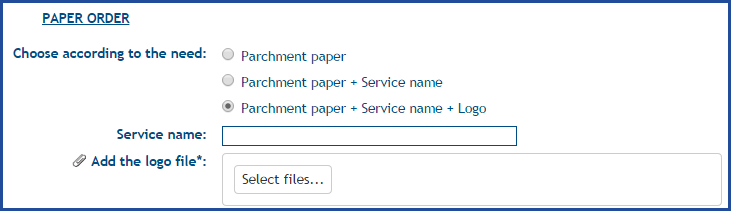
The result will be to make the Add the logo file field appear if the condition is met.
- Use the equal = sign in a condition based on fields of the following types Check box, Date, Date and Time, File Attachment or CI.
- = True, indicates that the condition will be met if the field is checked or filled.
- = False, indicates that the condition will be met if the field stays empty.
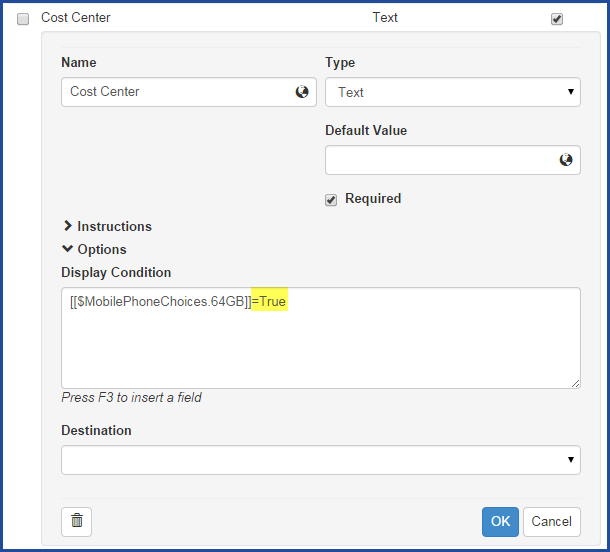
As part of a mobile phone request, we offer the user to check the options he needs.

There are no conditions related to the first three choices, but if the user checks 64GB we want a comment to appear along with a question asking for the user's Cost Center.
Here is the condition for the Cost Center:
And the result if the condition is true:

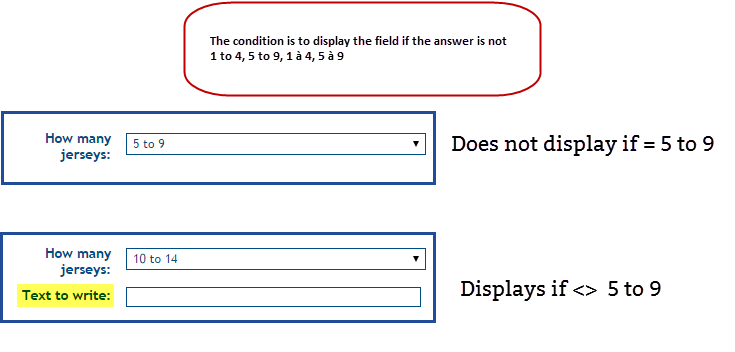
Is different from
- Use smaller than and greater than signs as follows <> in a condition based on a Combo list or Radio button type field.
- To indicate the choice or choices that will make the condition true.
A choice is presented to the user to have some paper prepared for a service.
There are 3 options:
In two of the three choices, we will need to ask the Service name to the user.
The service name will only be requested if the user's choice <>Parchment paper.
Here is the Service name condition:
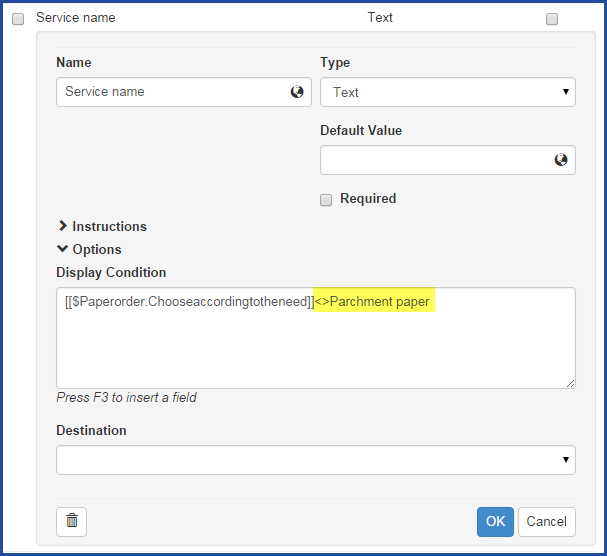
And the result when the condition is met:
The field was filled or selected
Conditions can be based on the fact of adding information or using a field.
- Use the =True combination in a condition based on using one of the following types Check box, Date, Date and Time, File Attachment or CI.
- =False will indicate the opposite, meaning that the field was left empty.
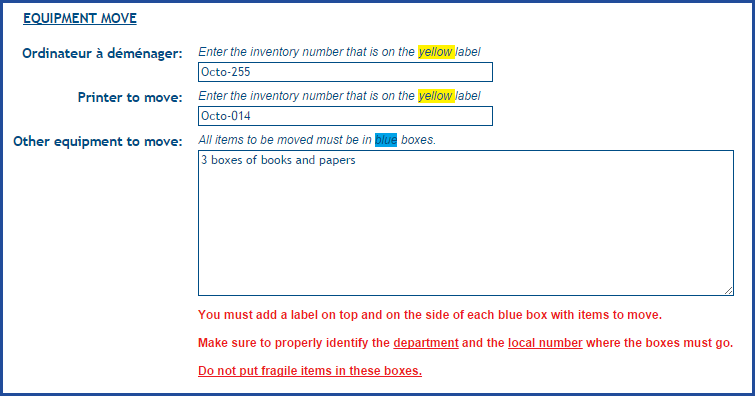
In a move request, a message needs to appear to the user if there are boxes to move.
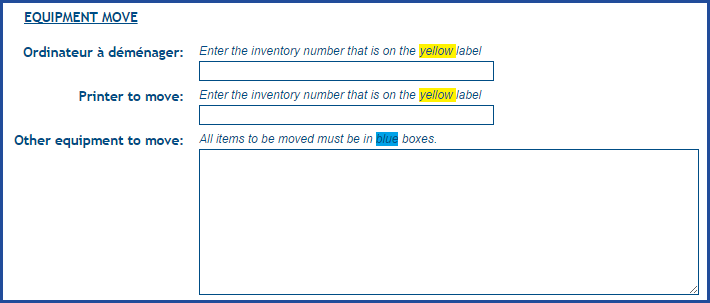
The comment will appear only if there is information added to the Other items to move field.
Here is the condition for the comment:
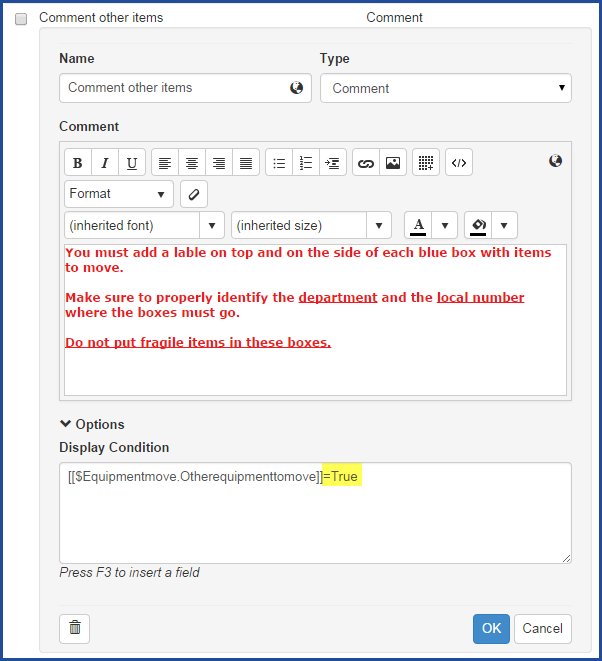
And the result when the condition is true:
Values contained in a specific field of a form
- A condition can be based on the text entered into a text or large text field.
- The text searched needs to be in quotes.
- Octopus does not distinguish between upper and lower case letters.
- Wild cards variables are not supported.
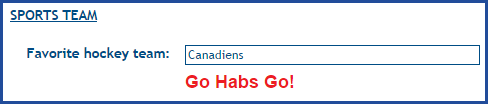
The user is asked via a text field the name of his favourite hockey team.

A comment will appear based on the answer. To do this, there will be multiple comment field types to personalize the message to the user following his answer.
Here is the condition of one of the comments:
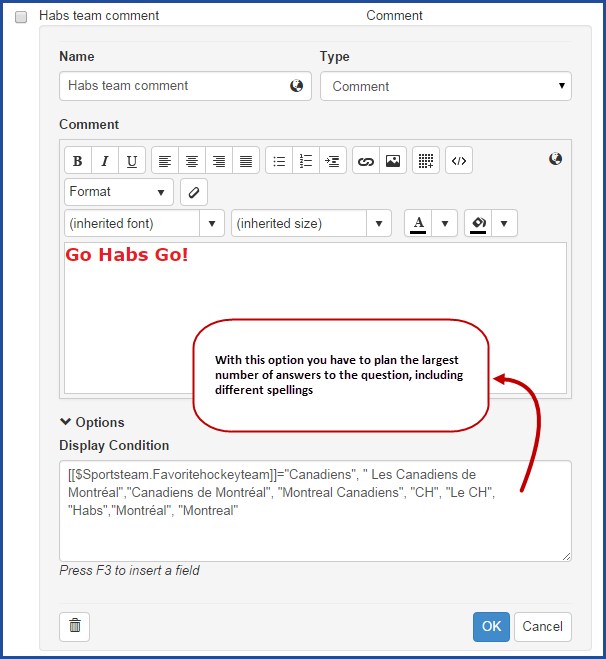
And the different results when the condition is true:


Value contained in a field from the request
- A condition can be based on the fields of a request instead of the ones from the form, for example:
- The Site of the user.
- The Department of the user.
- The VIP field of the user.
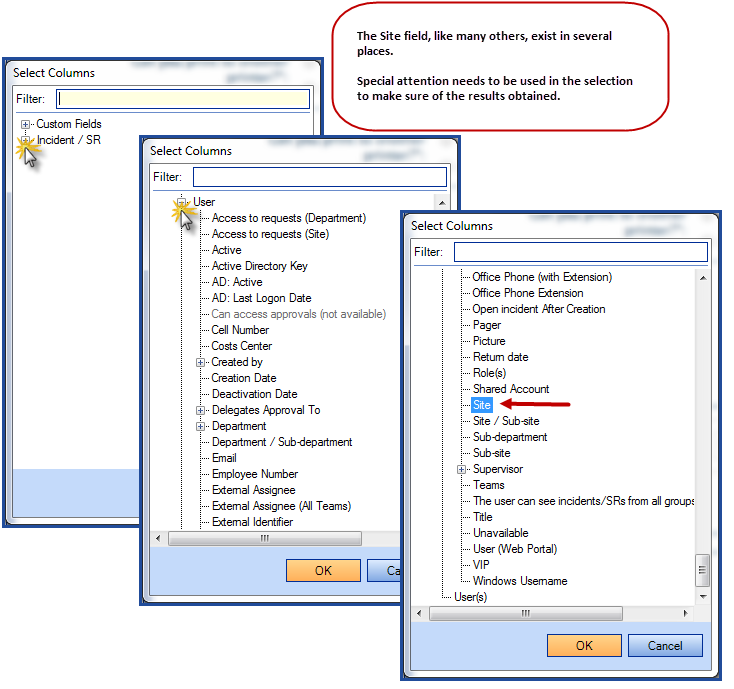
Certain fields, like Site or Department, can be associated with diverse elements like the Requester, the User or the CI. It is hence very important to make the selection from the correct node .To build a condition with Site/subsites, they must be separated by comma, such as: Field1 = "Site,Subsite1,Subsite2" .
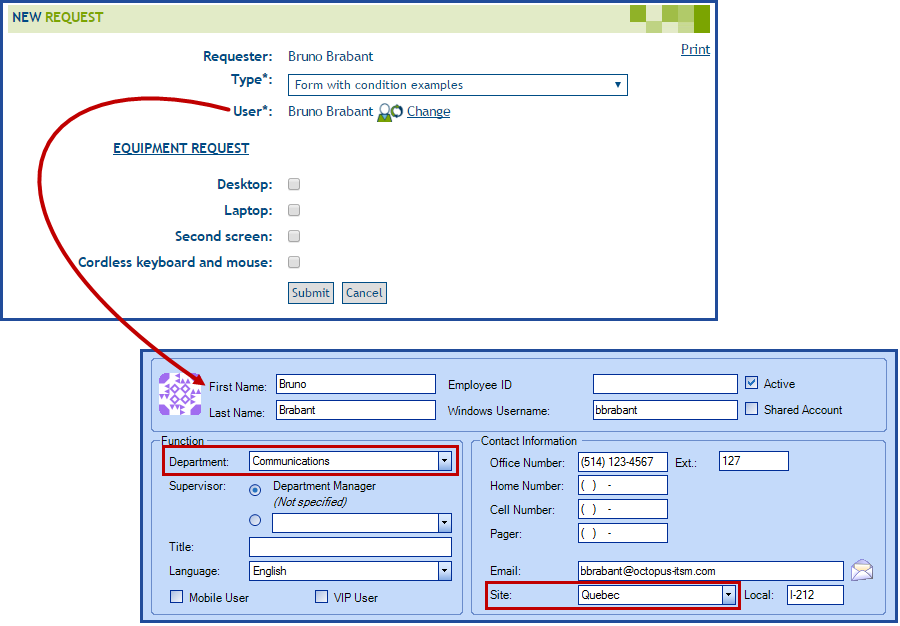
In our scenario, because we are replacing equipment, we know that the information available to users is not the same from one site to the other.
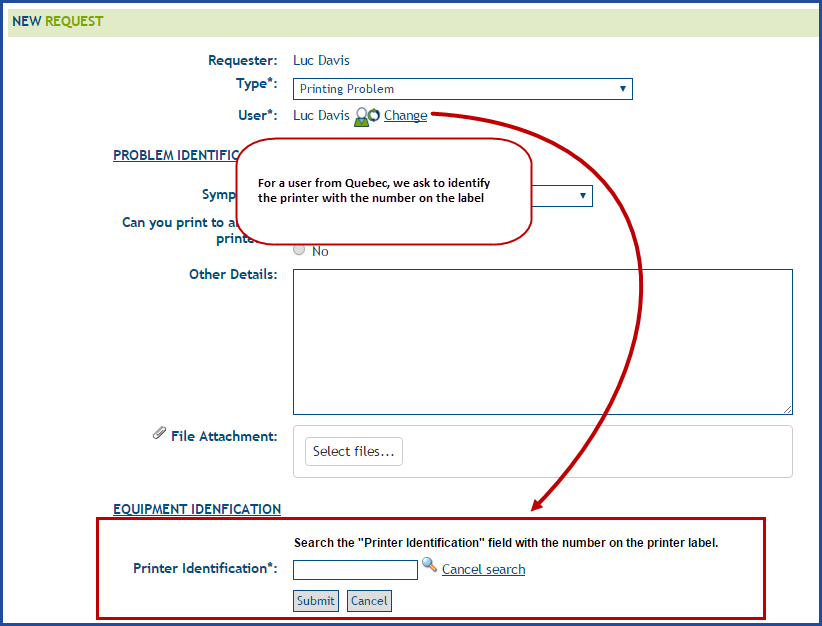
The new printers, installed in Quebec, have a label that clearly identifies them, but this is not the case elsewhere.
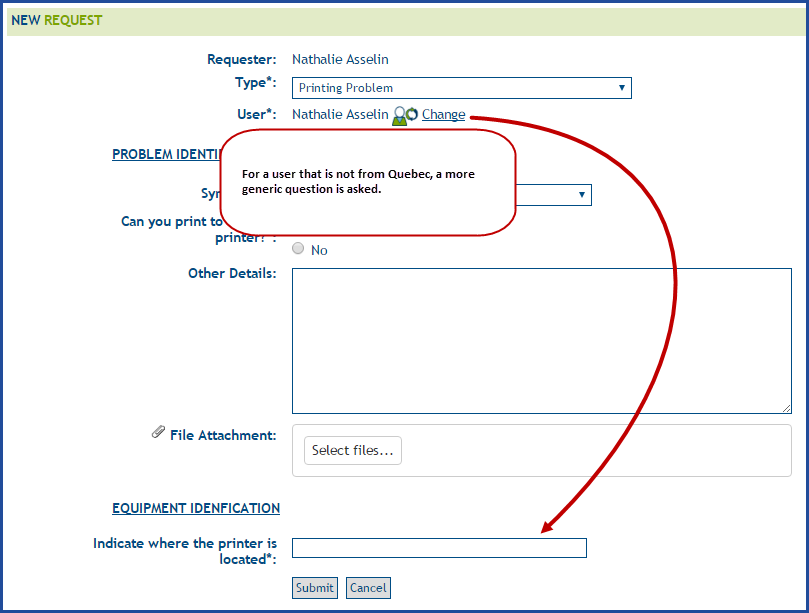
The condition will then be based on the site of the user. If the user is from Quebec, and reports a printer problem, additional fields will be used to identify the equipment in question.
From the Identification Comment, Printer Identification and Indicate where the printer is located fields, we add the display conditions.
- With F3 we open the window to make the selection:
- Open the Incident / SR node.
- Open the User node.
- Make the selection of the Site field.
@Incident.User.SiteRootName
- We finish the condition with the site equal or different from:
- =Quebec
- <>Quebec
Here is the condition to add the comment:

The form will be as follows for a user that is not from Quebec:
And for a user from Quebec:
The combination of fields
Conditions can be combined to define a condition on more than one field at a time. This works with fields from the form as well as fields from the request.
Use the following variables to combine more than one field to a condition:
- @OR
- For a OR type condition, Field1=ABC@ORField2=ABC, DEF.
- Everything can be on the same line or there can be a carriage return (Enter) to separate the first field of the variable.
- Only one of the conditions must be true for the condition to work.
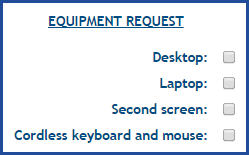
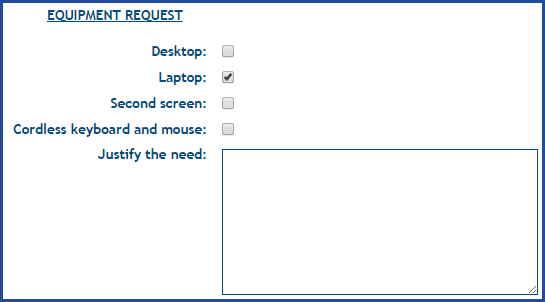
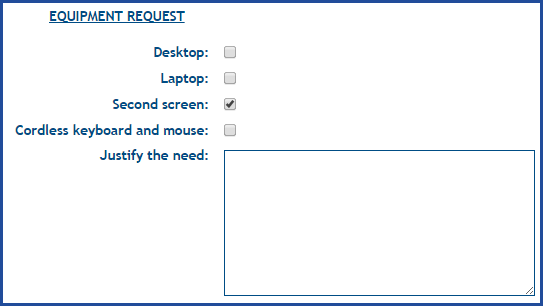
In a form to request equipment, we ask the user to check the items that he needs. However, if he asks for a laptop or a second screen, we want him to justify his need. There is only one justification field, but two field can trigger the condition.
Choices presented to the user:
Here is the condition for the justification field:
$Equipmentrequest.Laptop]=Yes@OR$$Equipmentrequest.Secondscreen=Yes
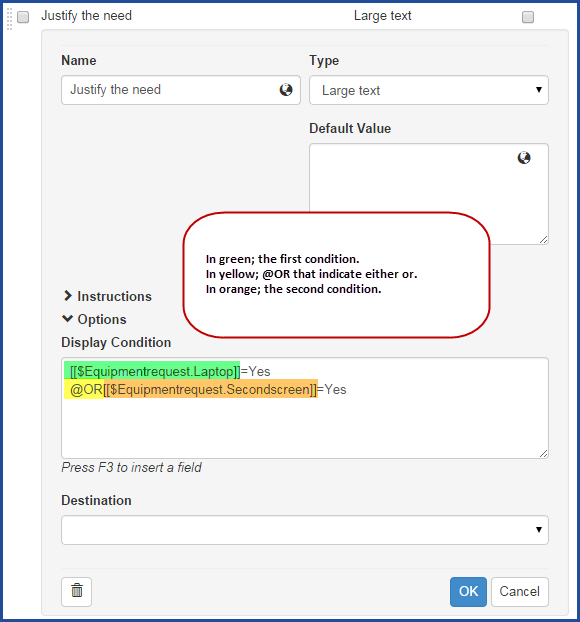
Results if one or the other is checked:
- @AND
-
For a AND type condition, Field1= ABC @AND Field2 = DEF.
-
Everything can be on the same line or there can be a carriage return (Enter) to separate the first field of the variable.
-
Every variable must be met for the condition to work.
-
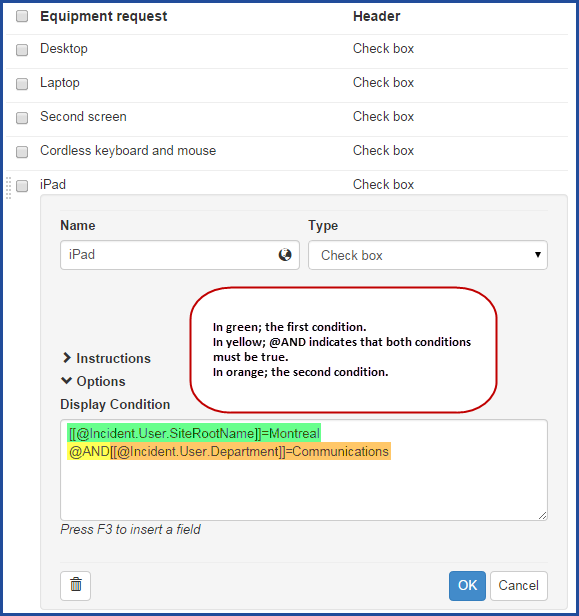
In a form to request equipment, we want to offer users from Montreal that are part of the Communications department the choice of an iPad to check on the content of the company's Web pages. The condition will need to be based on the site and the department.
Here is the condition for the iPad choice :
@Incident.User.SiteRootName=Montreal@AND@Incident.User.Department=Communications
Results depend on the site and department:
For a user from Montreal from the Marketing department, only one condition is true.
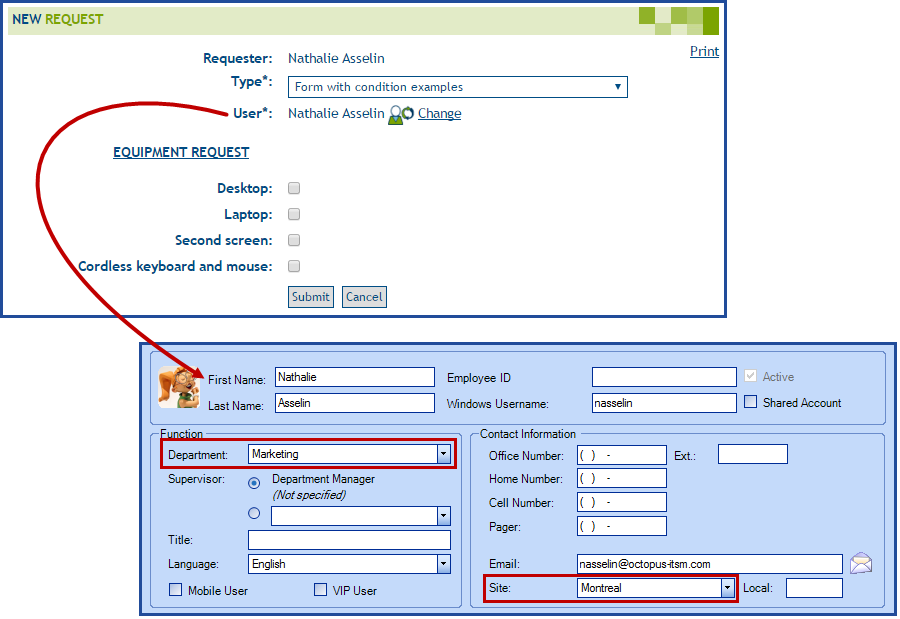
For a user from Quebec from the Communications department, only one condition is true.
For a user from Montreal from the Communications department, both conditions are true.

- Parentheses
- Allows combining multiple operators in a single logical expression.
- Respects operator priority by resolving expressions contained within parentheses first.
- Parentheses must be in equilibrium on either side of an operator, e.g.: ( expr1 ) @And ( expr2 @Or expr3 ) presents the same amount of parentheses on either side of the @And operator.
 Tip: We can use conditions to present a field in which information is missing from the user's file.
For example, if the email or extension fields are empty.
The condition for an empty email field would be @Incident.User.Email=False
Error display
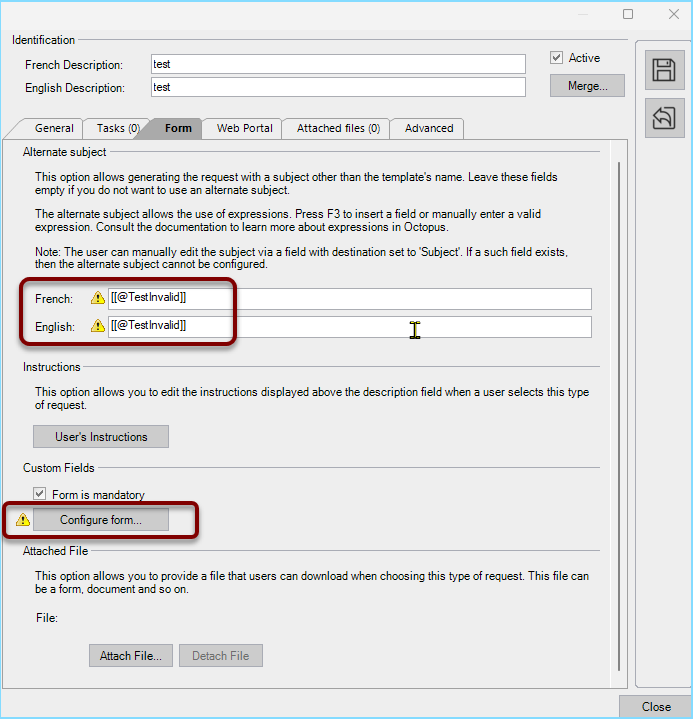
Over time, changes may be made to your catalog of custom fields (merging, deletion, etc.) which may leave invalid references in your query types.
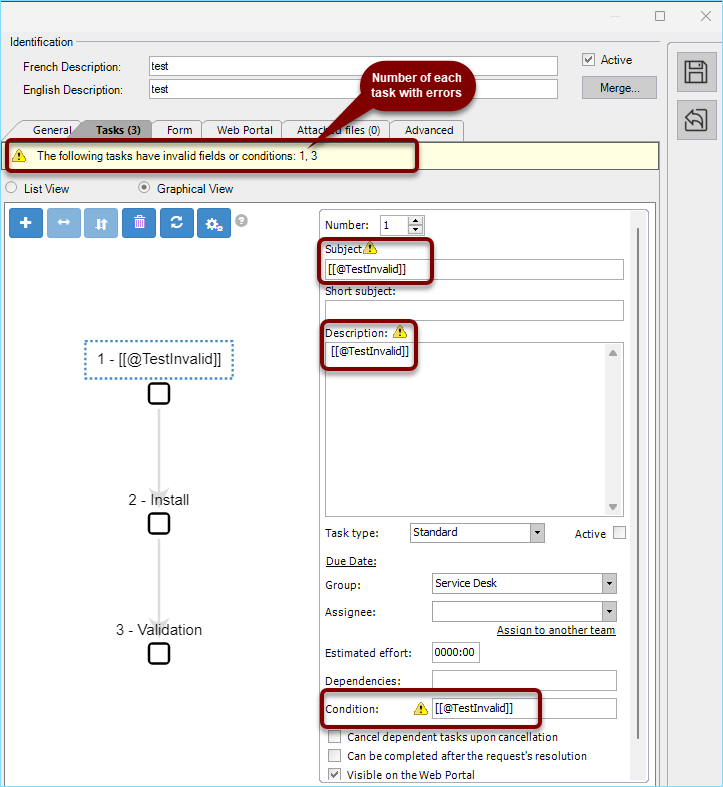
Existing errors can be viewed by consulting the query types in the Reference data management menu. They will be reported as a warning by a triangle with an exclamation mark, or by a yellow circle where they occur. In the case of tasks, the number(s) of problematic tasks, i.e. where errors occur, will be indicated. See the 2nd image below.
Please note that it will still be possible to save your query type, but the presence of invalid fields or conditions will affect the desired behavior in the query types concerned.
Custom field variables can be used in the following places:
- Alternative subject
- Tasks
- Subject
- Description
- Condition
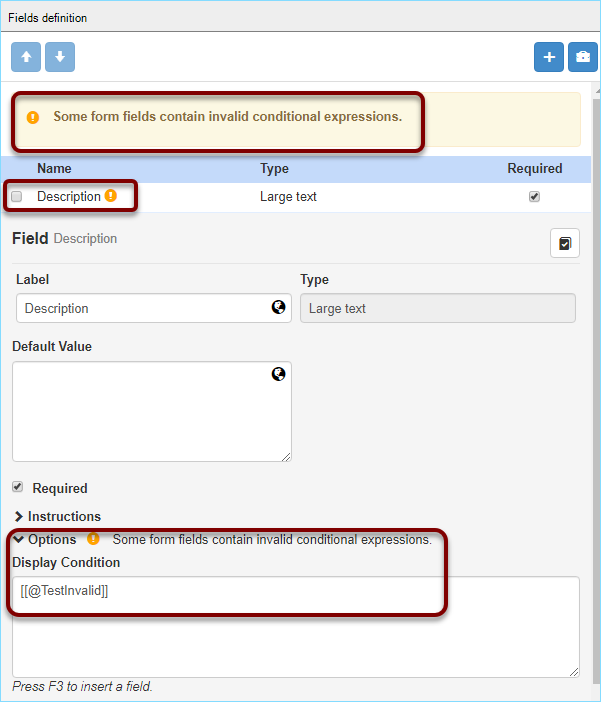
- Form fields
- Display condition
Here are some examples of errors:
Thank you, your message has been sent.